 OK, so not really four-and twenty. That would be entirely too much chicken for one pie, and one pie is really all I tend to have energy and room for. I started out this week planning to do just the orange rolls for the blog post, but then I realized that a lot of that process is pretty much identical to making cinnamon rolls, so you get a two-in-one: Chicken pie and orange rolls. Dinner and dessert you might say.
The chicken pie recipe is one that I’m inordinately proud of, since it started out as something that got thrown together out of what was in the kitchen.
The first time I made homemade pie crust, I didn’t think very far ahead. I just wanted to see if I could do it, so when it came time to actually use the crust, I asked for suggestions. A savory pie got more votes than a sweet one, and since Courtney has dietary restrictions, we were a little limited on what could go in it. What we had on hand were chicken thighs, mushrooms, and onions. That’s been the typical filling since.
This time, however, we are short a Courtney due to an illness in the family. No Courtney in the house is normally when we cook everything we can’t have if she’s eating with us. So, this pie came out much more like your standard pot pie with carrots and peas added to the normal mushrooms and onions.
This is one of those not-quite-recipes where you’re going to hear a lot of ‘and then add in enough of Ingredient X to make it right.’ I apologize ahead of time for that. It’s also a recipe where you spend a lot of time moving between parts of the kitchen to get your timing just right. At least it is if you do it with a scratch-made crust. This could just as easily be made with pre-made refrigerated, store-bought crust, but where’s the fun in that?
These are the basic ingredients for the filling:
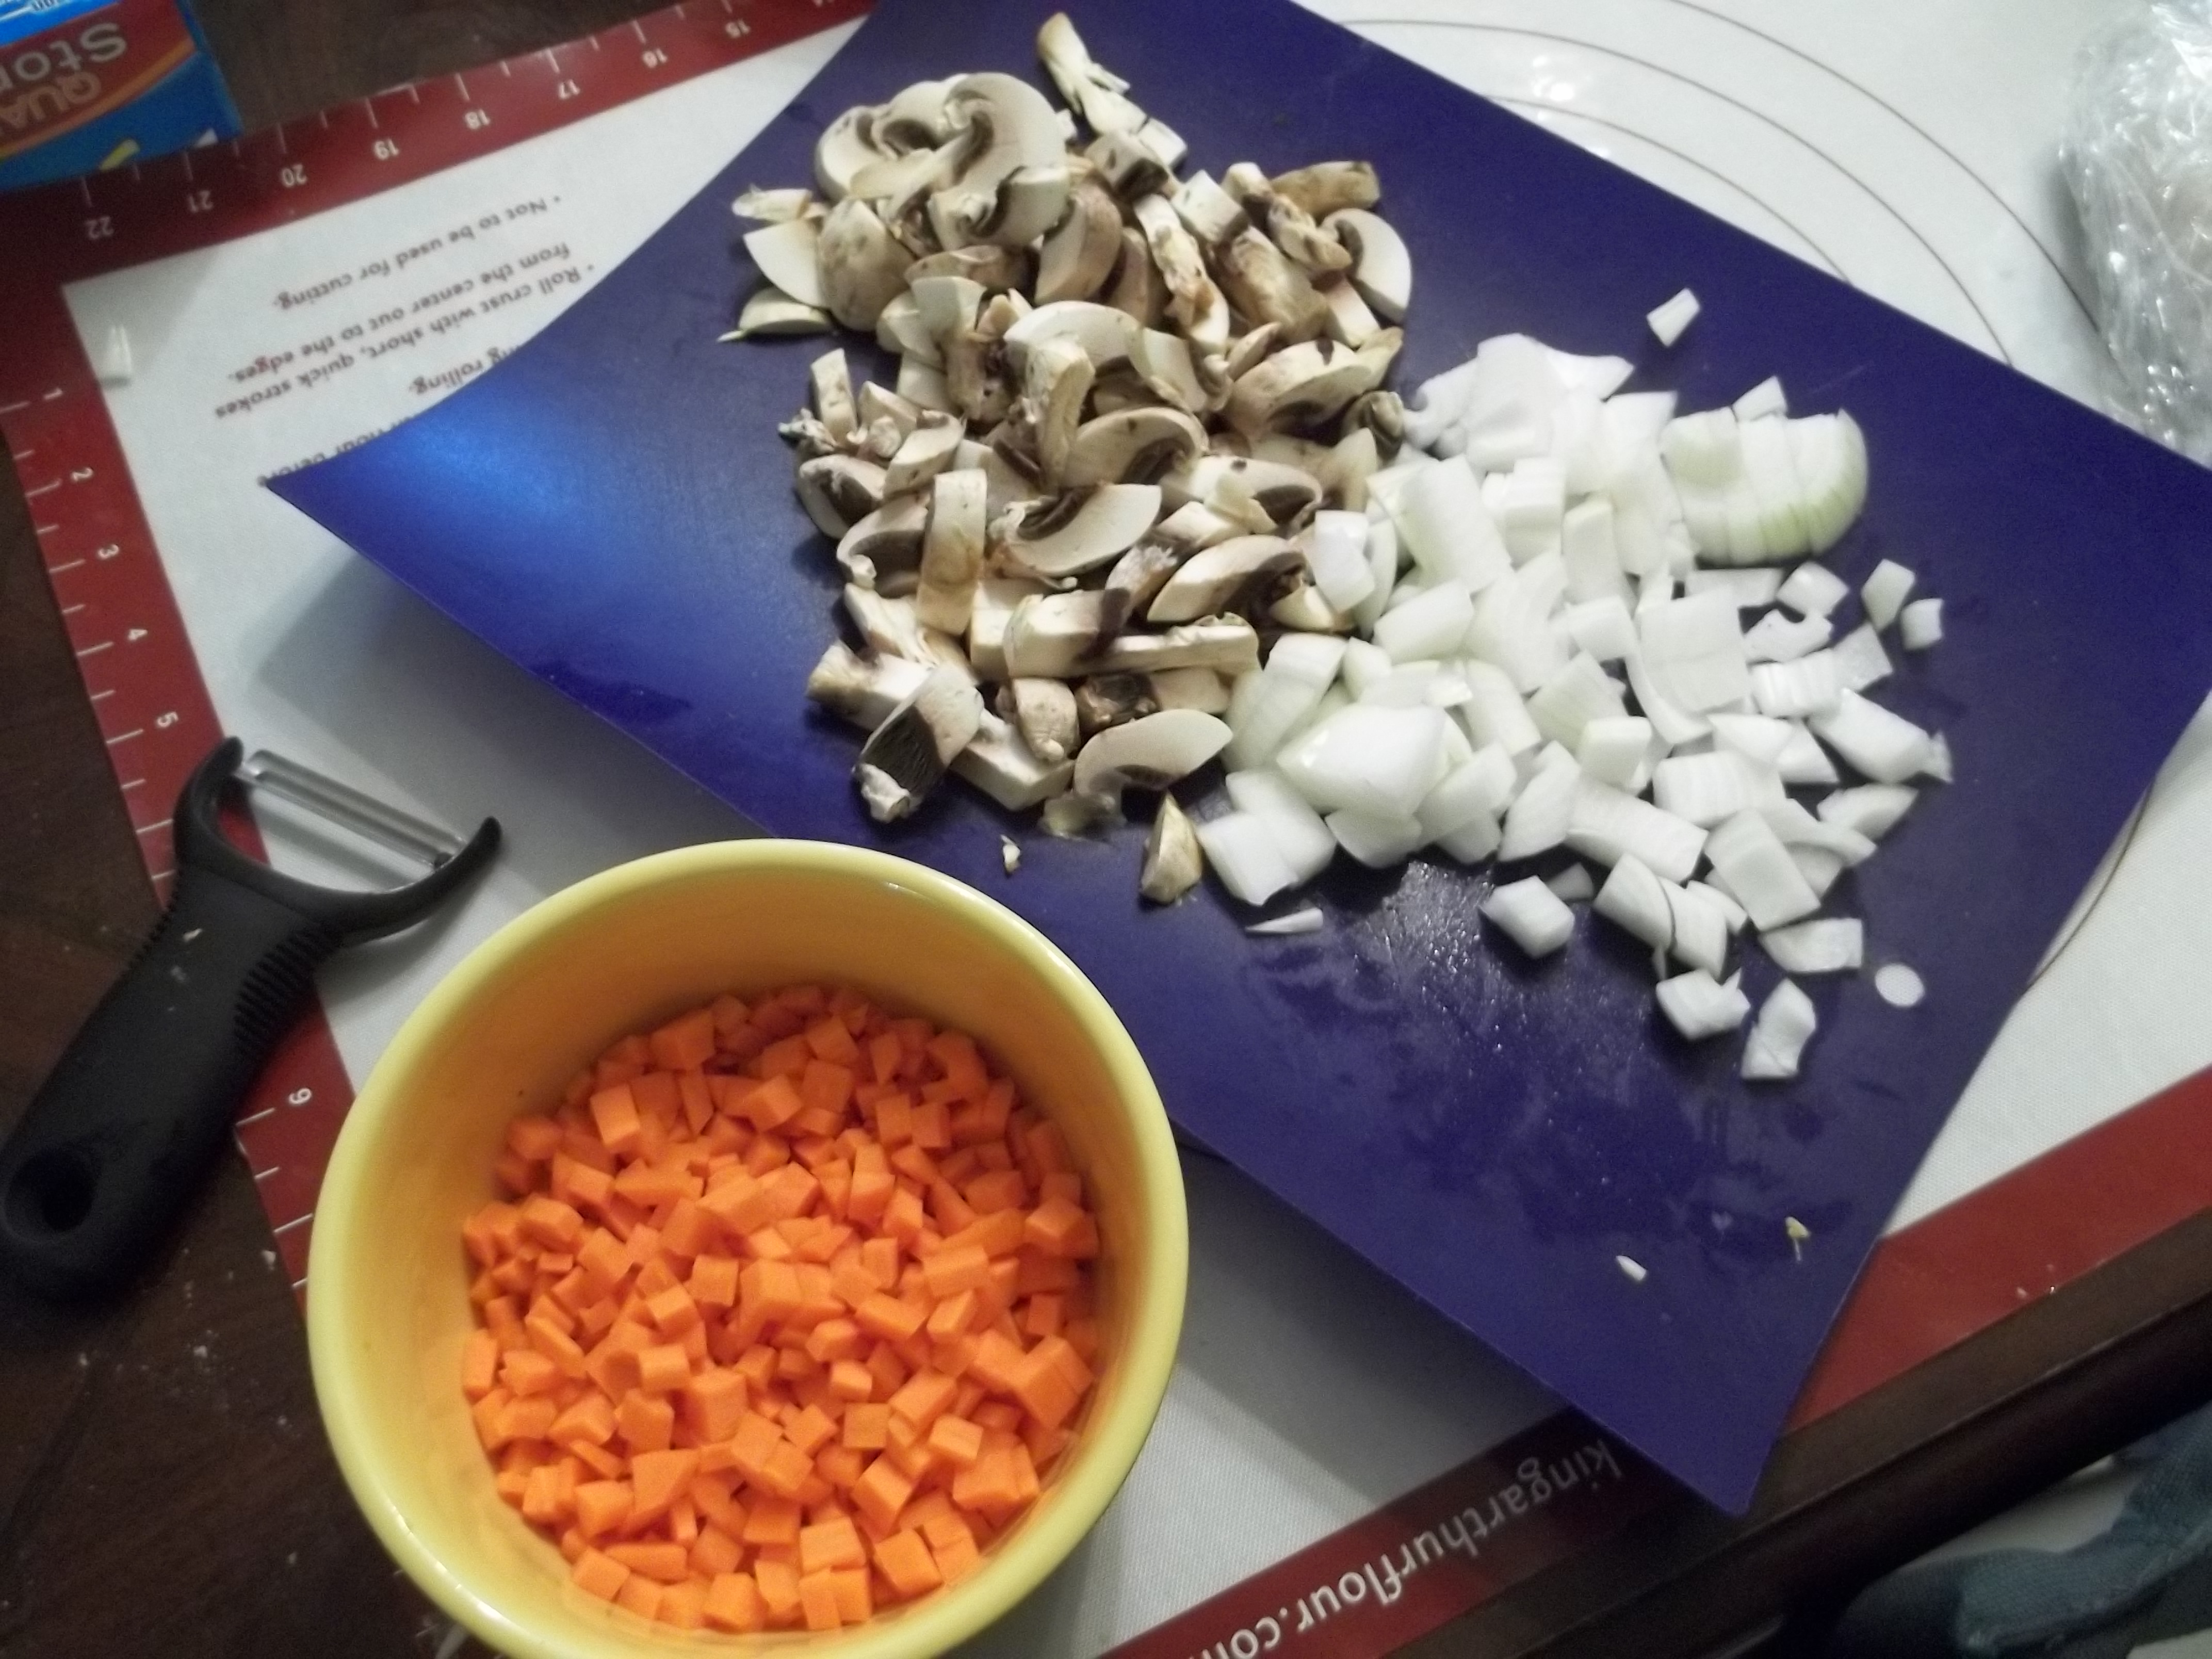
5 boneless, skinless chicken thighs, cut into roughly 1″ chunks
1 large or 1 1/2 small onions (about one heaped cup) medium dice
2 large carrots, peeled and diced fine
8 ounces white mushrooms, sliced.
1/2 cup frozen or fresh green peas
1/2 cup chicken stock (low sodium preferred)
1/2 cup unbleached all purpose flour
Salt
Black pepper
Garlic powder
Poultry seasoning
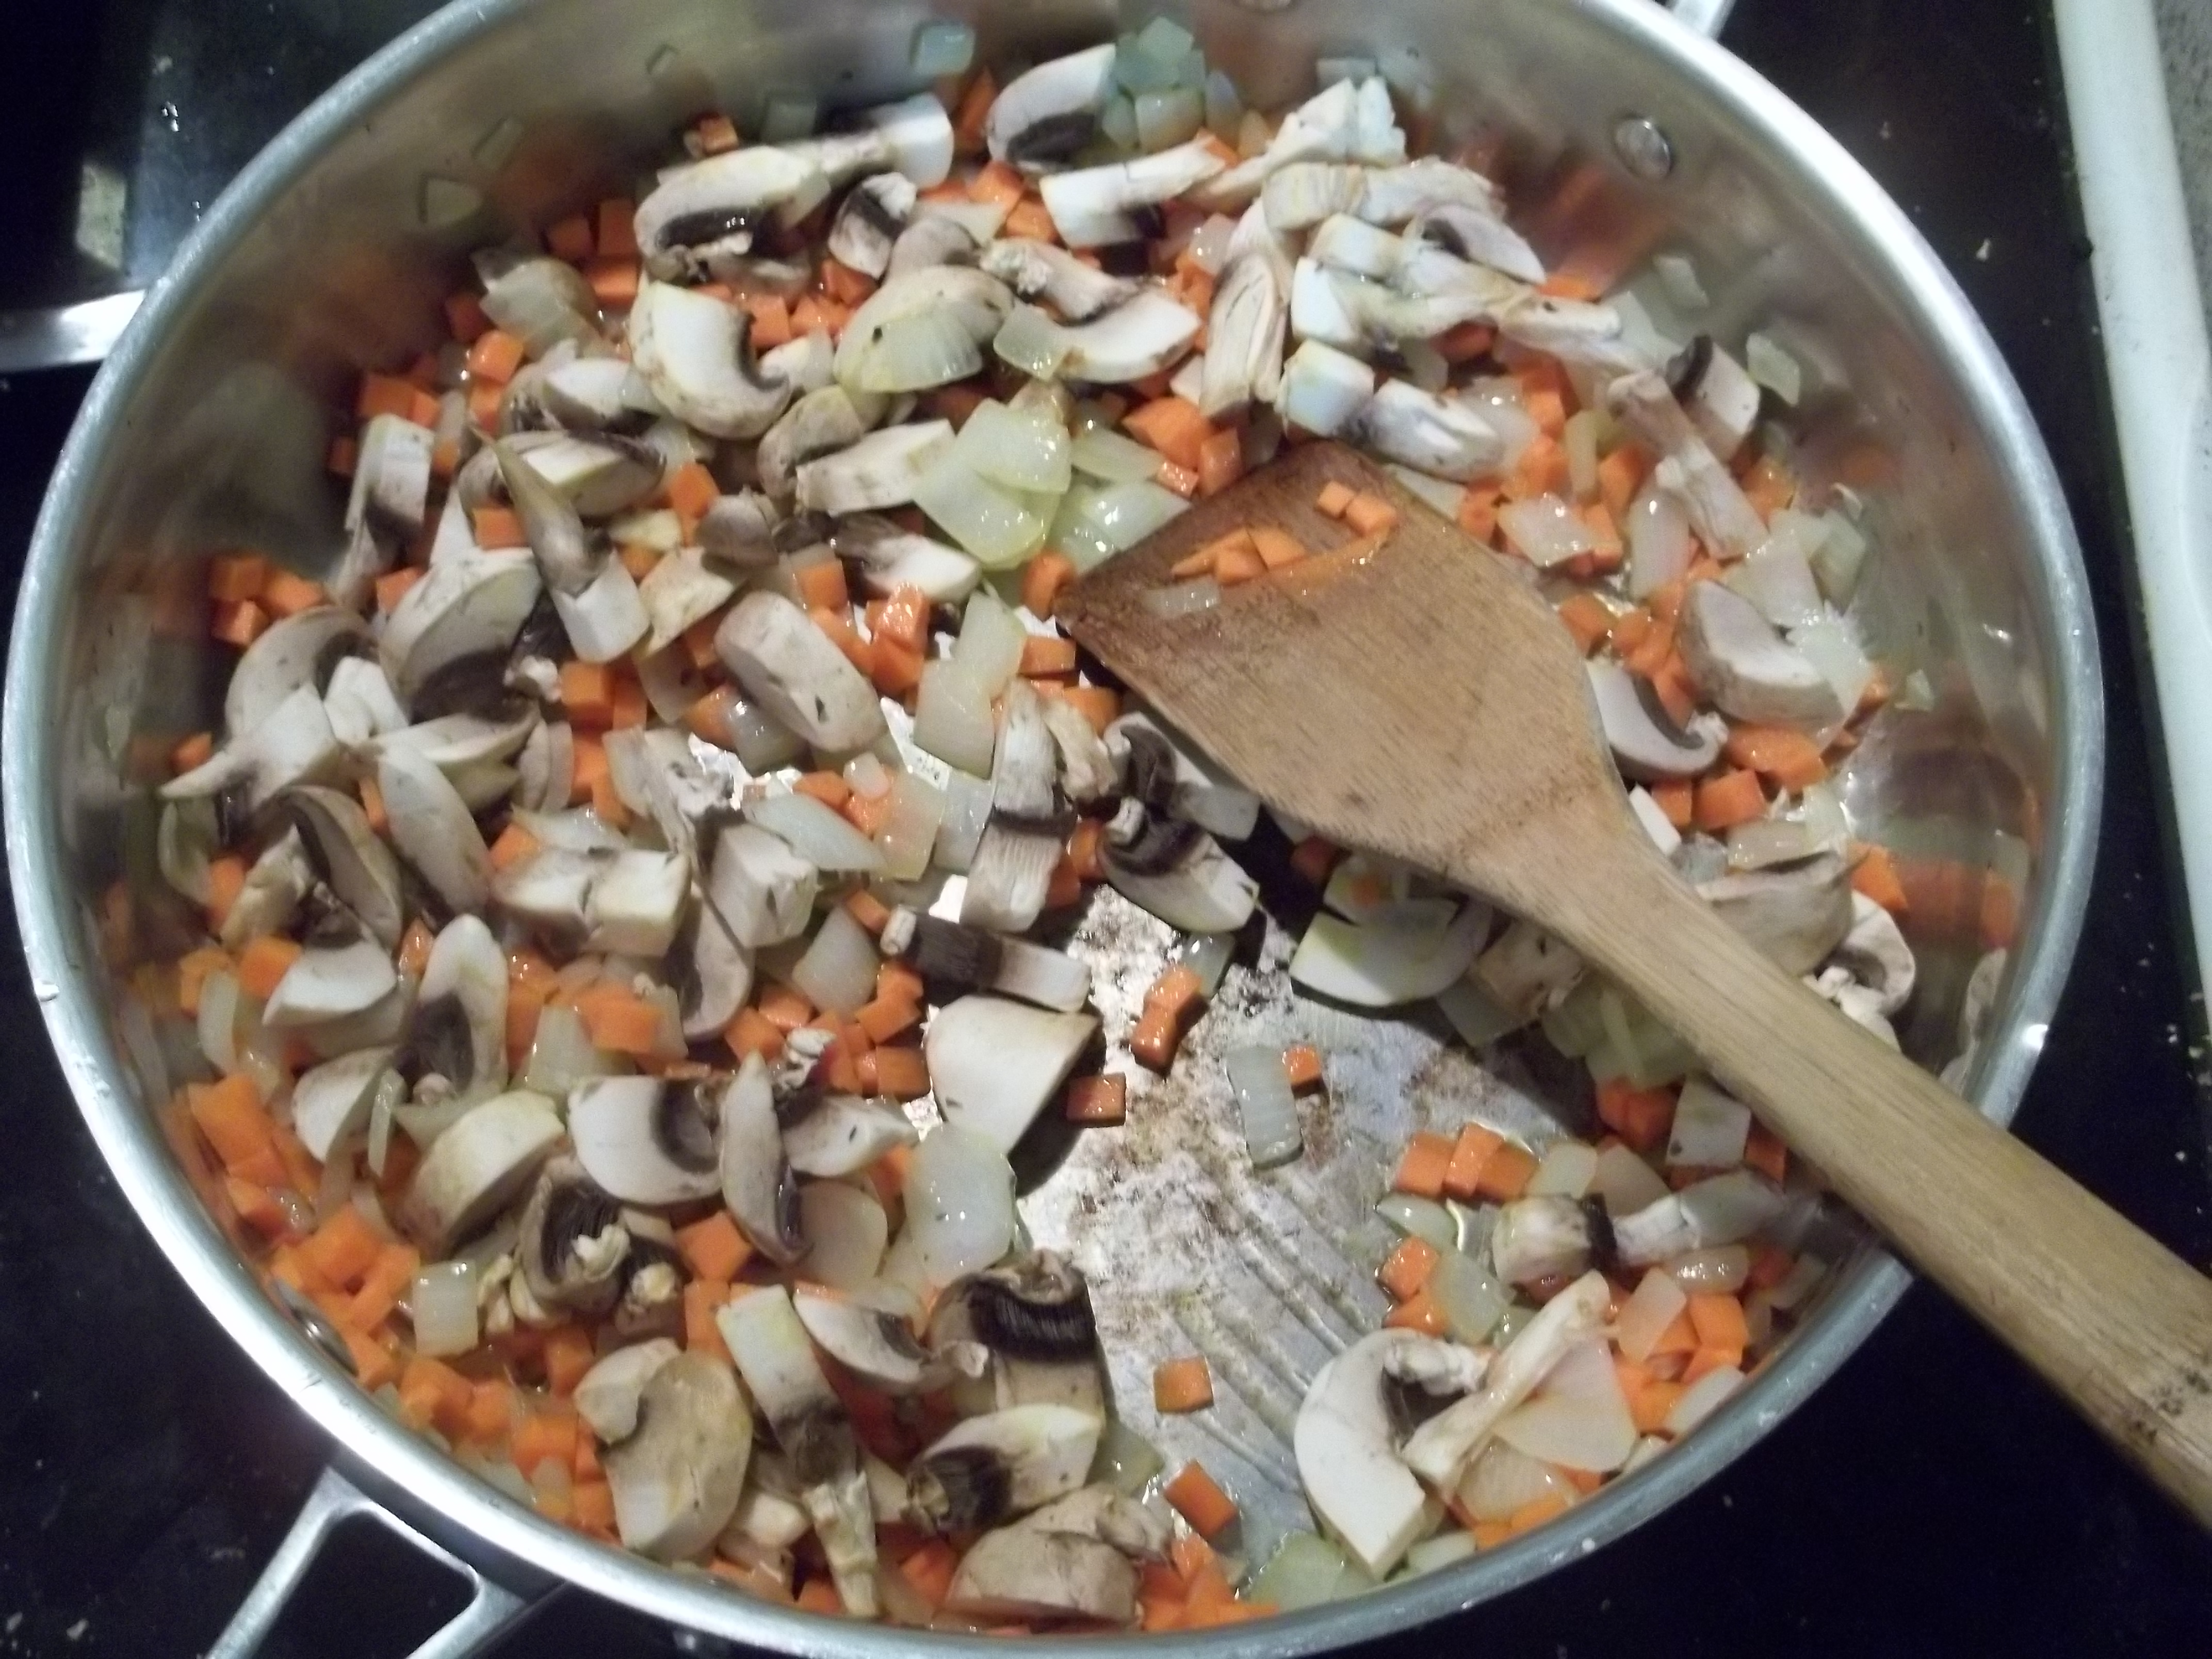
As in almost any recipe I have ever made, you start with your veggies. I use our largest skillet and heat a couple of tablespoons of olive oil at medium high heat. Onions go in first, then when they’re starting to soften, the mushrooms. When the mushrooms are starting to get a little limp, I normally throw in the chicken, but this time carrots came first. Once everything is starting to soften up. toss in the chicken. The peas don’t go in until the chicken is nearly done, simply because they will get gross and mushy if you overcook them.
 Now, while all this is happening, you want to get your crust ready.

This is the same batch of crust I made in my post a couple of weeks ago. It keeps really well in the freezer and I take it out to let it thaw in the fridge a day or so before I’m going to use it.
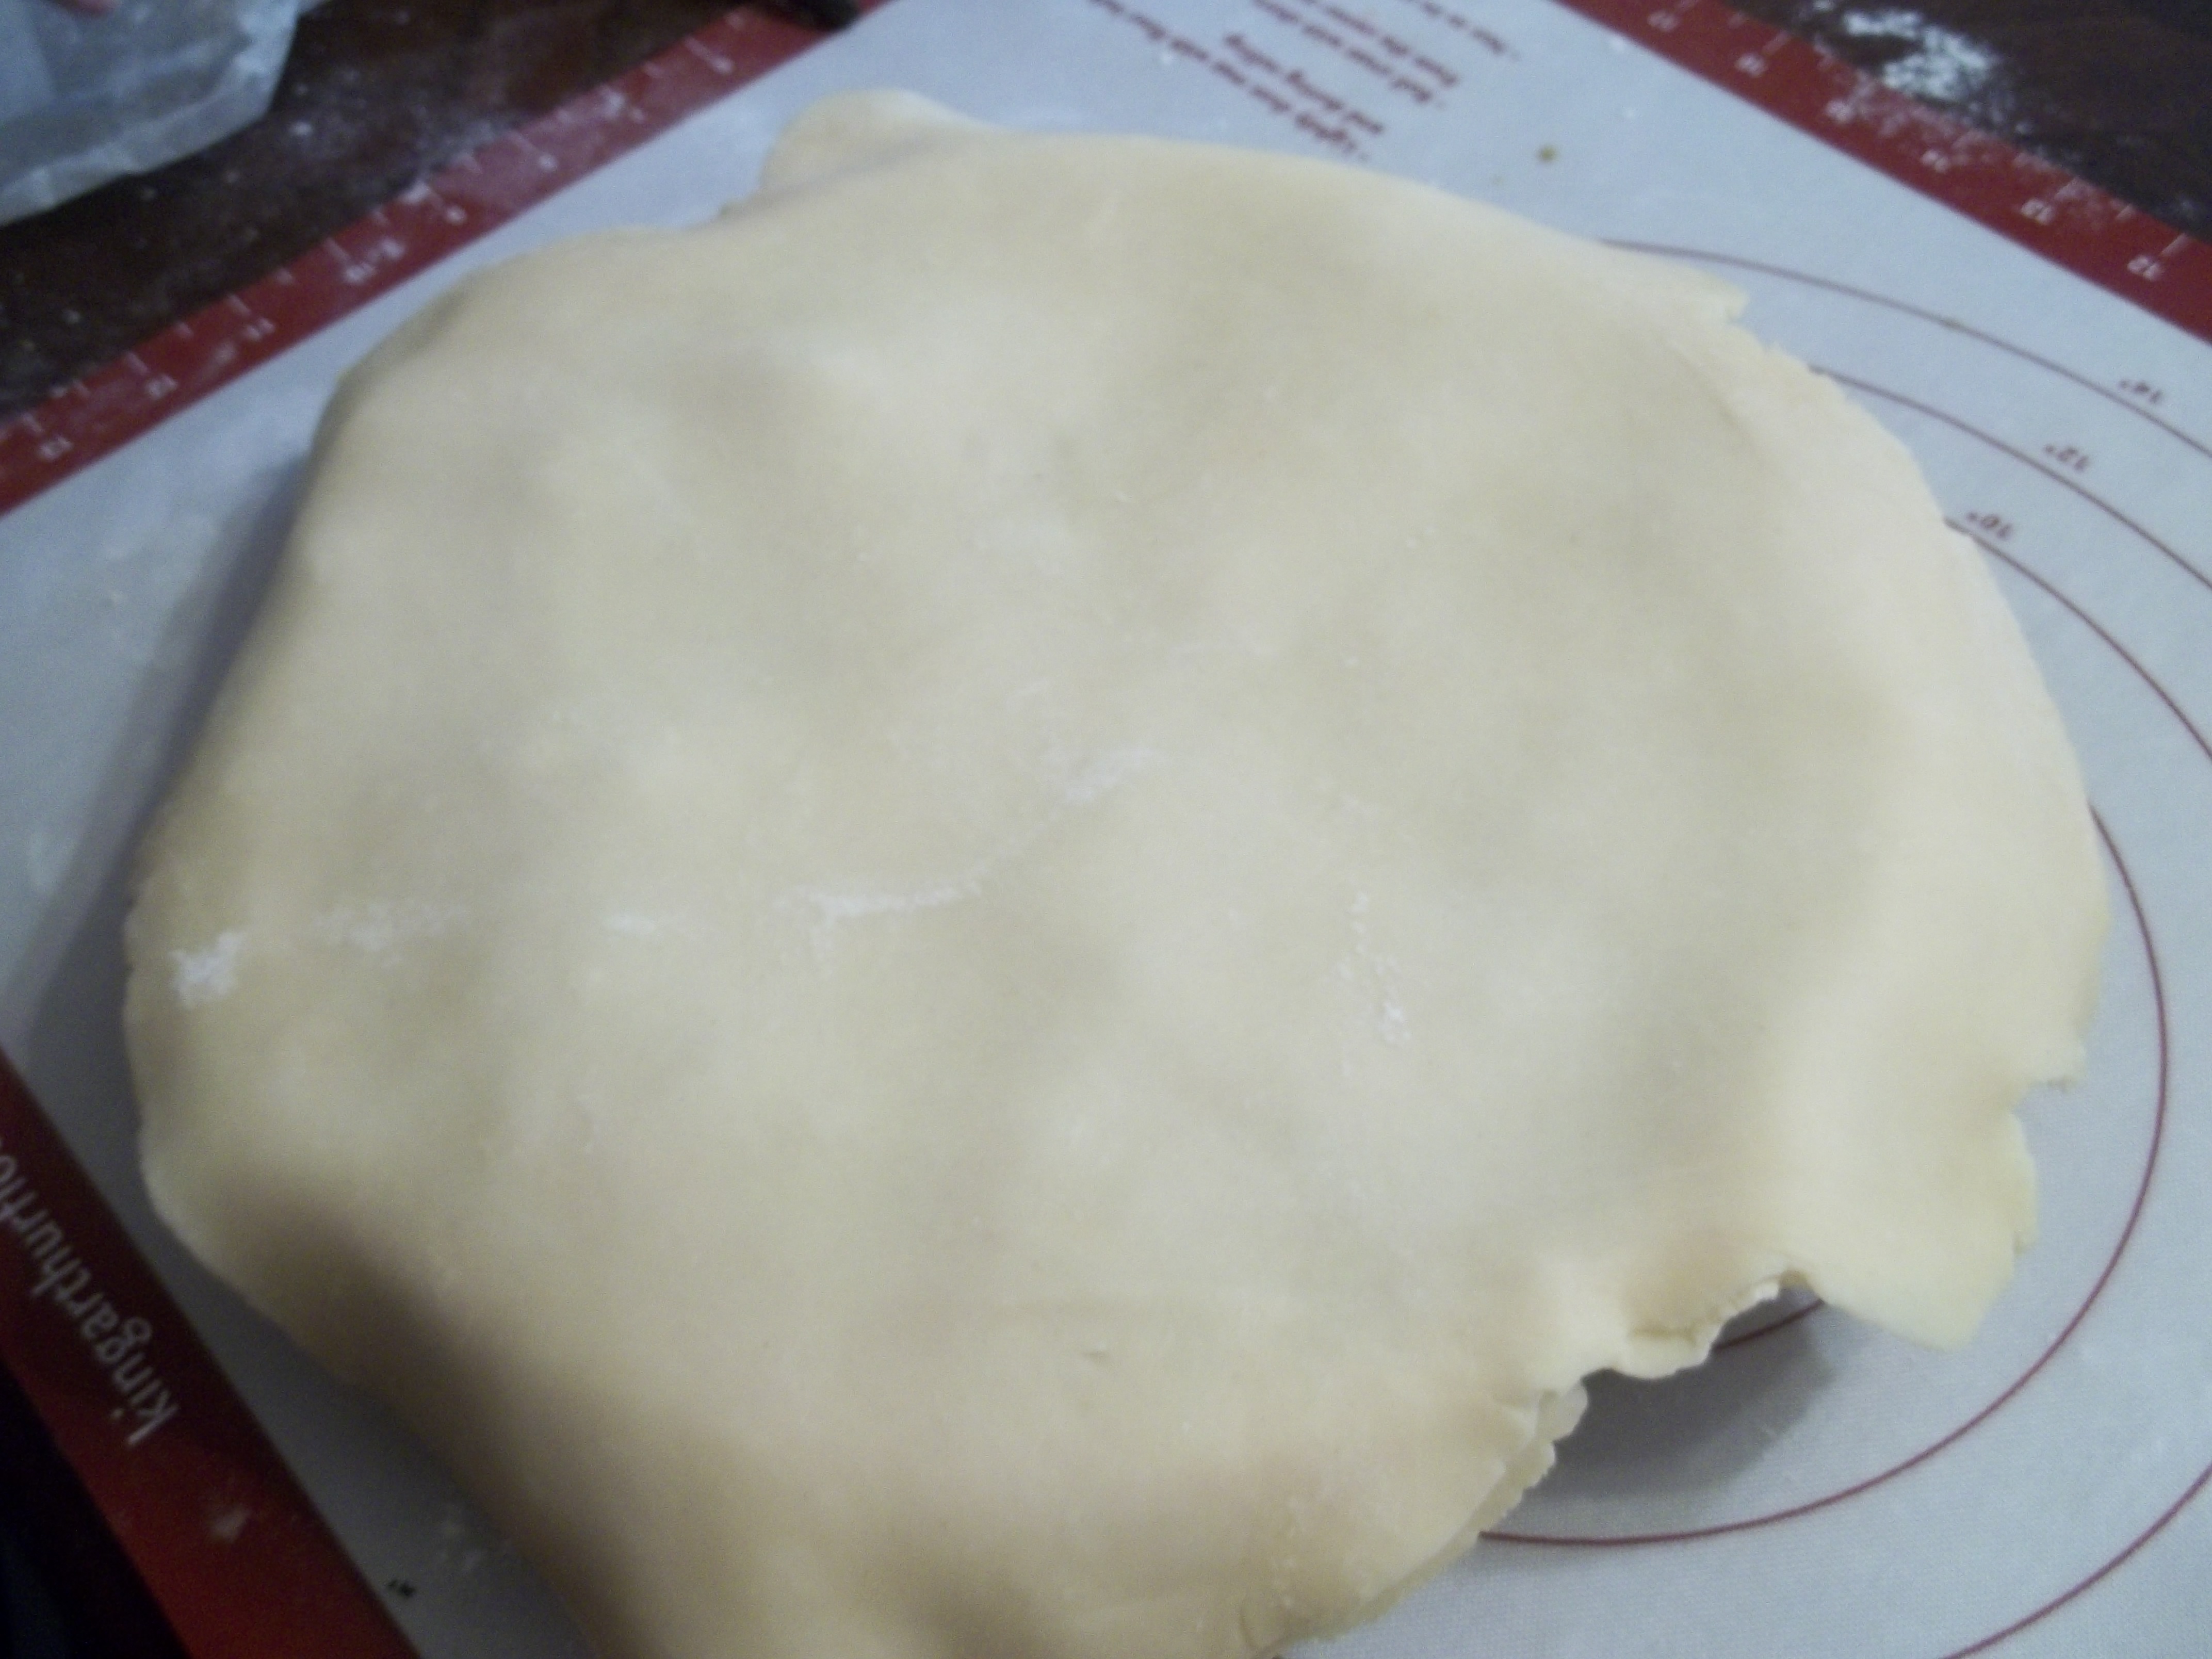
The secret to rolling this out seems to be a cold rolling pin and not being afraid to sprinkle flour around to keep it from sticking to the pastry mat/counter or the pin itself. Also, using short, even strokes in several directions. It spreads the disc of dough out more evenly and keeps you from overworking any one part.

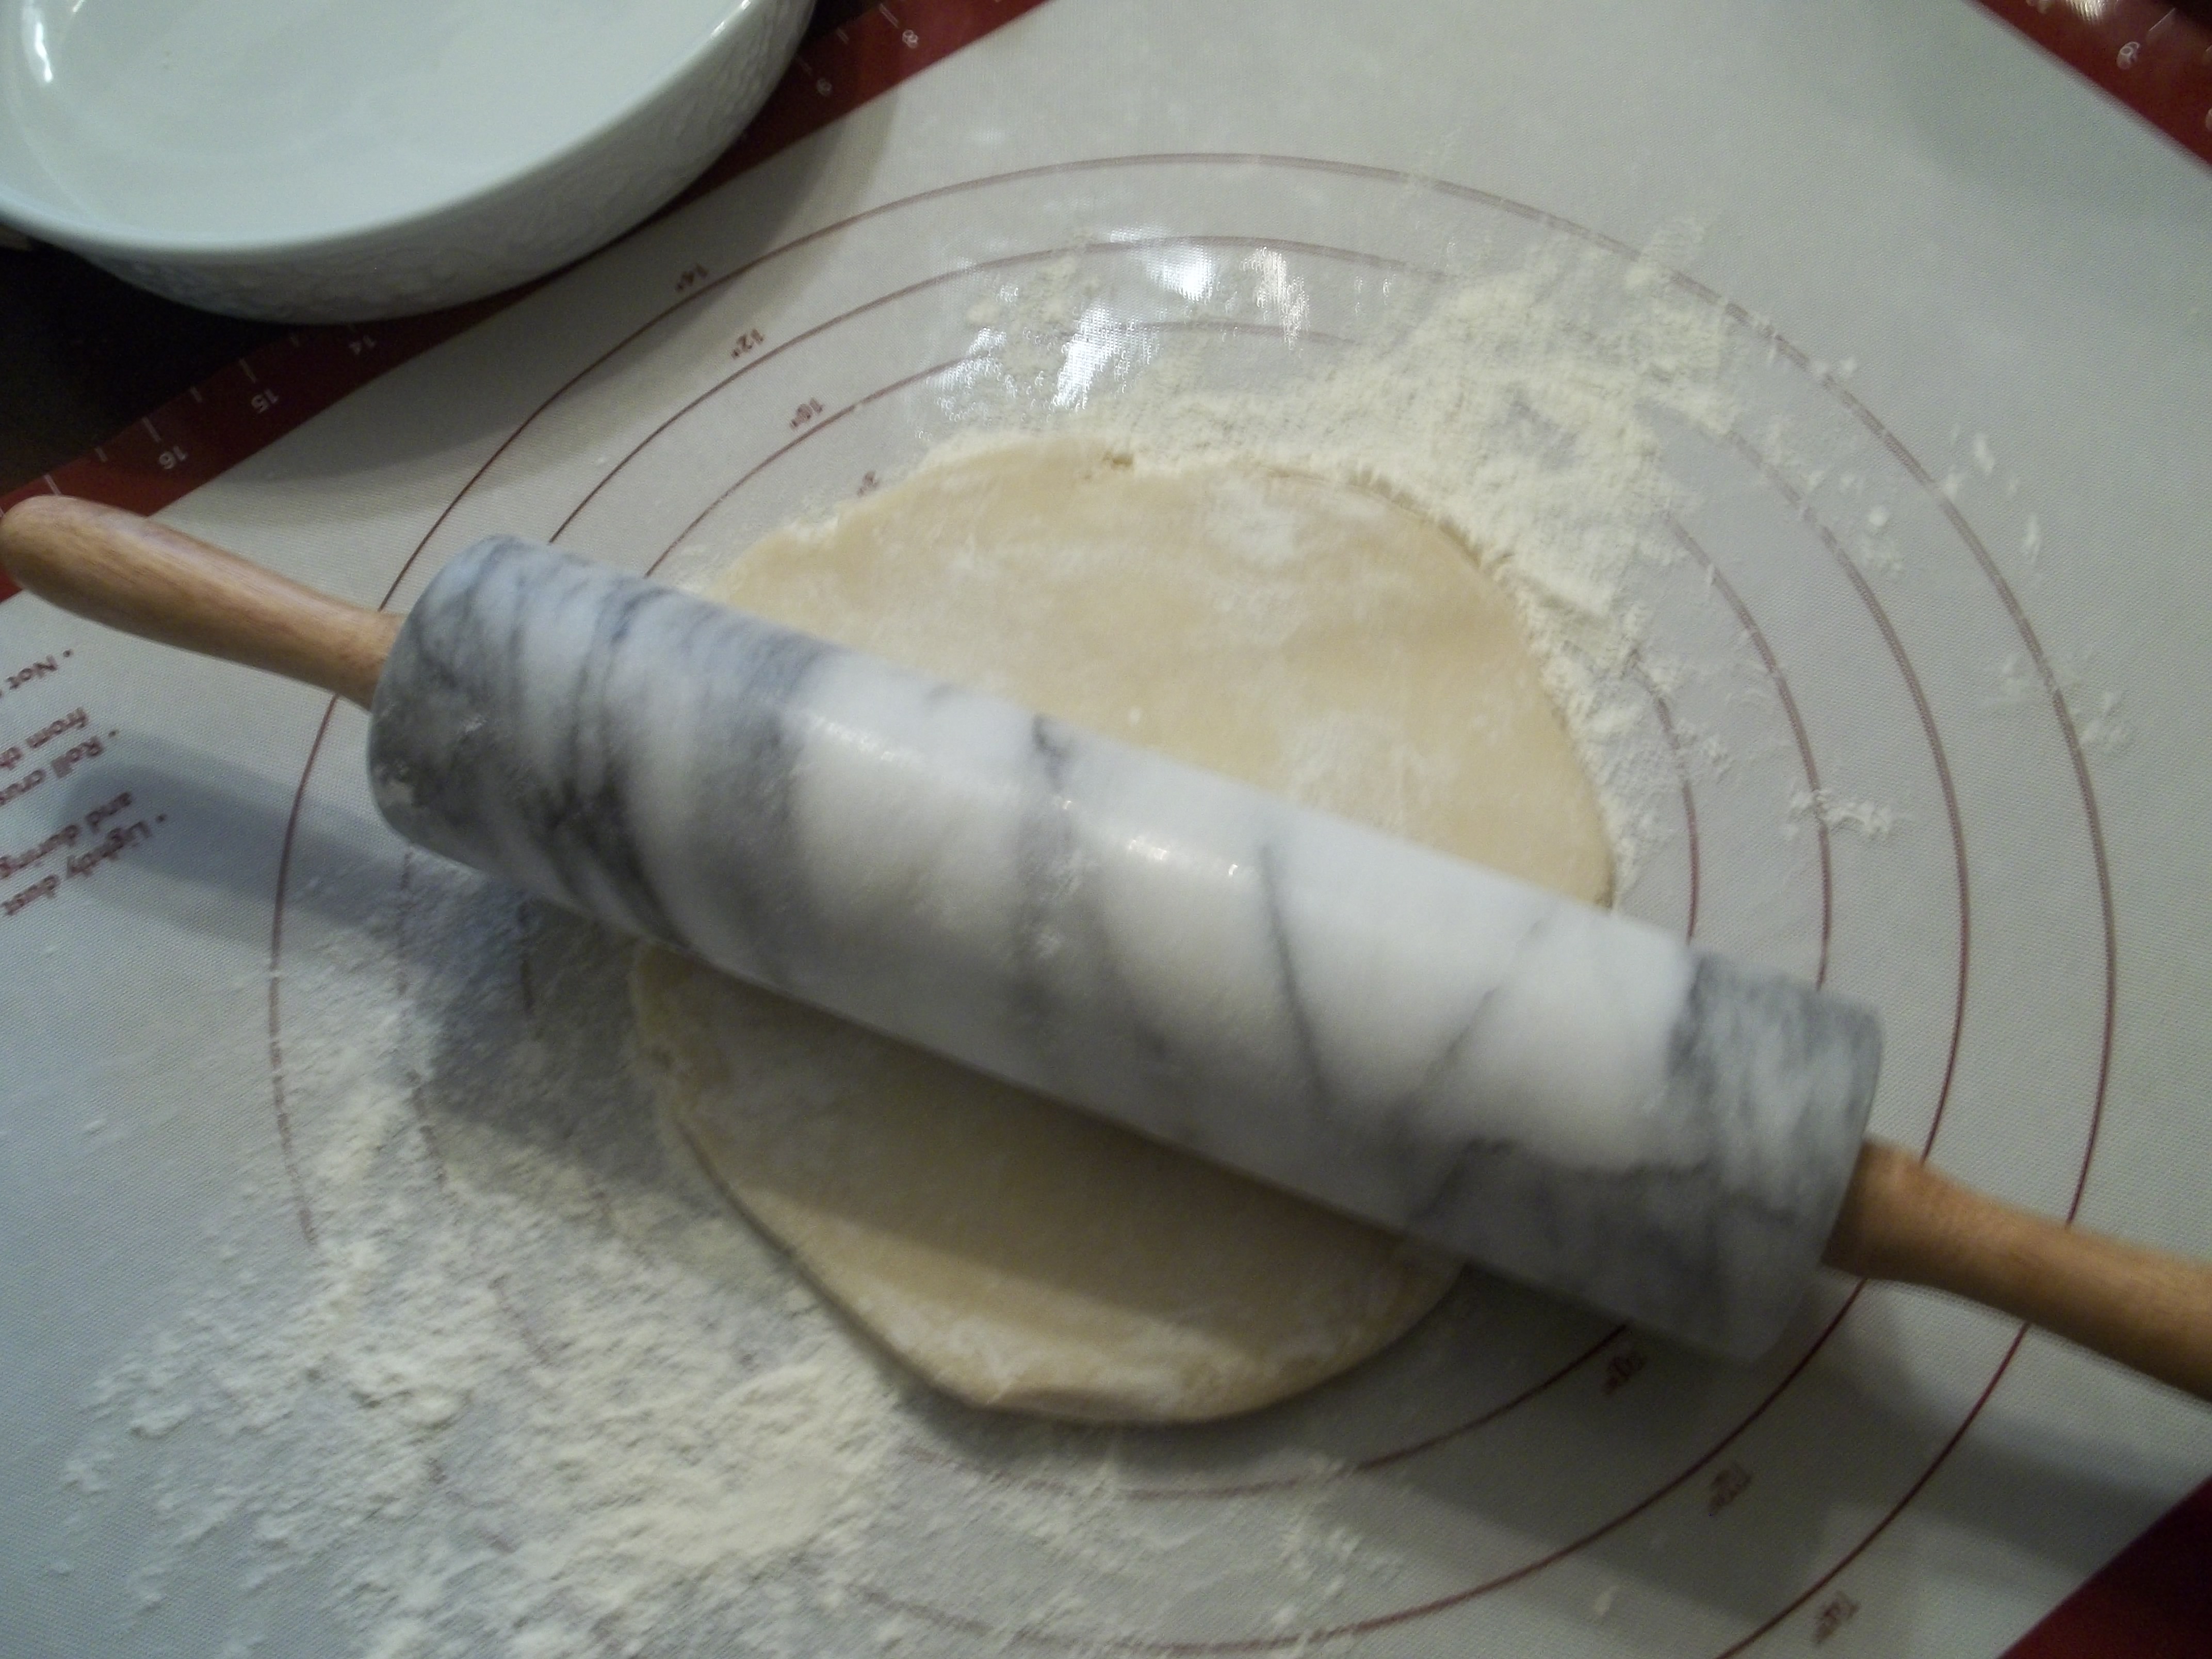
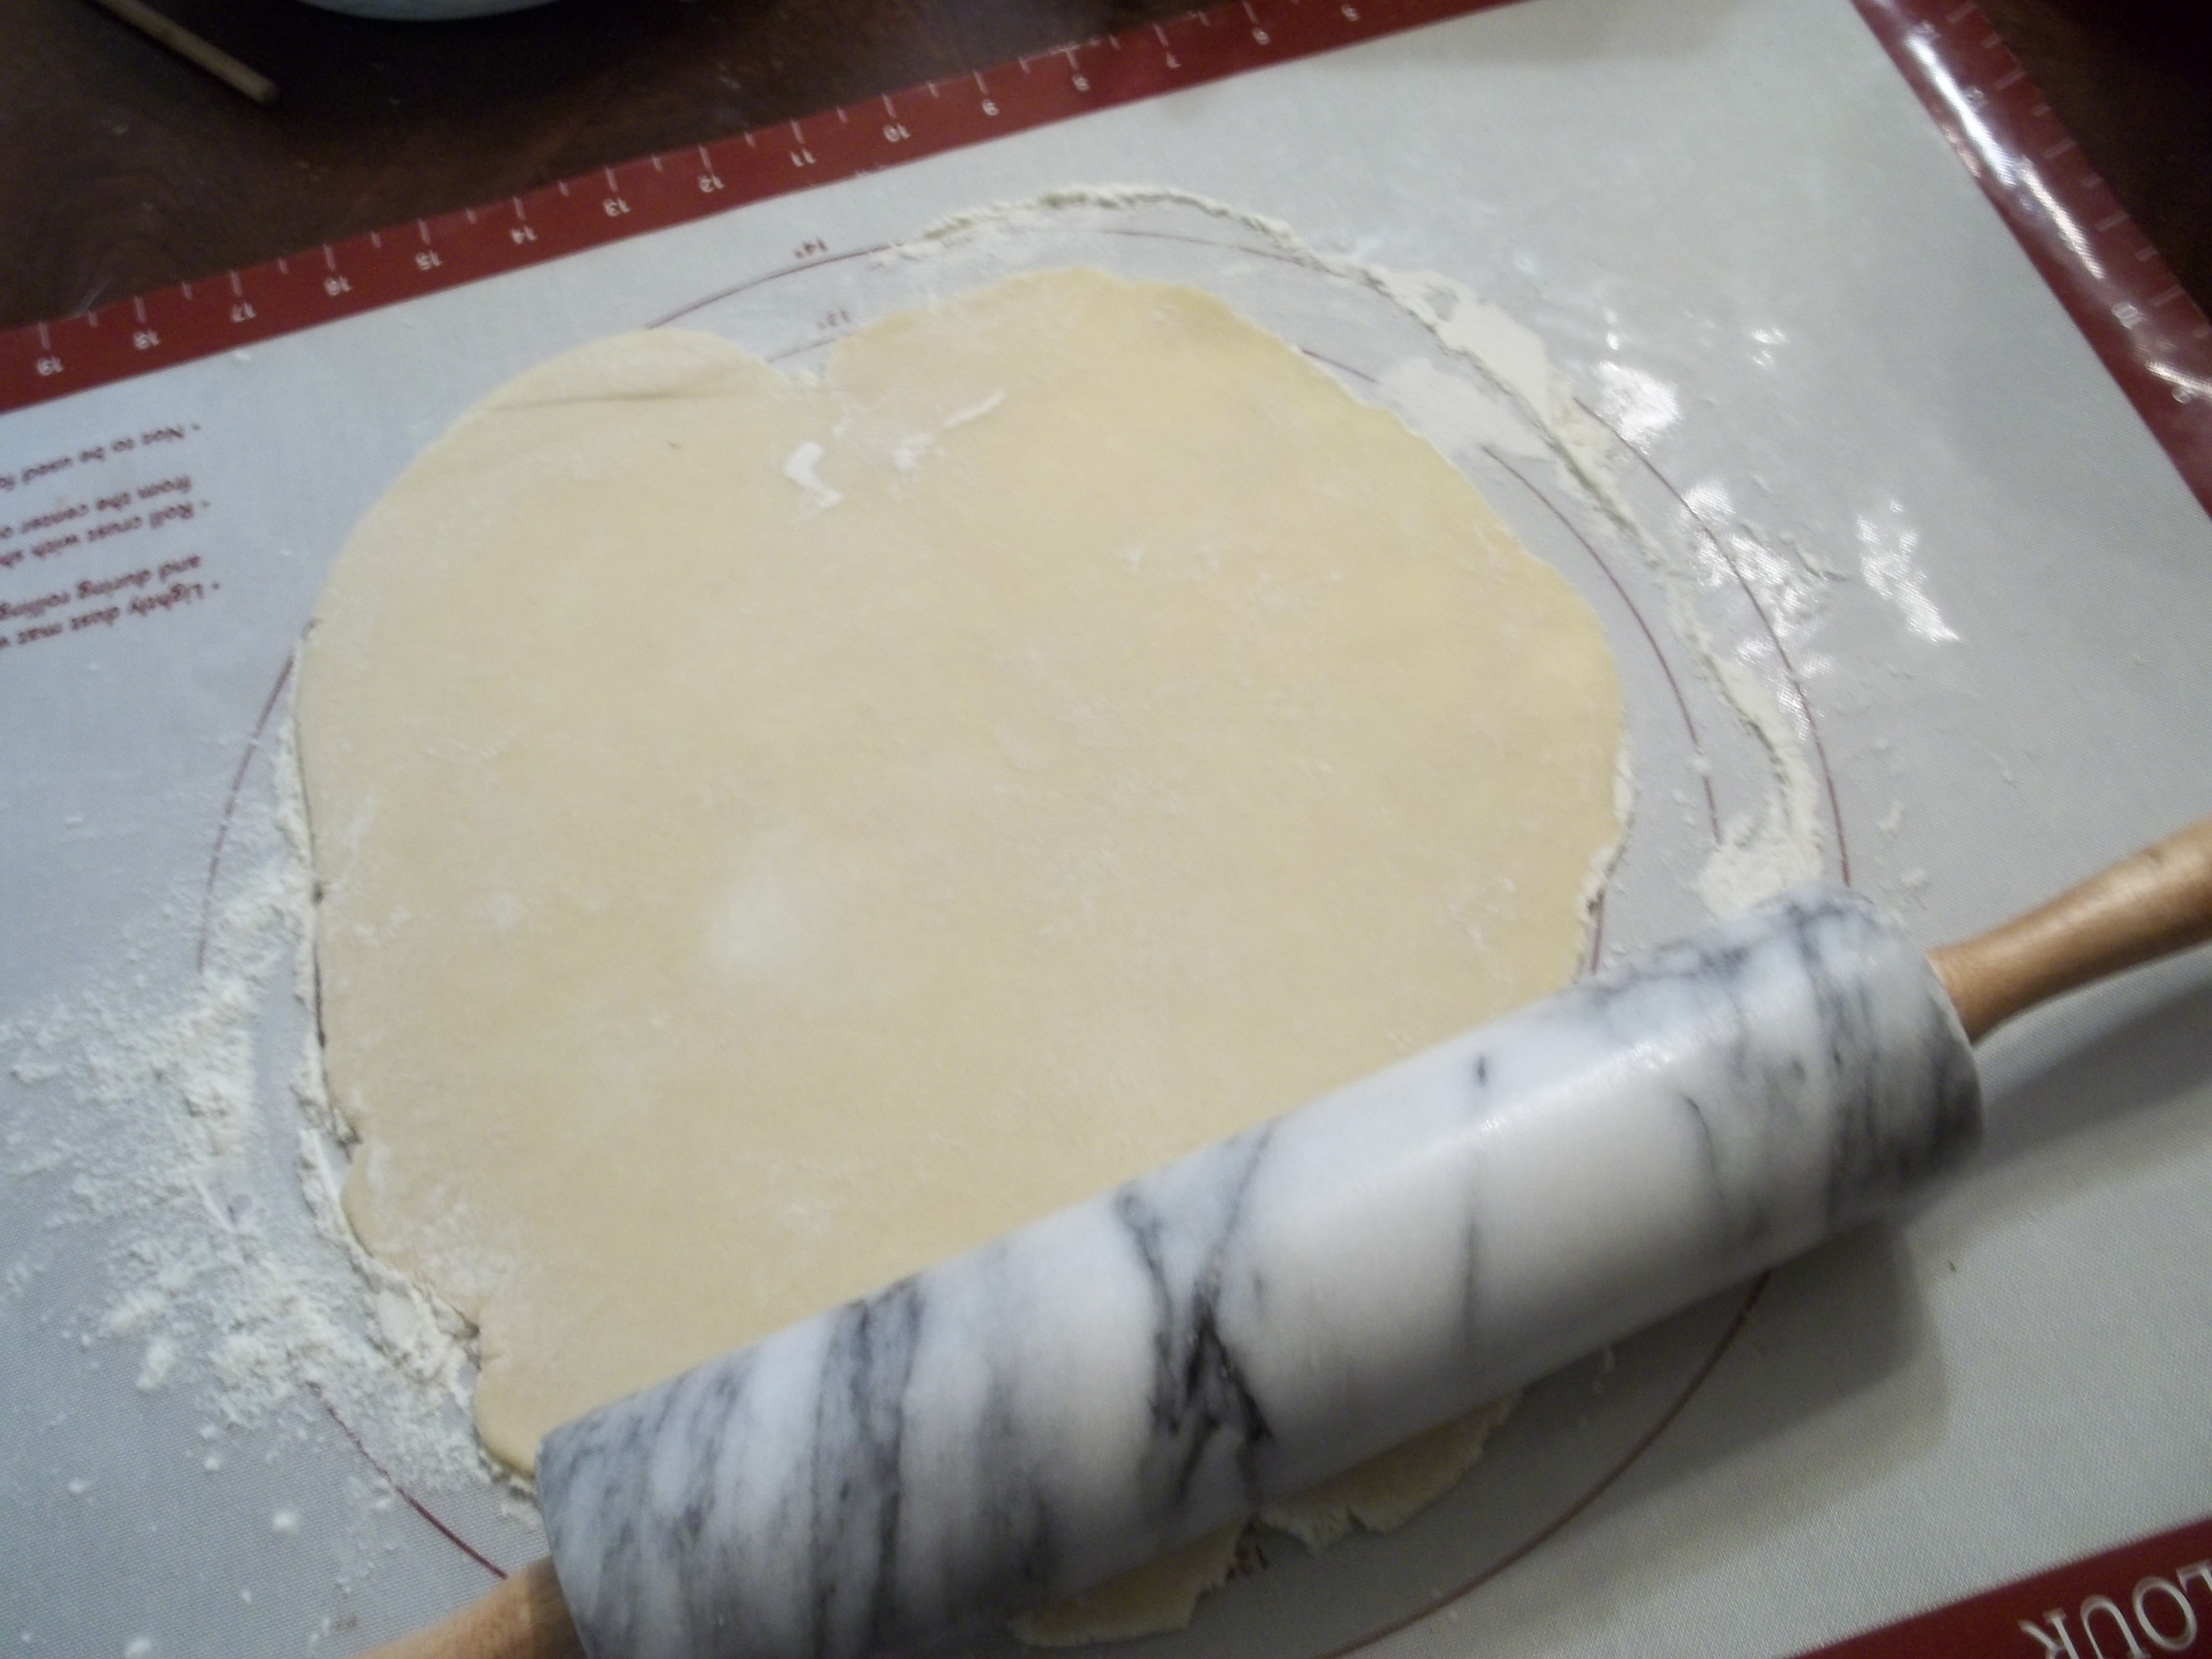
As you can see, it’s not perfectly round, like one you’d get out of the refrigerated section in the store. That’s OK, though. It just needs to be pretty even and wide enough all the way around to fill your pie pan and lap over the sides.
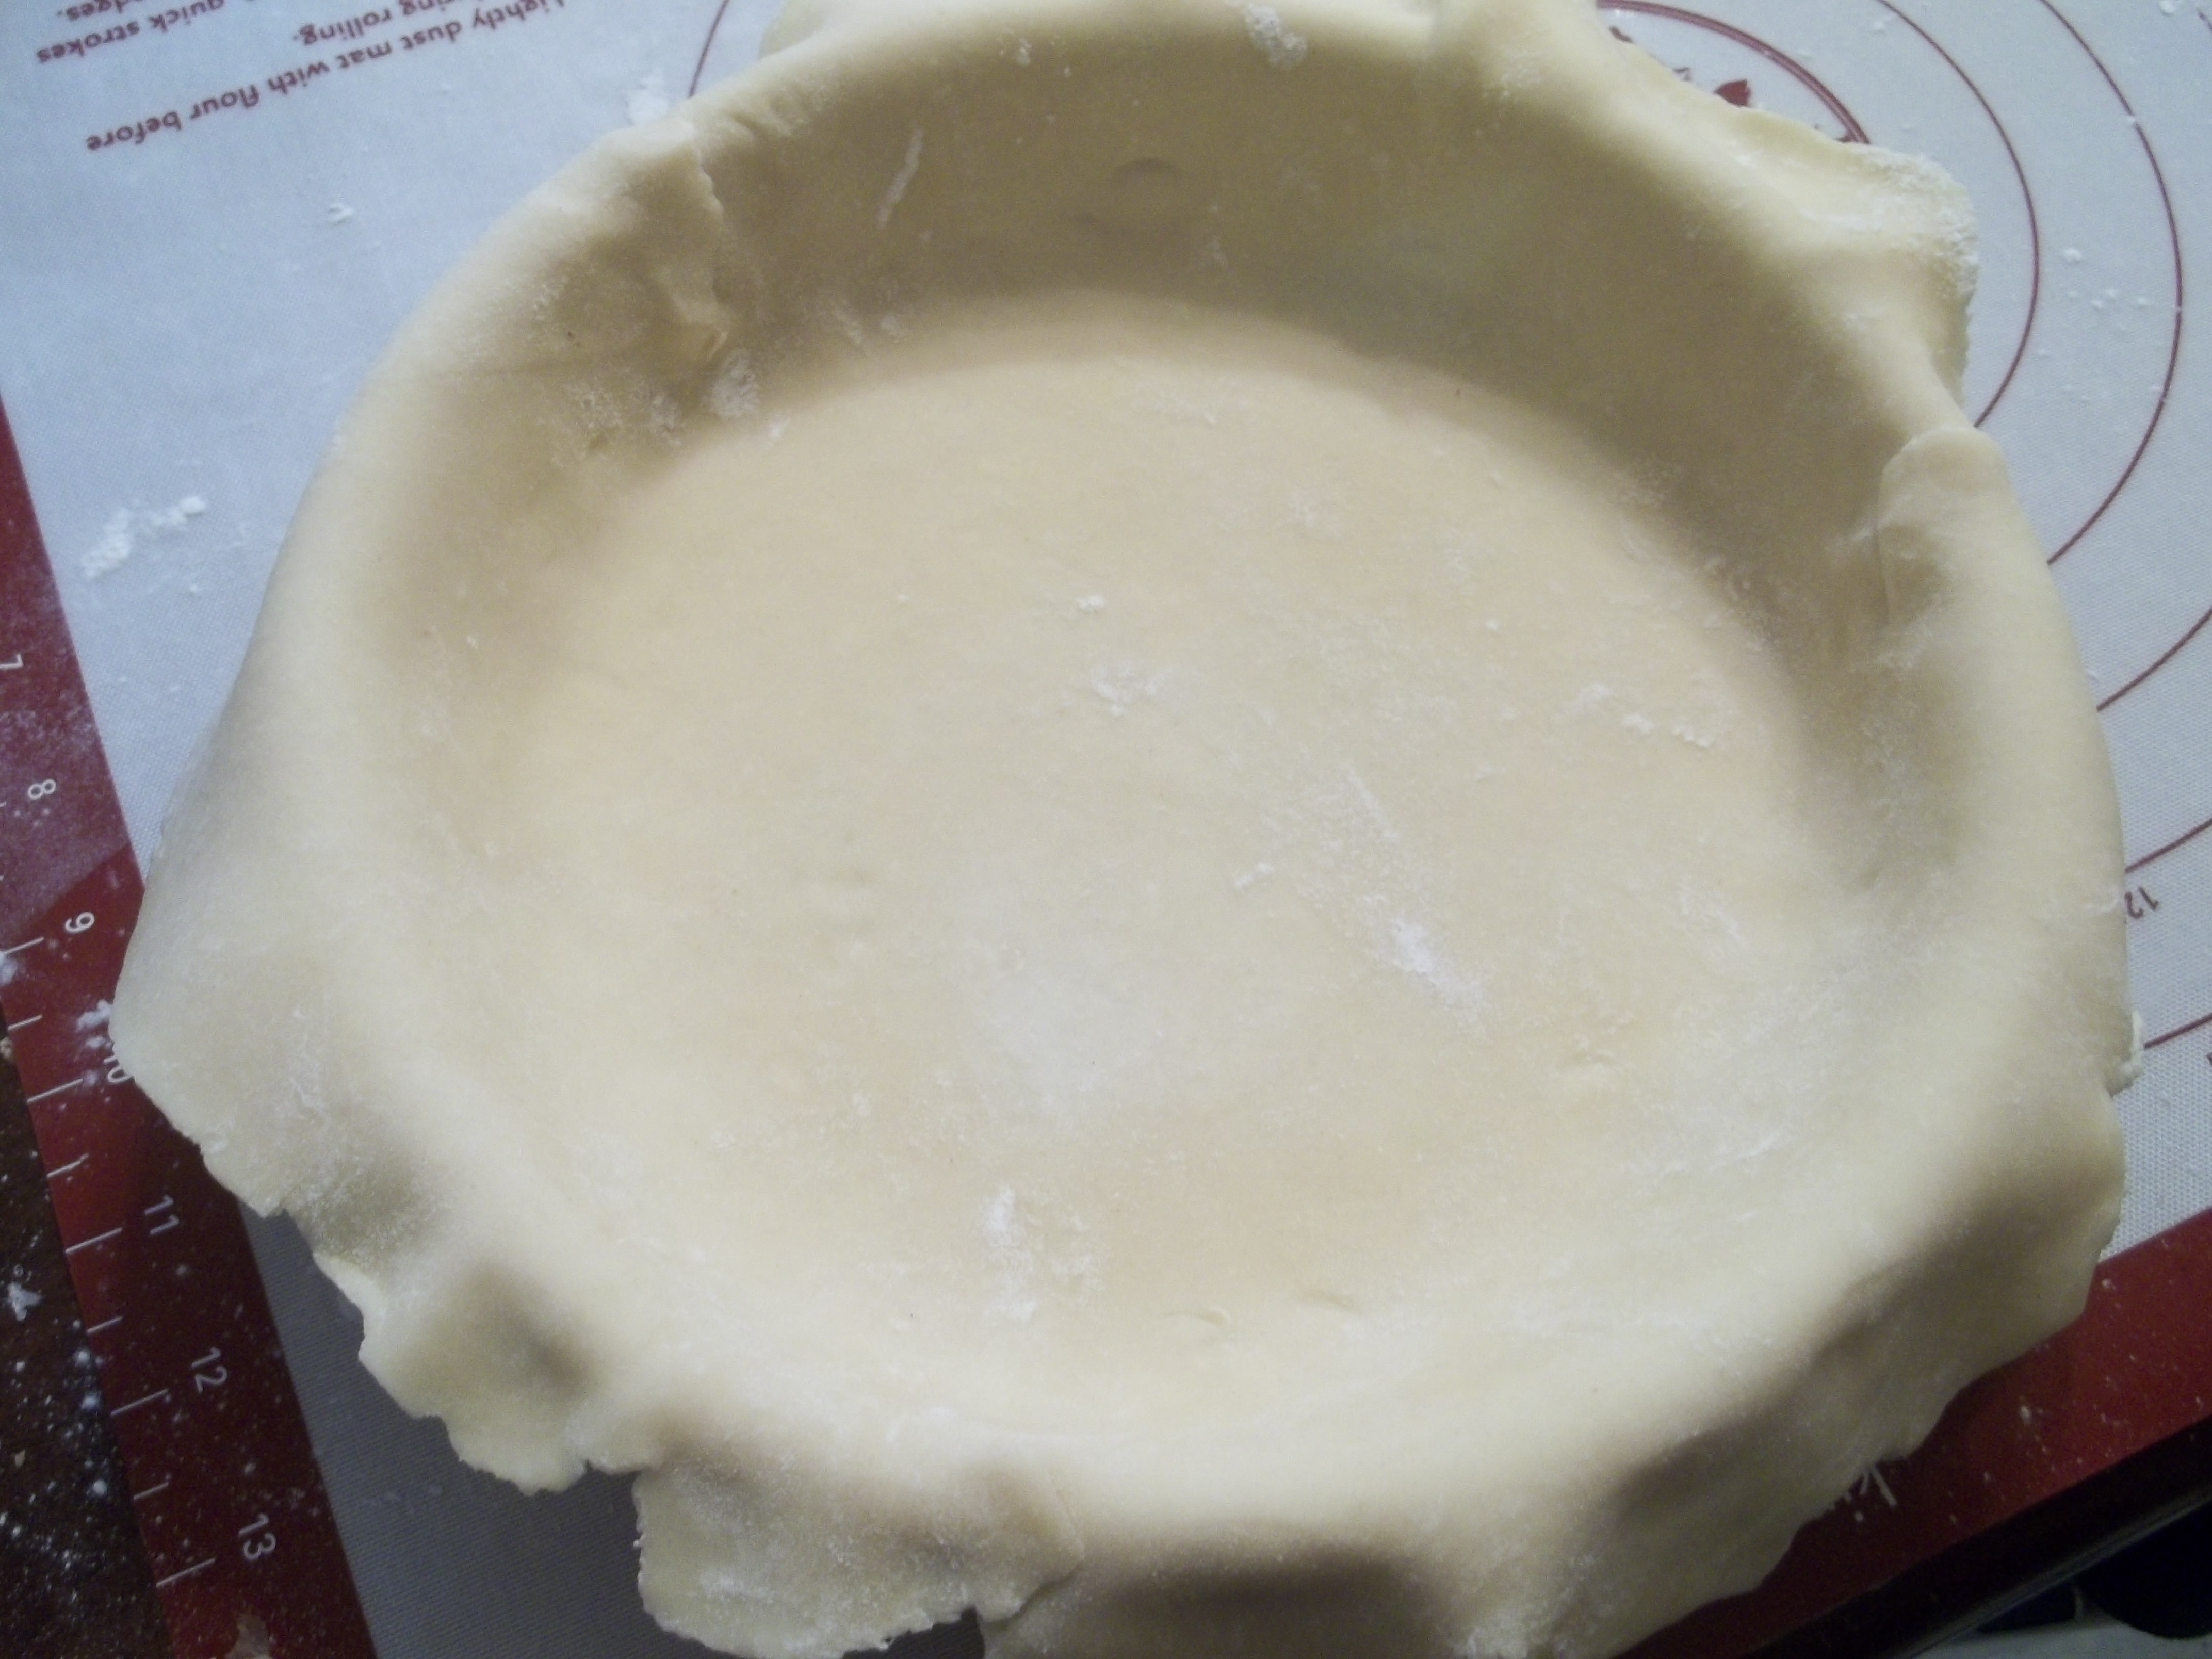
The pan I use for this is a ceramic deep-dish pie pan. It’s OK to stretch the dough gently with your fingers to get it to sit down into the bottom and edges of the pan, but be careful that you don’t tear it. You can patch it with a spare piece of dough, but it usually leaks when I do that. YMMV. Once you’ve got the crust ready, run back to the stove.
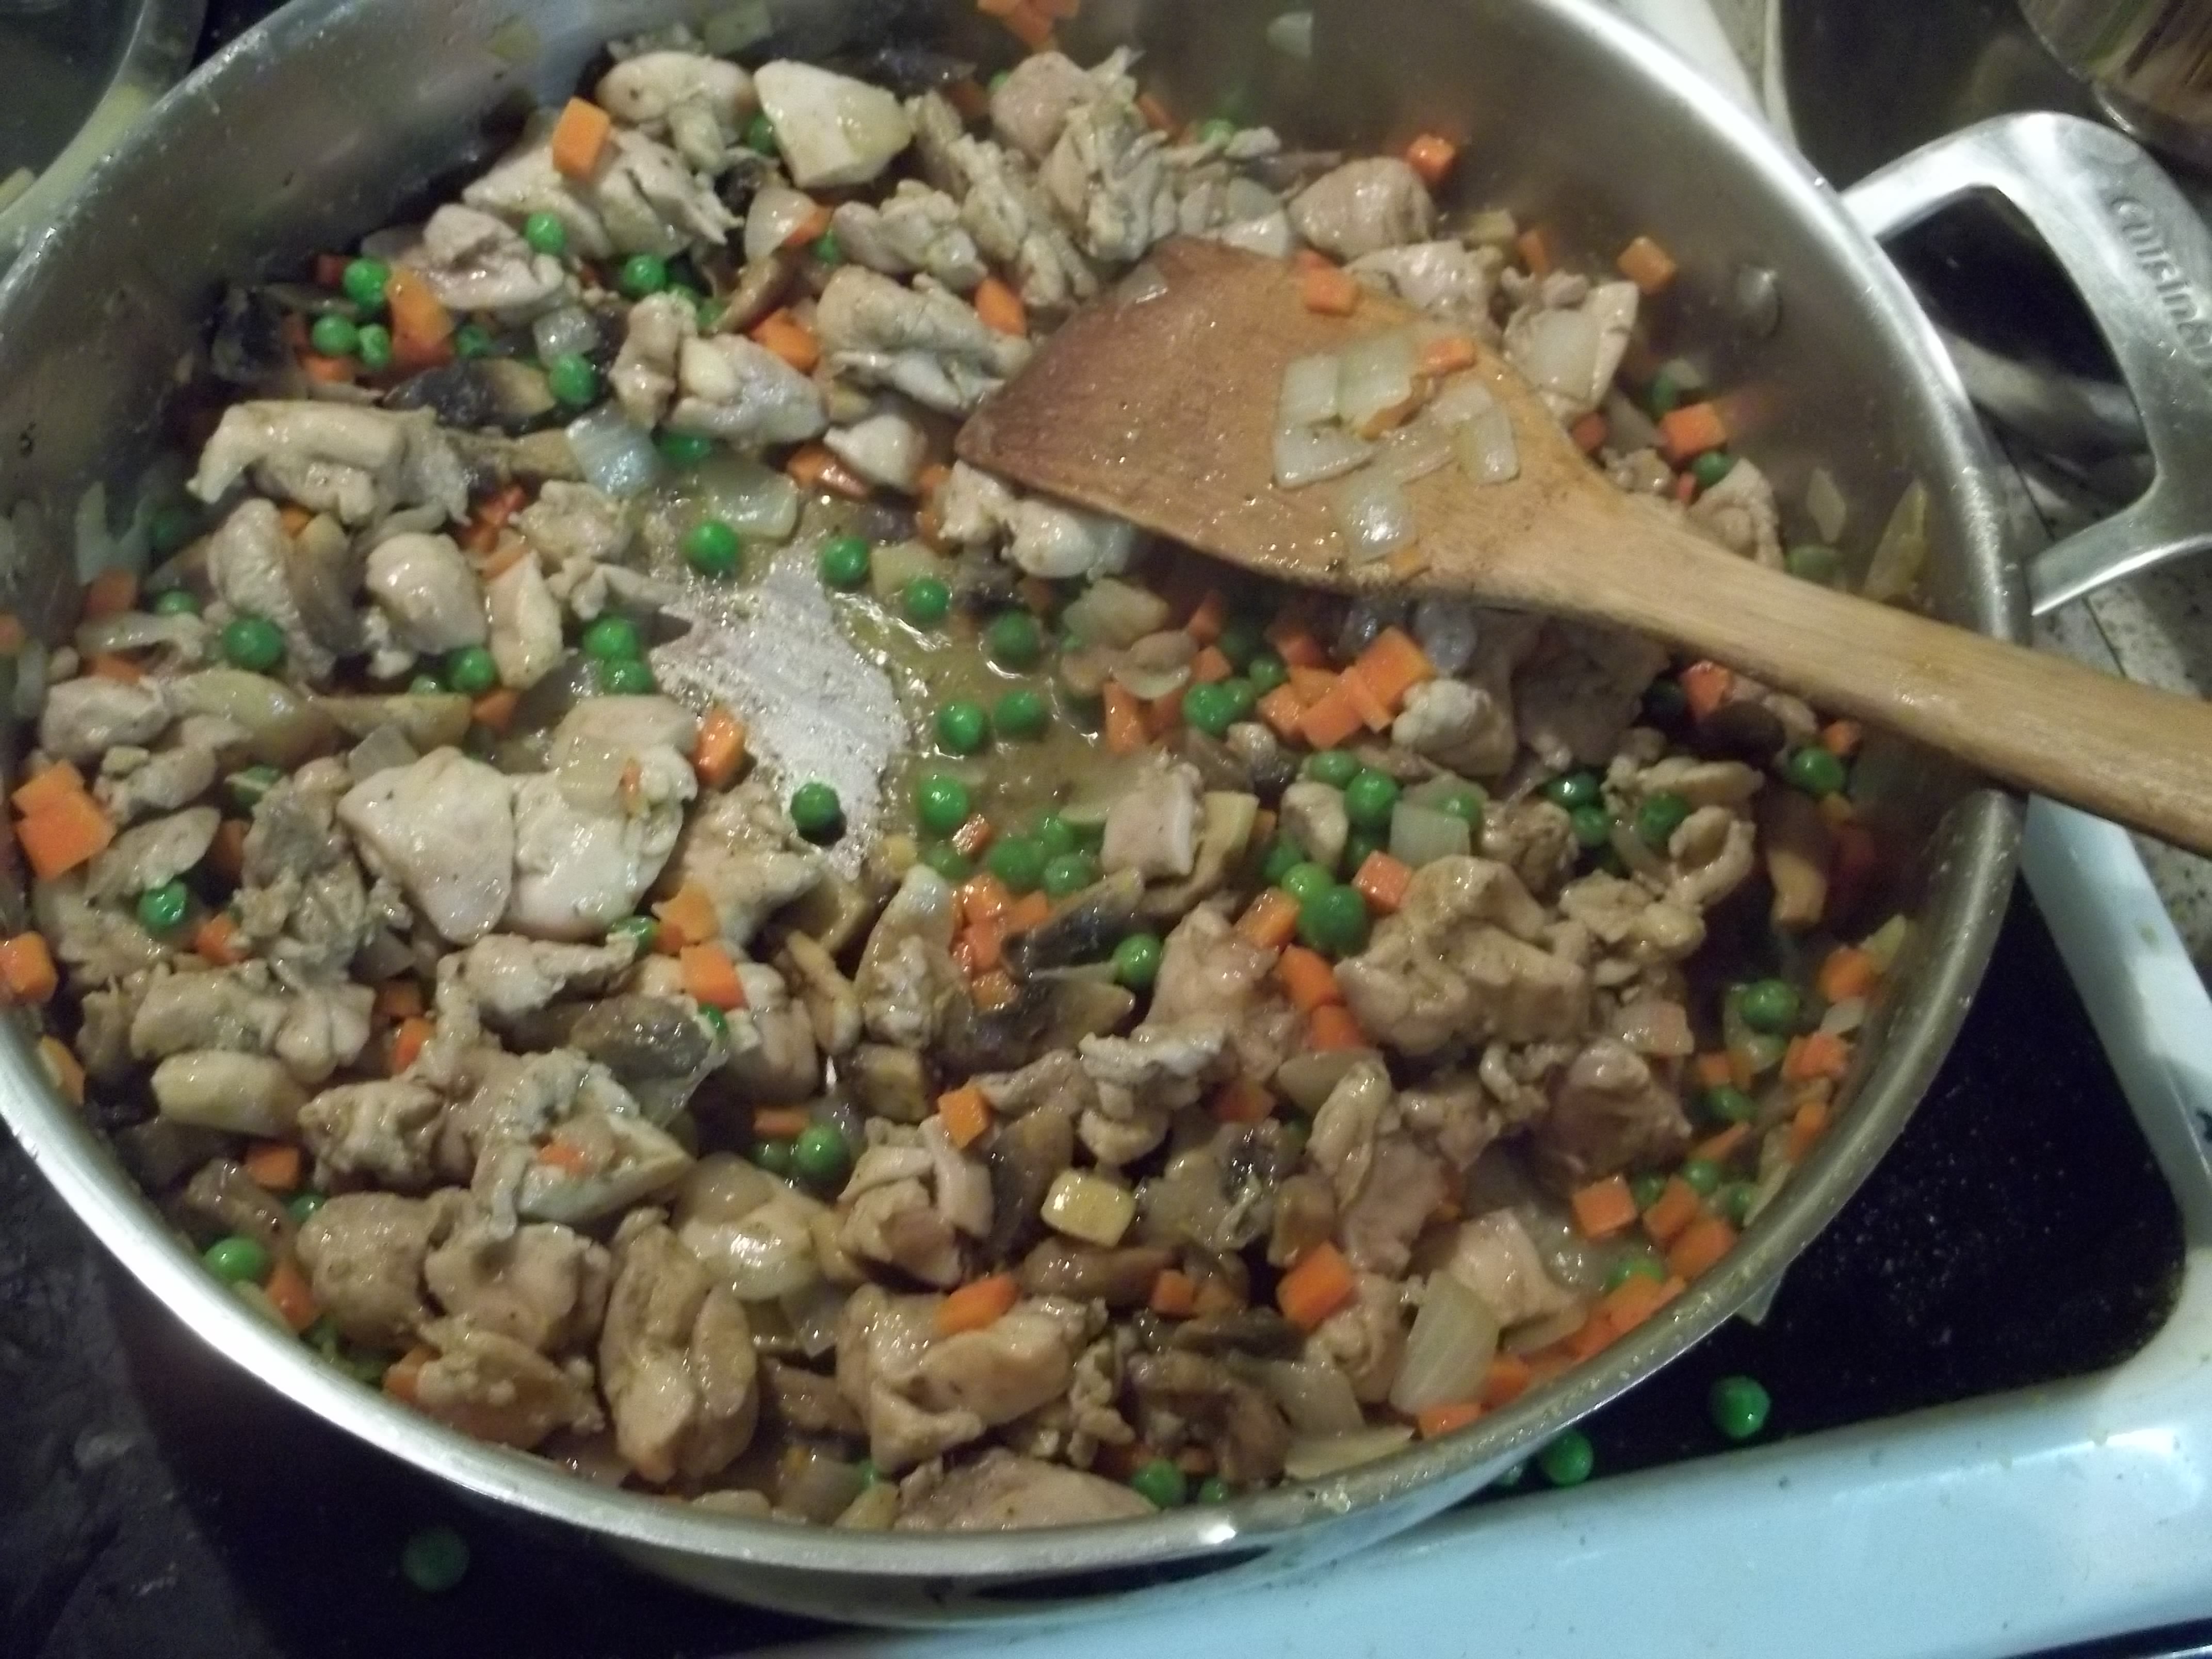
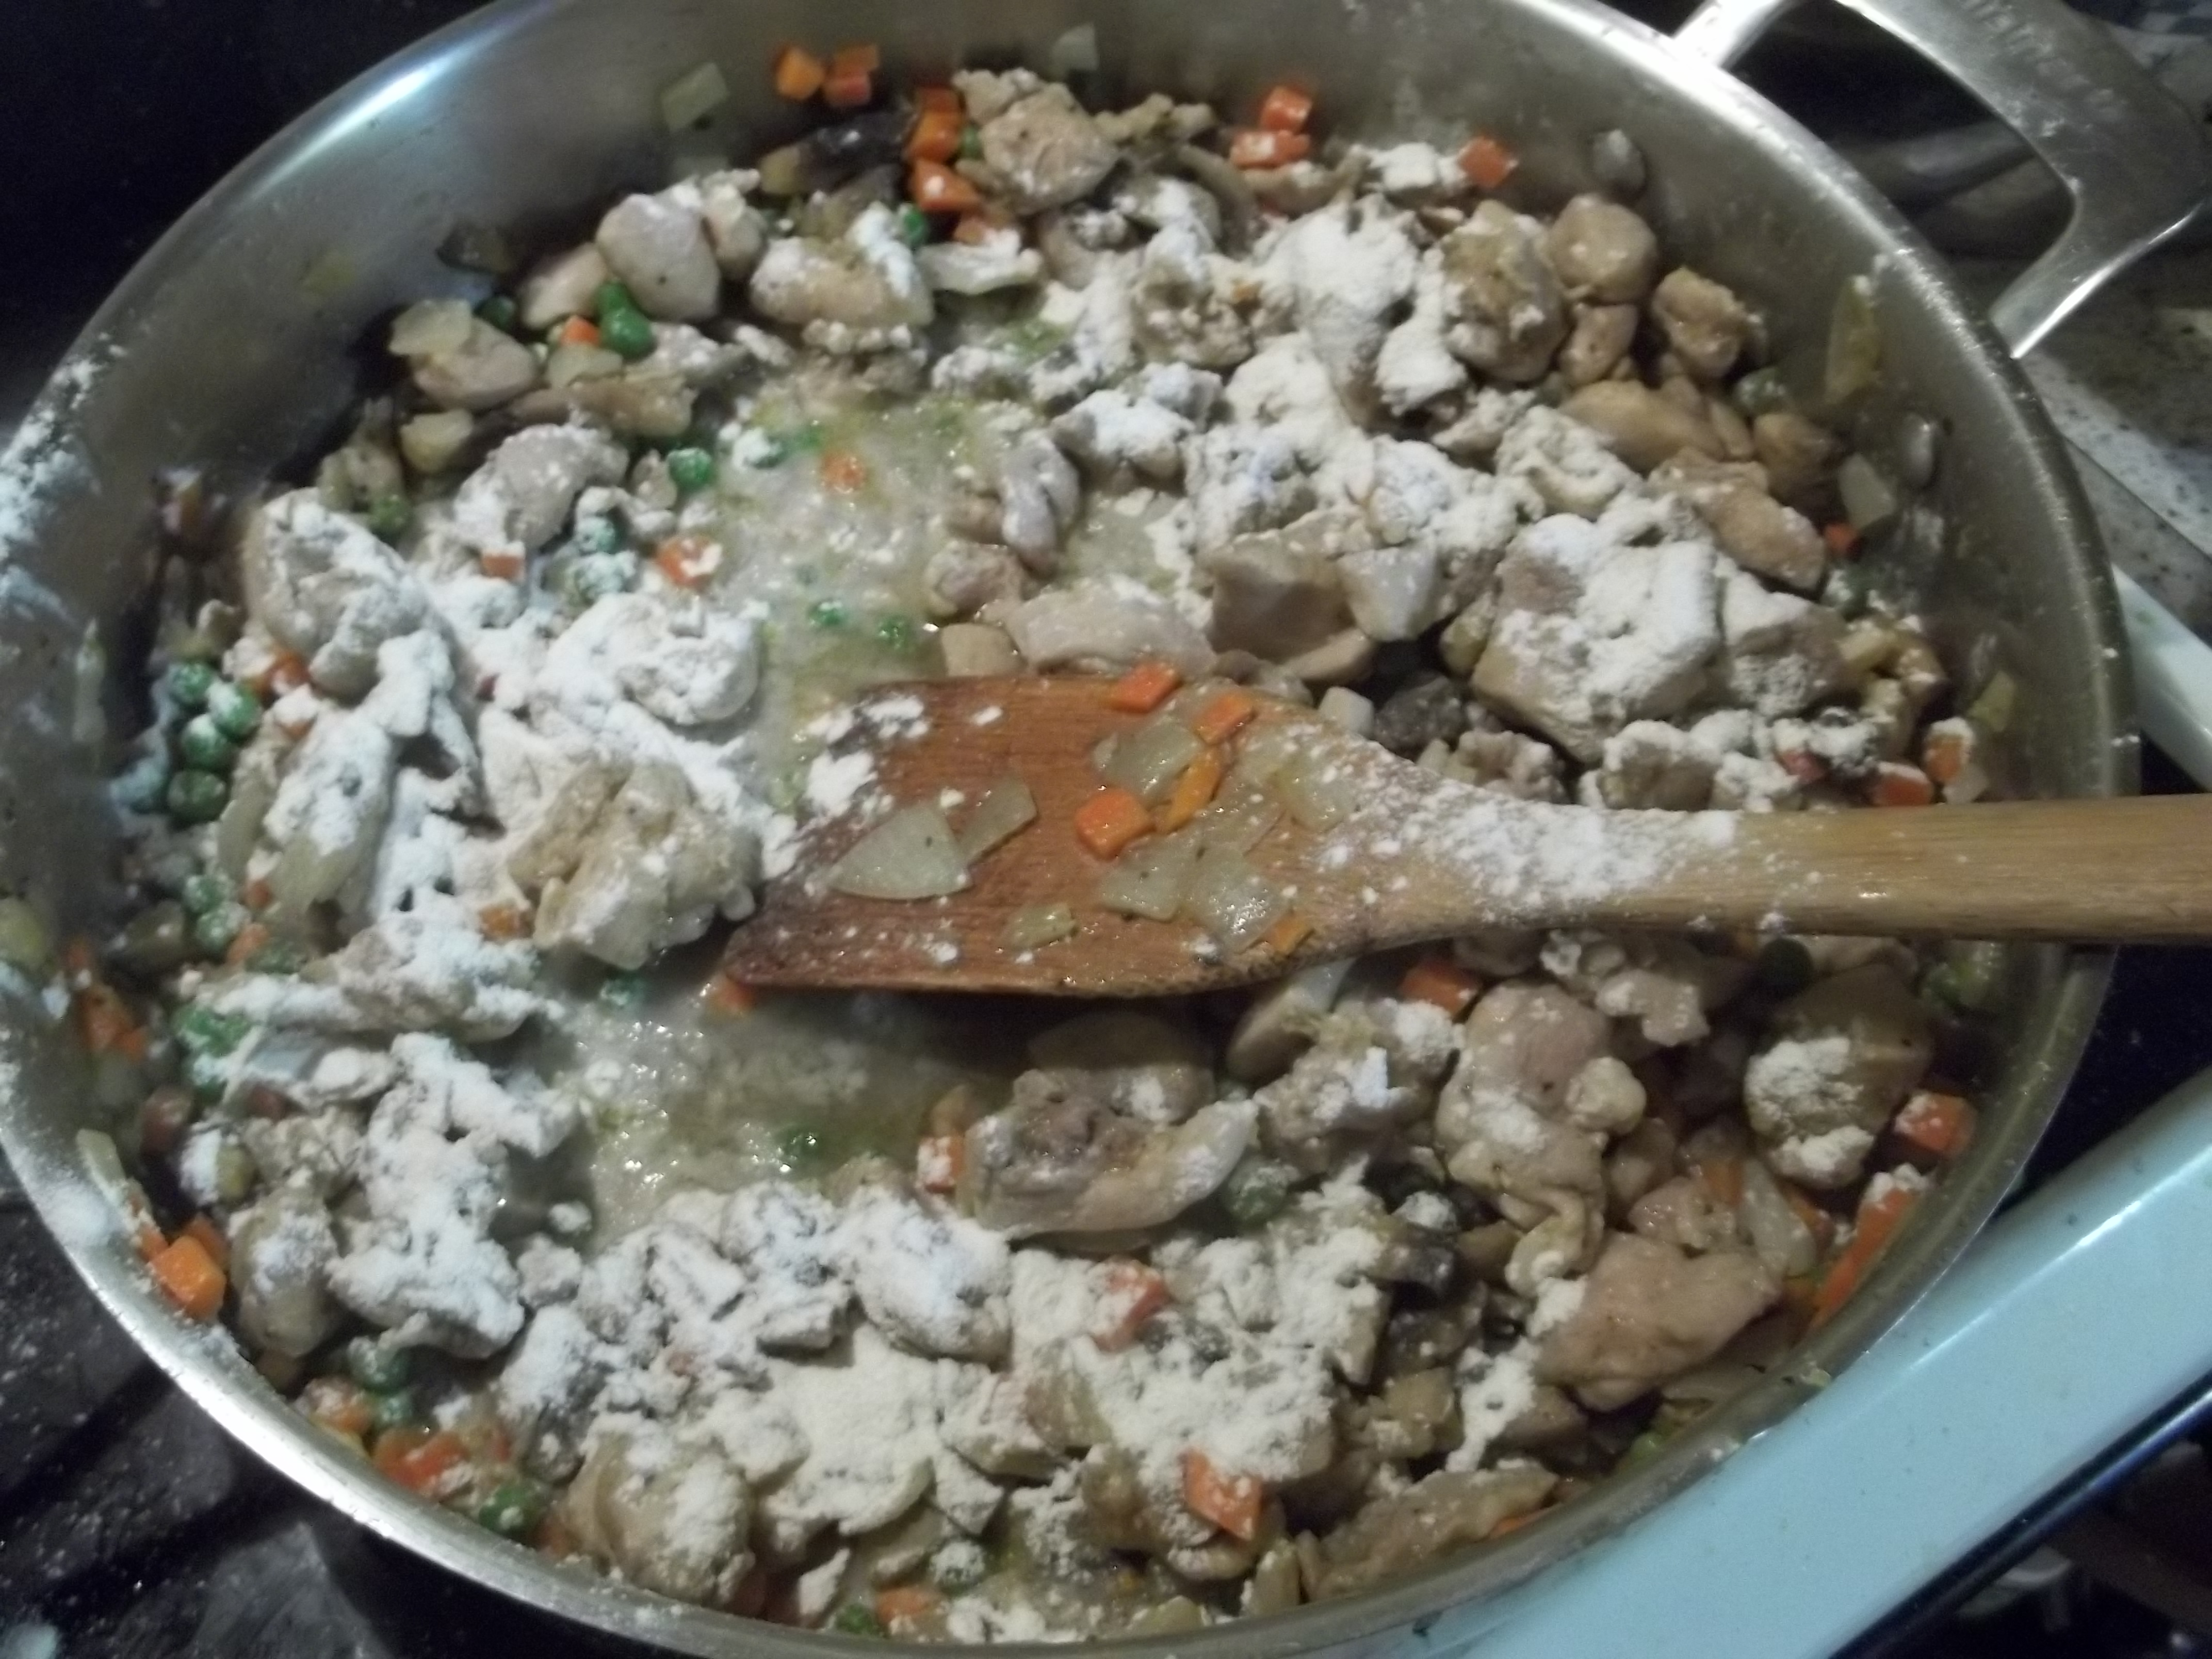
Your chicken should be well-browned by now and you can add those peas. I honestly didn’t measure very closely and basically just added peas until it looked like there were enough. Sprinkle on your herbs and spices now. I didn’t give measurements because it pretty much went like this:
“Hrm… two big pinches of kosher salt should be enough. Aaaaand, enough garlic powder to sort of dust over top of everything. And you need black pepper, right? Oh! The poultry seasoning! What’s that? Two tablespoons? Lots! But not too much.”
This is why I will never write a recipe book. I cook way too much by the ‘that looks like about enough’ method.

Once you’ve got everything seasoned to your taste, add the chicken broth. It’s somewhere between 1/4 and 1/2 cup. Another instances of ‘looking about right. Bring everything up to a slow simmer and sprinkle on a few tablespoons of flour and stir in slowly. The flour will bloom and thicken everything into a gravy. If the first dose of flour isn’t enough, sprinkle on more a tablespoon or so at a time until the gravy looks thick but not gloppy.
While you’re waiting for the gravy to thicken a little, roll out the second piece of pie crust. This one doesn’t have to be quite as large because it’s the top crust and just has to lay over the top and overlap some. Once your top crust is ready, pour the filling into the prepared bottom crust.
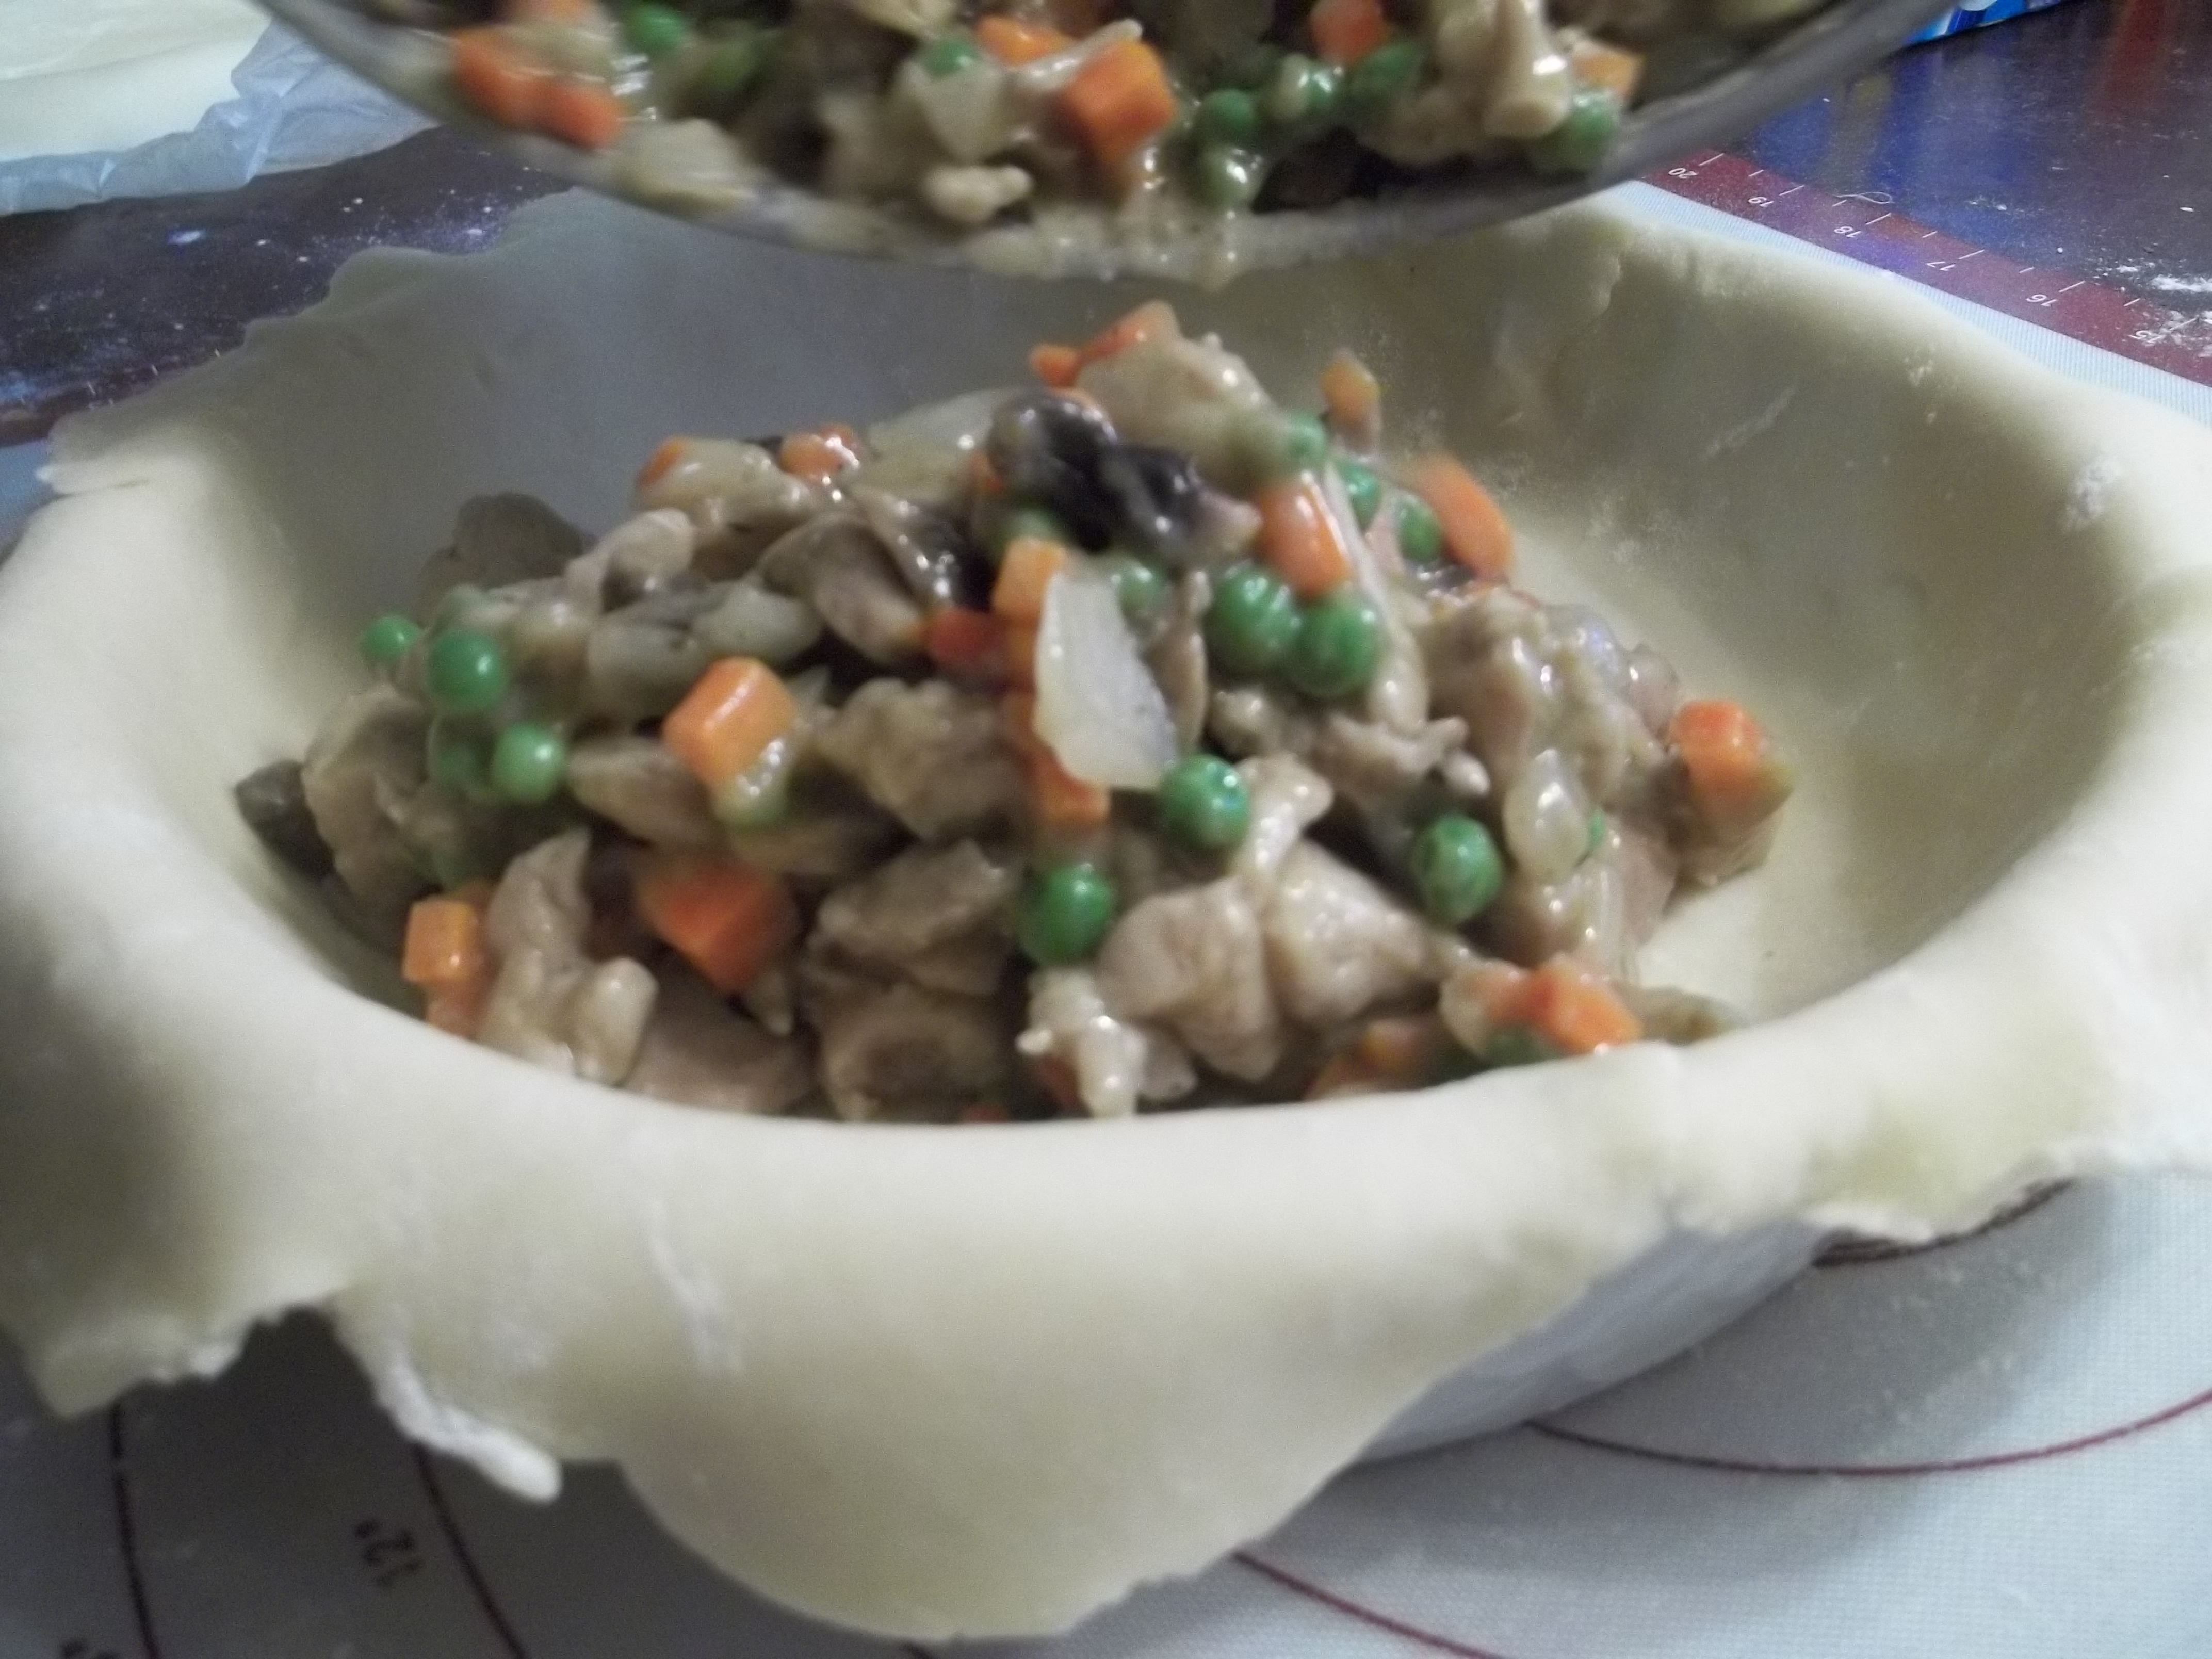
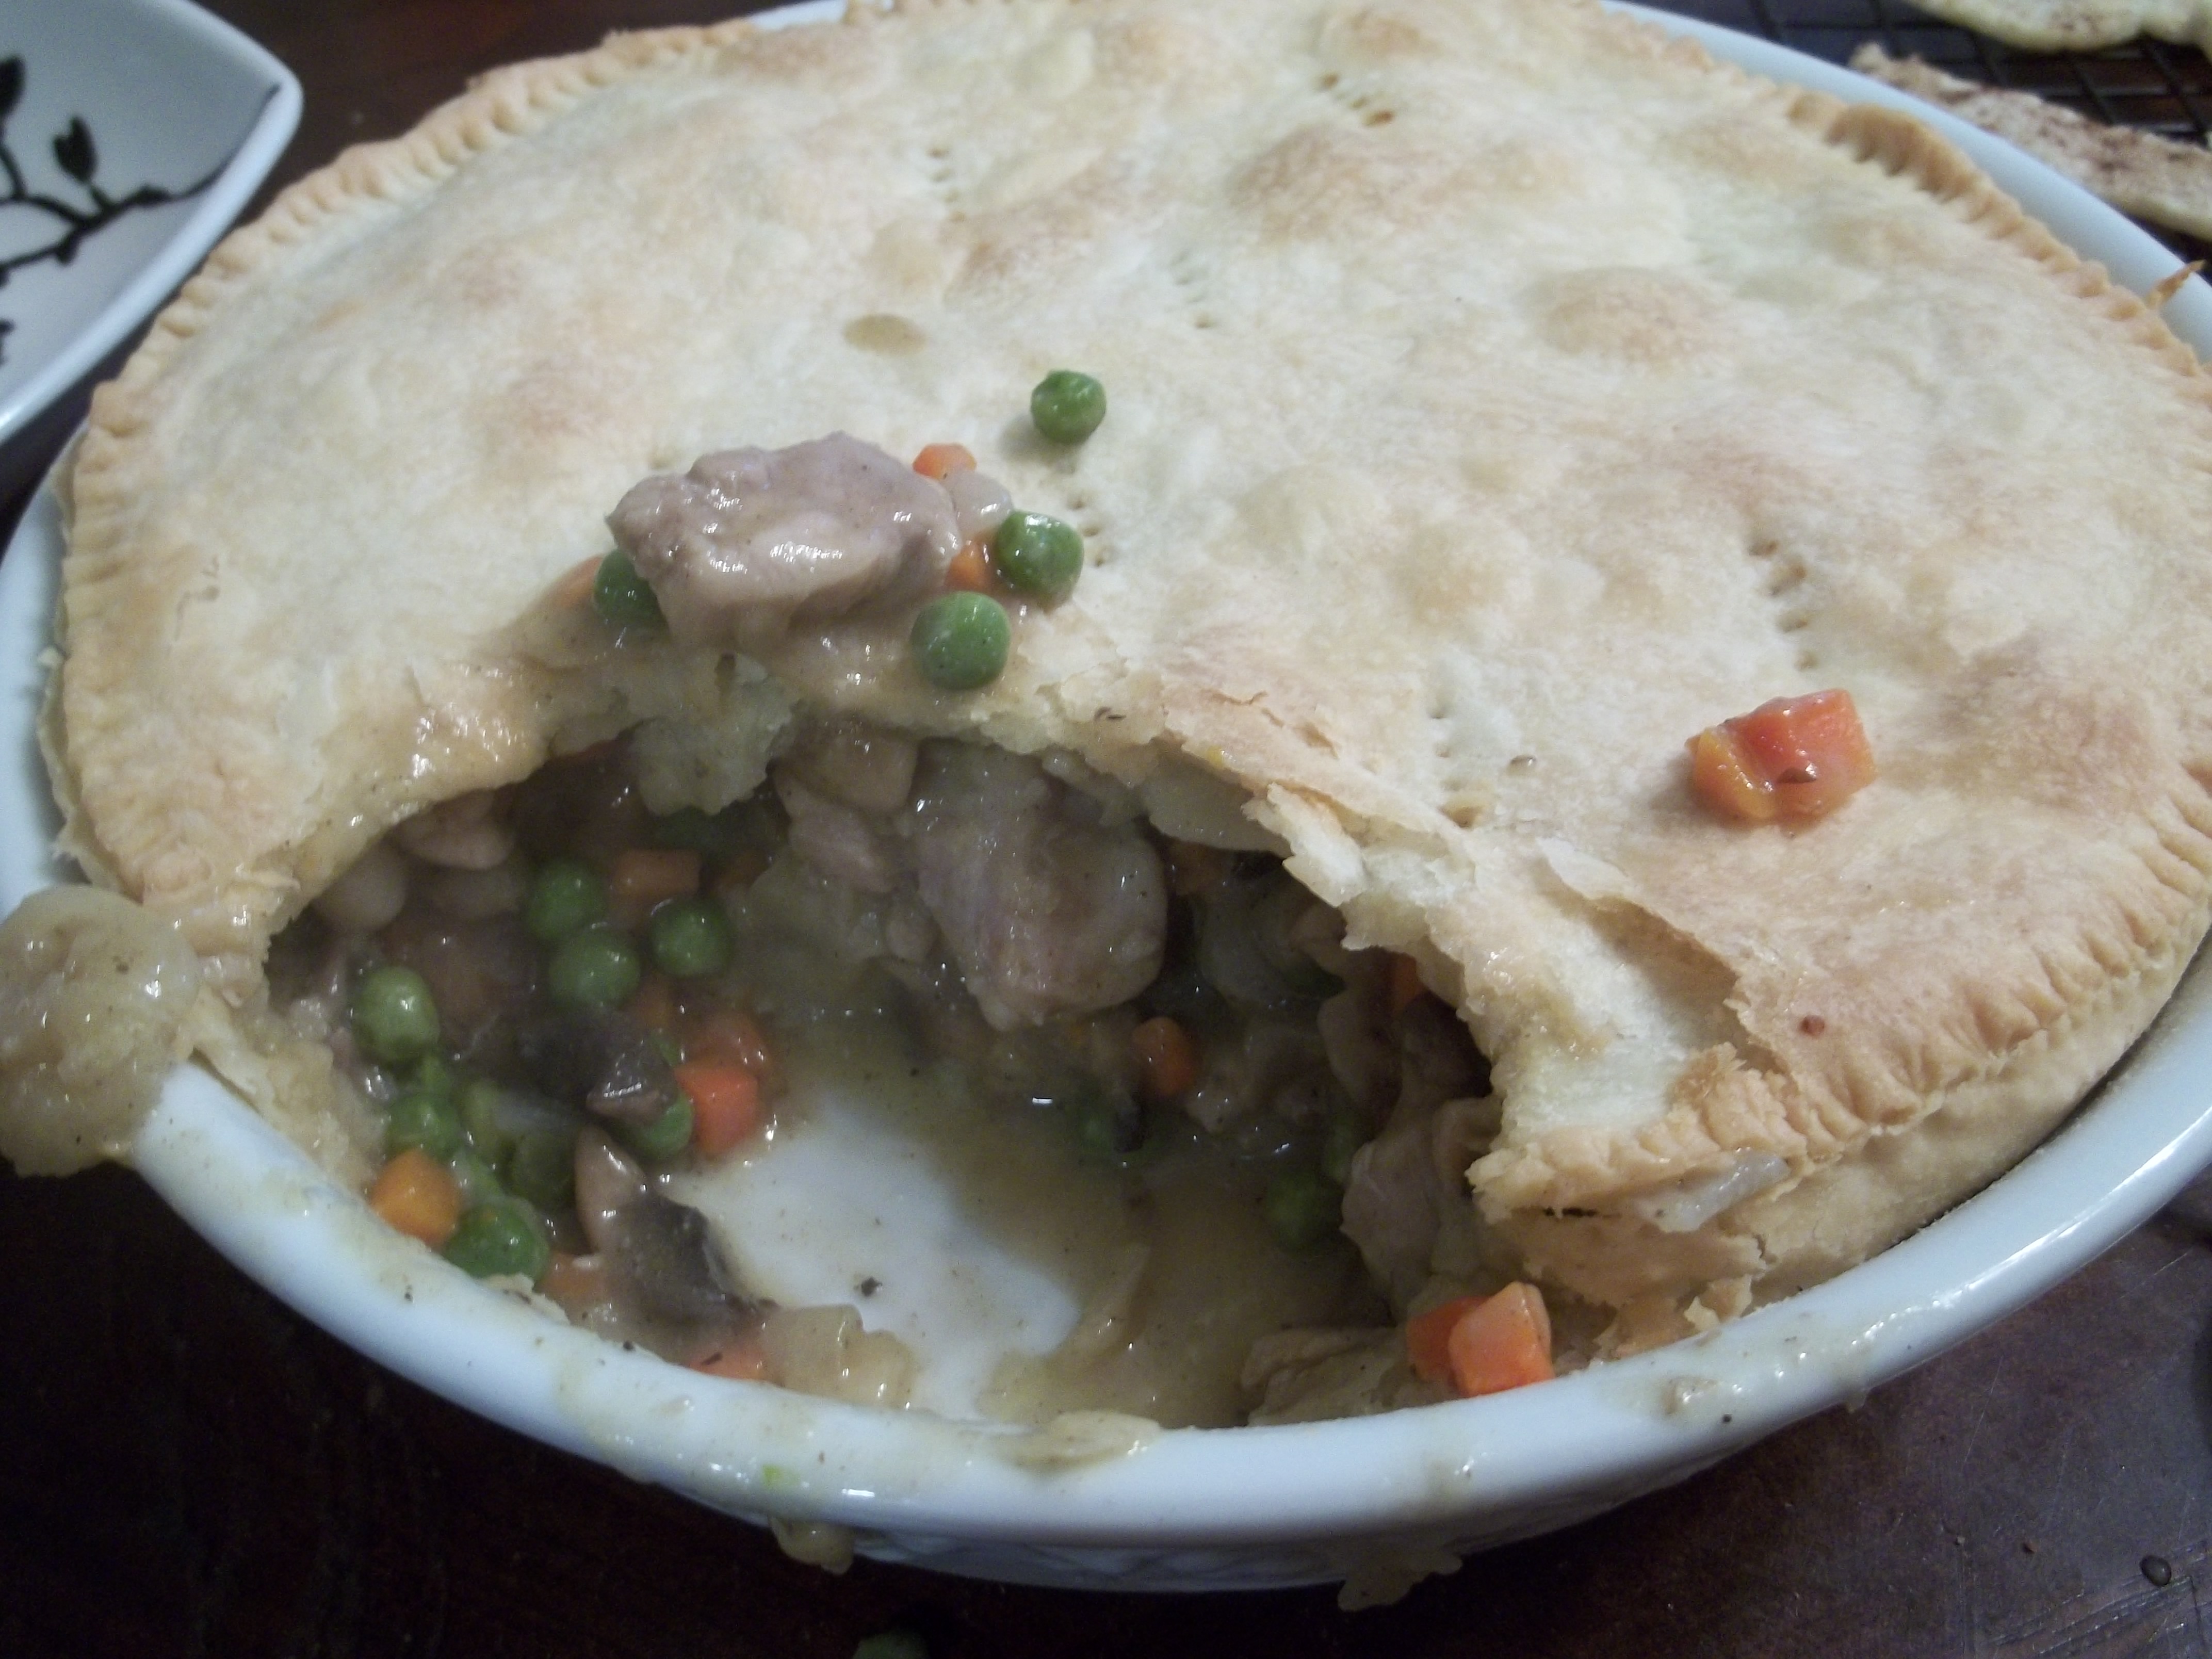
There should be enough to completely fill the pie pan. It doesn’t hurt if it’s a little under-full, but over-full will cause a lot of mess. If it looks like you’re overfilling, put the rest of the filling away and eat it later like stew. It will be just as tasty.
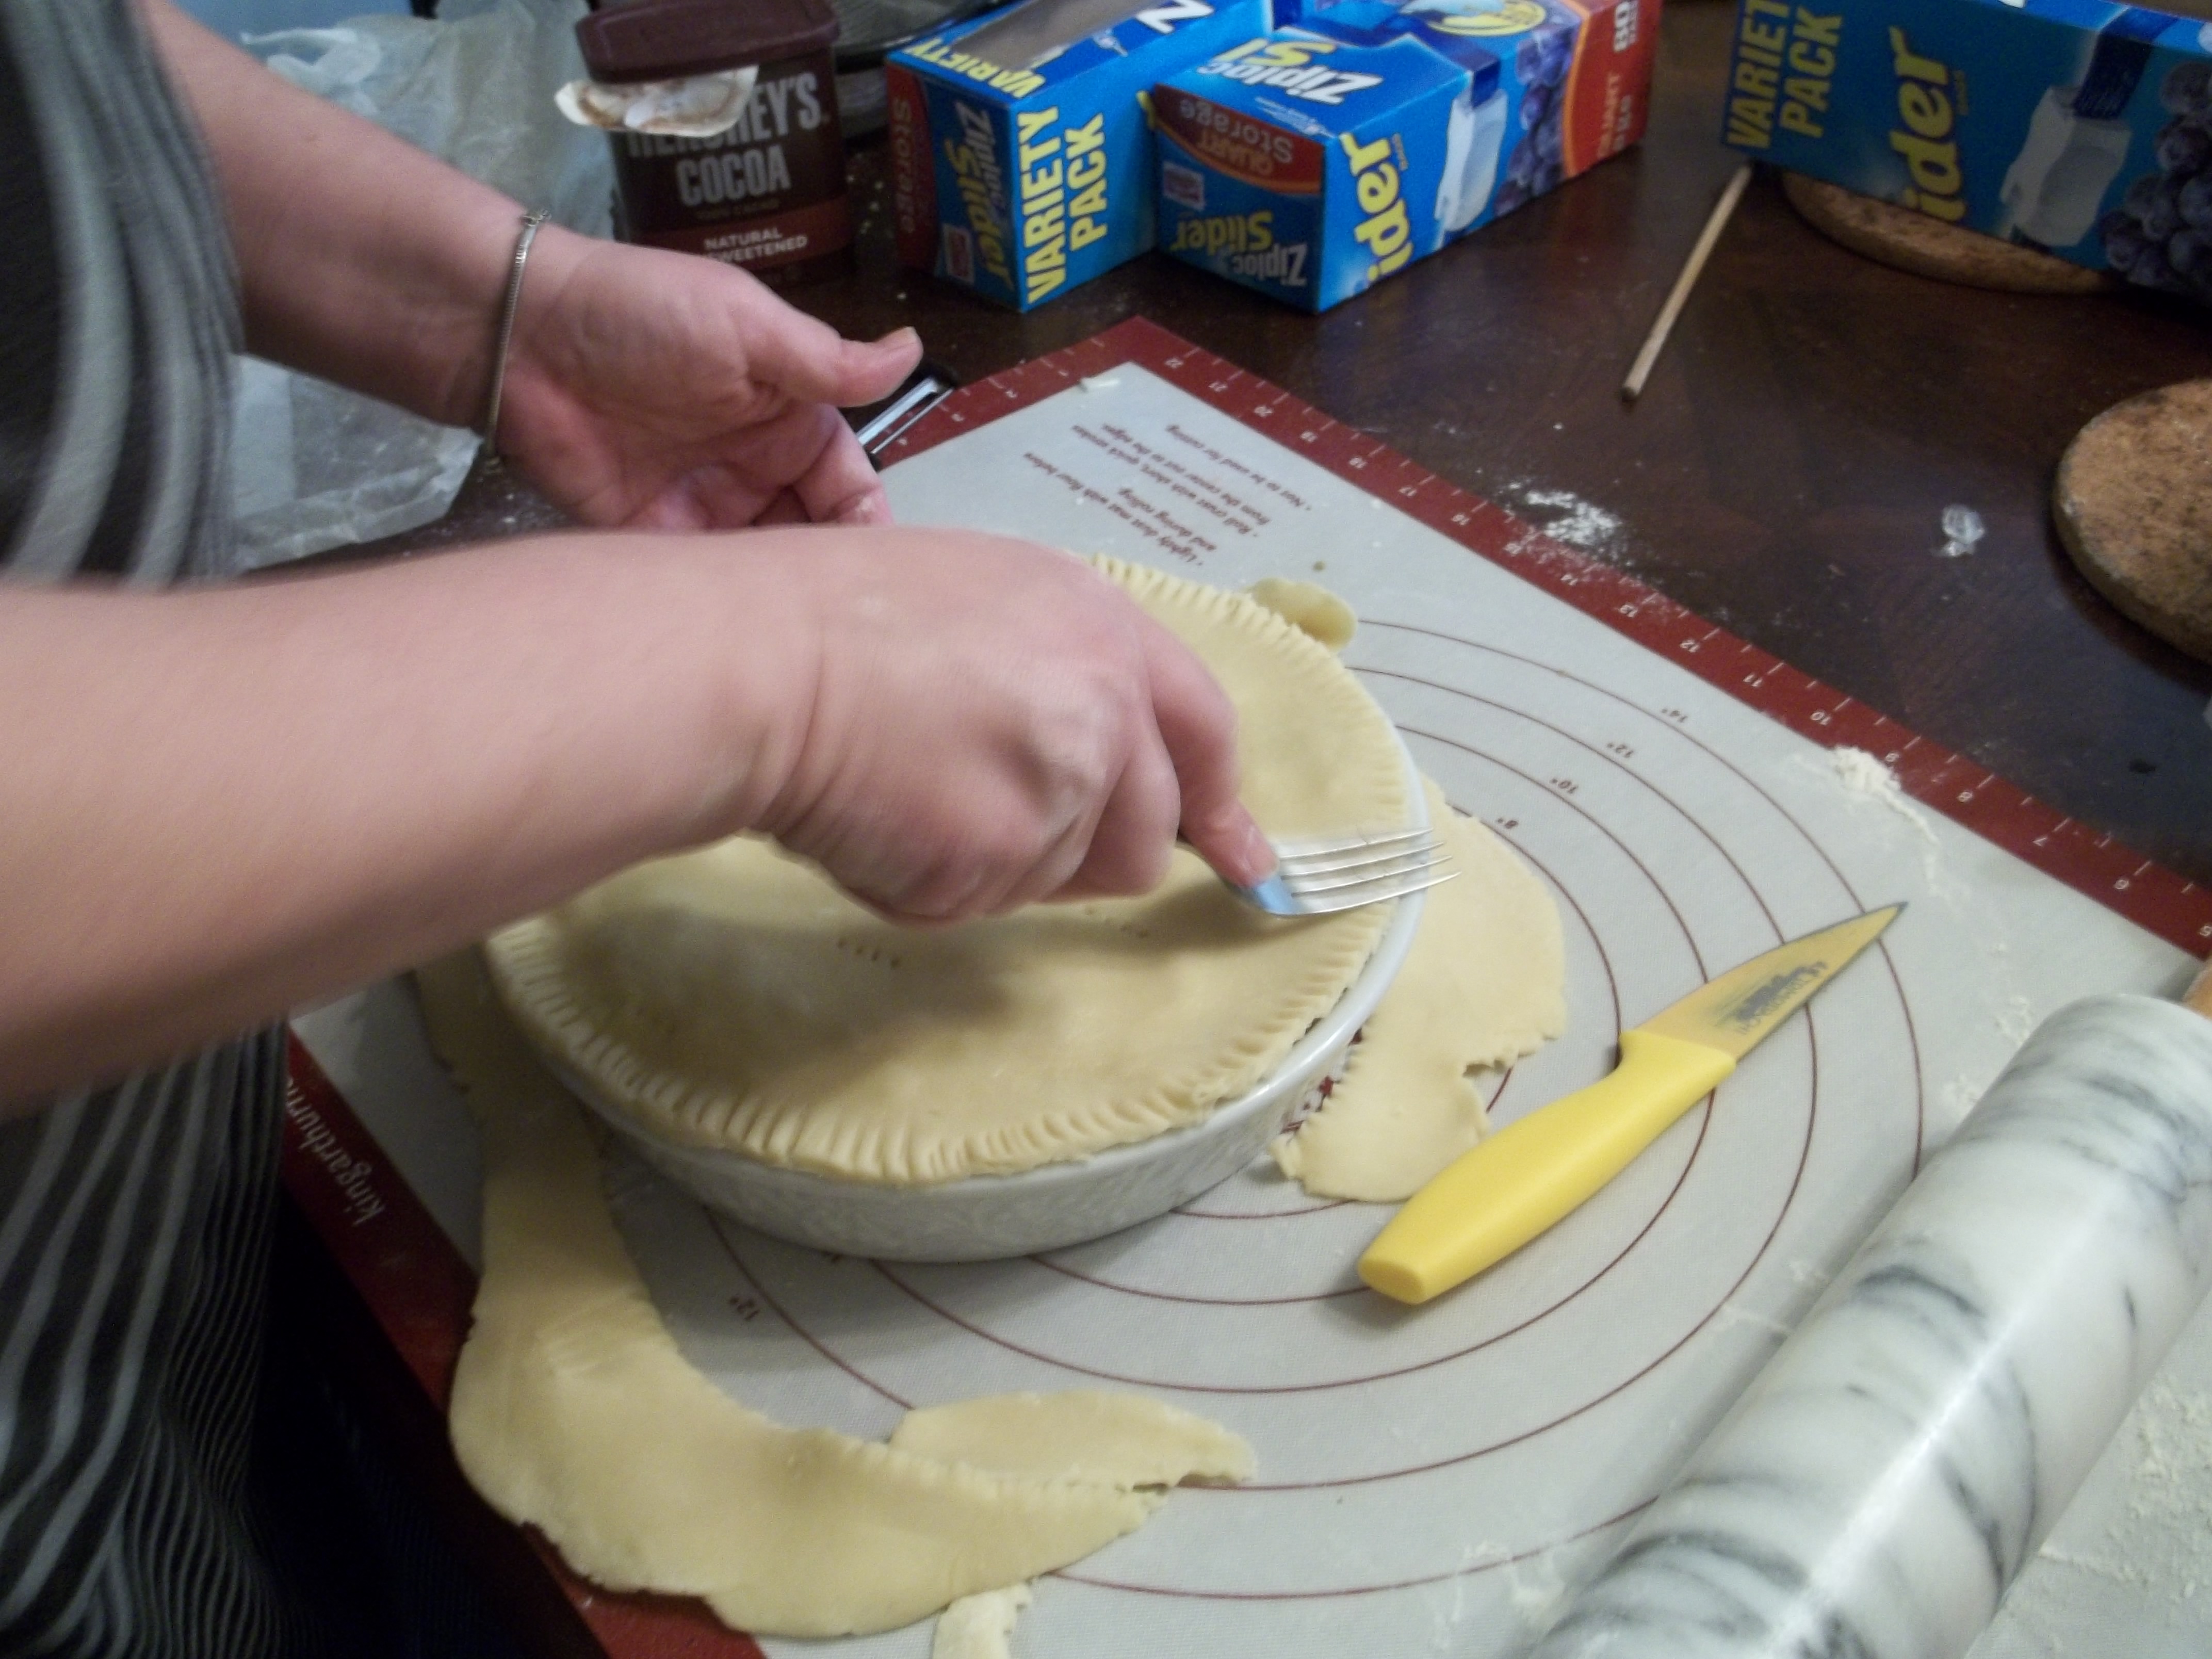
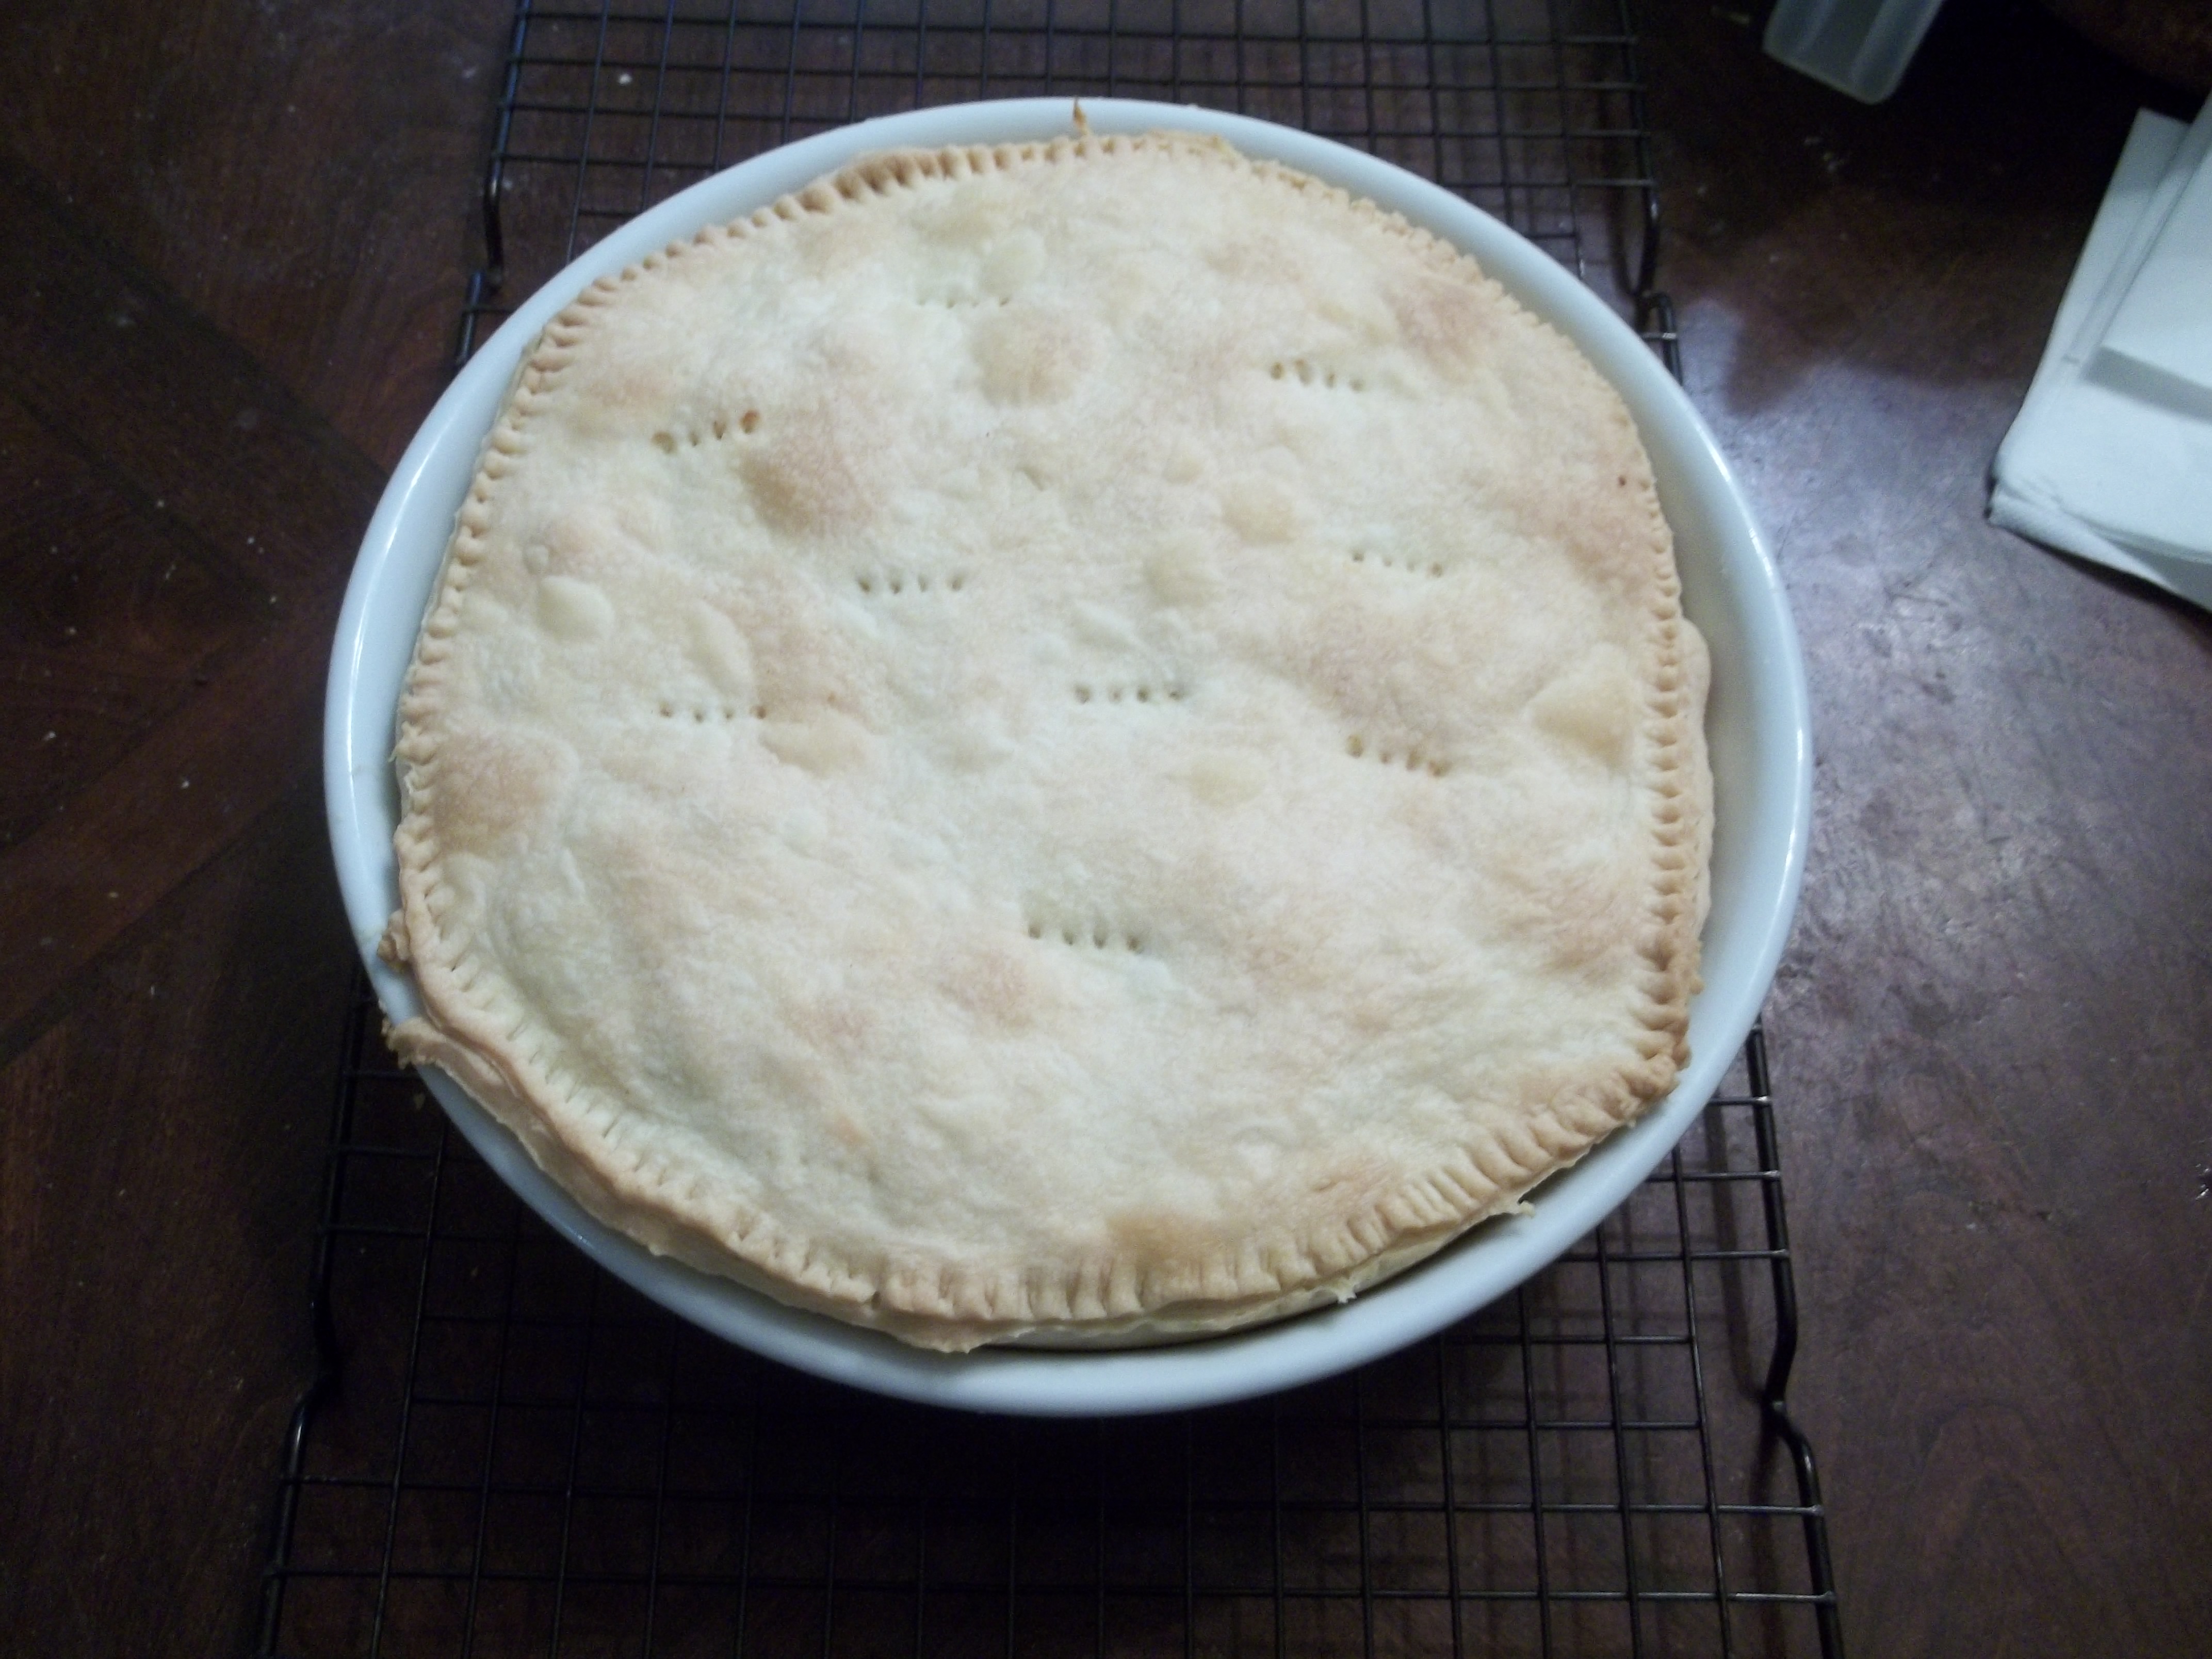
There are special tools for crimping pie crust. I don’t own one. Yet. What I do own is forks, and they do a perfectly fine job of sealing the edge of a pie like this. It’s as simple as pressing firmly down until you can feel the tines of the fork against the edge of the pie pan. You know then that you’ve got a pretty good seal between the two layers of crust. You want to overlap a little inside the edge and outside the edge.
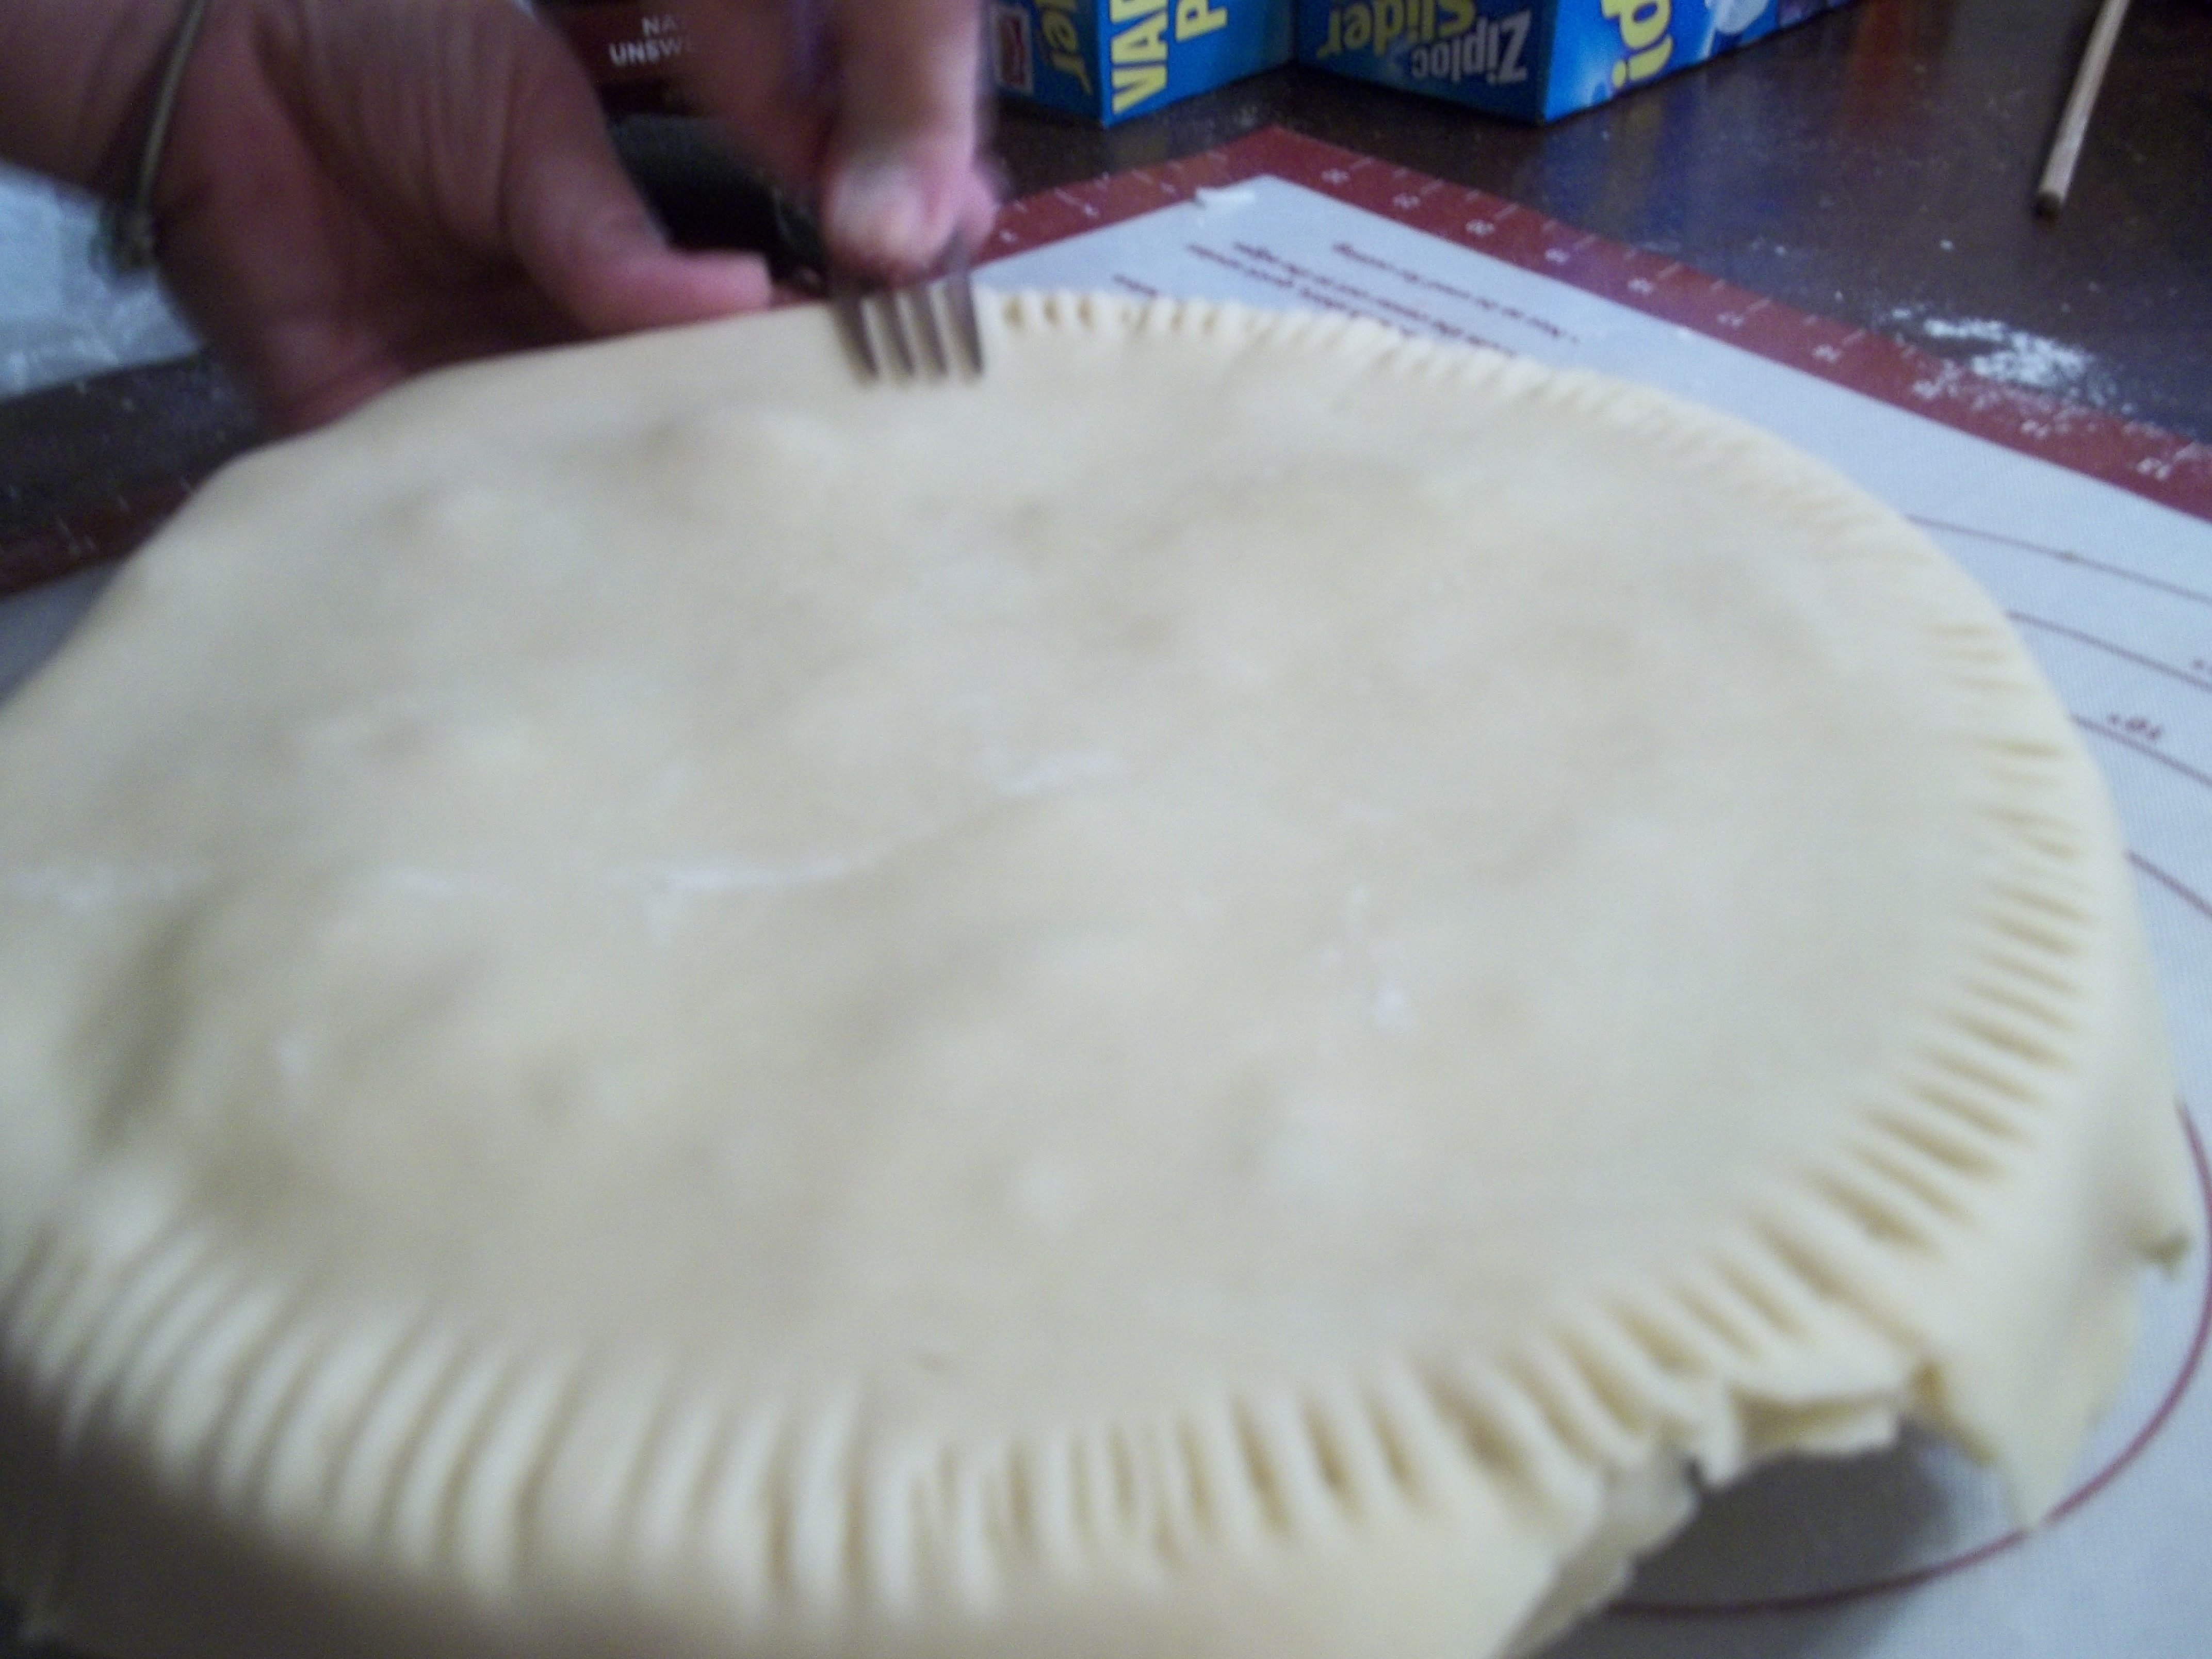
Once you’ve got it crimped all the way around, use a short, sharp knife to trim off the excess crust. Don’t worry, this will not go to waste. At least not in this house.

Trim very close to the edge of the pan. The other form marks are to release steam. Sometimes I slit the top crust, sometimes I just jab it with a fork. The slits tend to be prettier, but both methods work equally well. Once you’re done trimming, you may need to recrimp any places that look like the crusts are trying to separate.
Put the pan on a cookie sheet and put the whole shebang into a 350 degree oven for about thirty minutes. It won’t get super brown, because this crust doesn’t have sugar in it, but it will set up and get golden in places. It may also look a little bubbly and pull in from the edge of the pie pan.
As you can see, the crusts sealed nicely together as they cooked. Sometimes, you may have to use a little water to get a good seal if it doesn’t seem like they’re sticking pre-baking.
Let the pie sit for about 15 minutes before you serve it. That will give the gravy time to set up nicely and it will still be nice and warm when you dig in.
Now, for dessert. Orange rolls.
There are less photos for these, because they’re very similar to cinnamon rolls. By ‘very similar’ I mean ‘just about identical except in the particulars.’ They start with a batch of the ABin5 brioche dough. There was almost a bread-mergency with this batch, actually. I put it together, put the lid on the bucket and left to do errands. Two hours later, there was no rise whatsoever and I had a small panic.
Then I realized I had put in everything except a cup and a half of water. The new KitchenAid was a champ in helping me work the water in and, ninety minutes later, the dough had risen beautifully and went into the fridge to chill overnight. This morning, I zested two large oranges and set them aside while I got everything else ready.
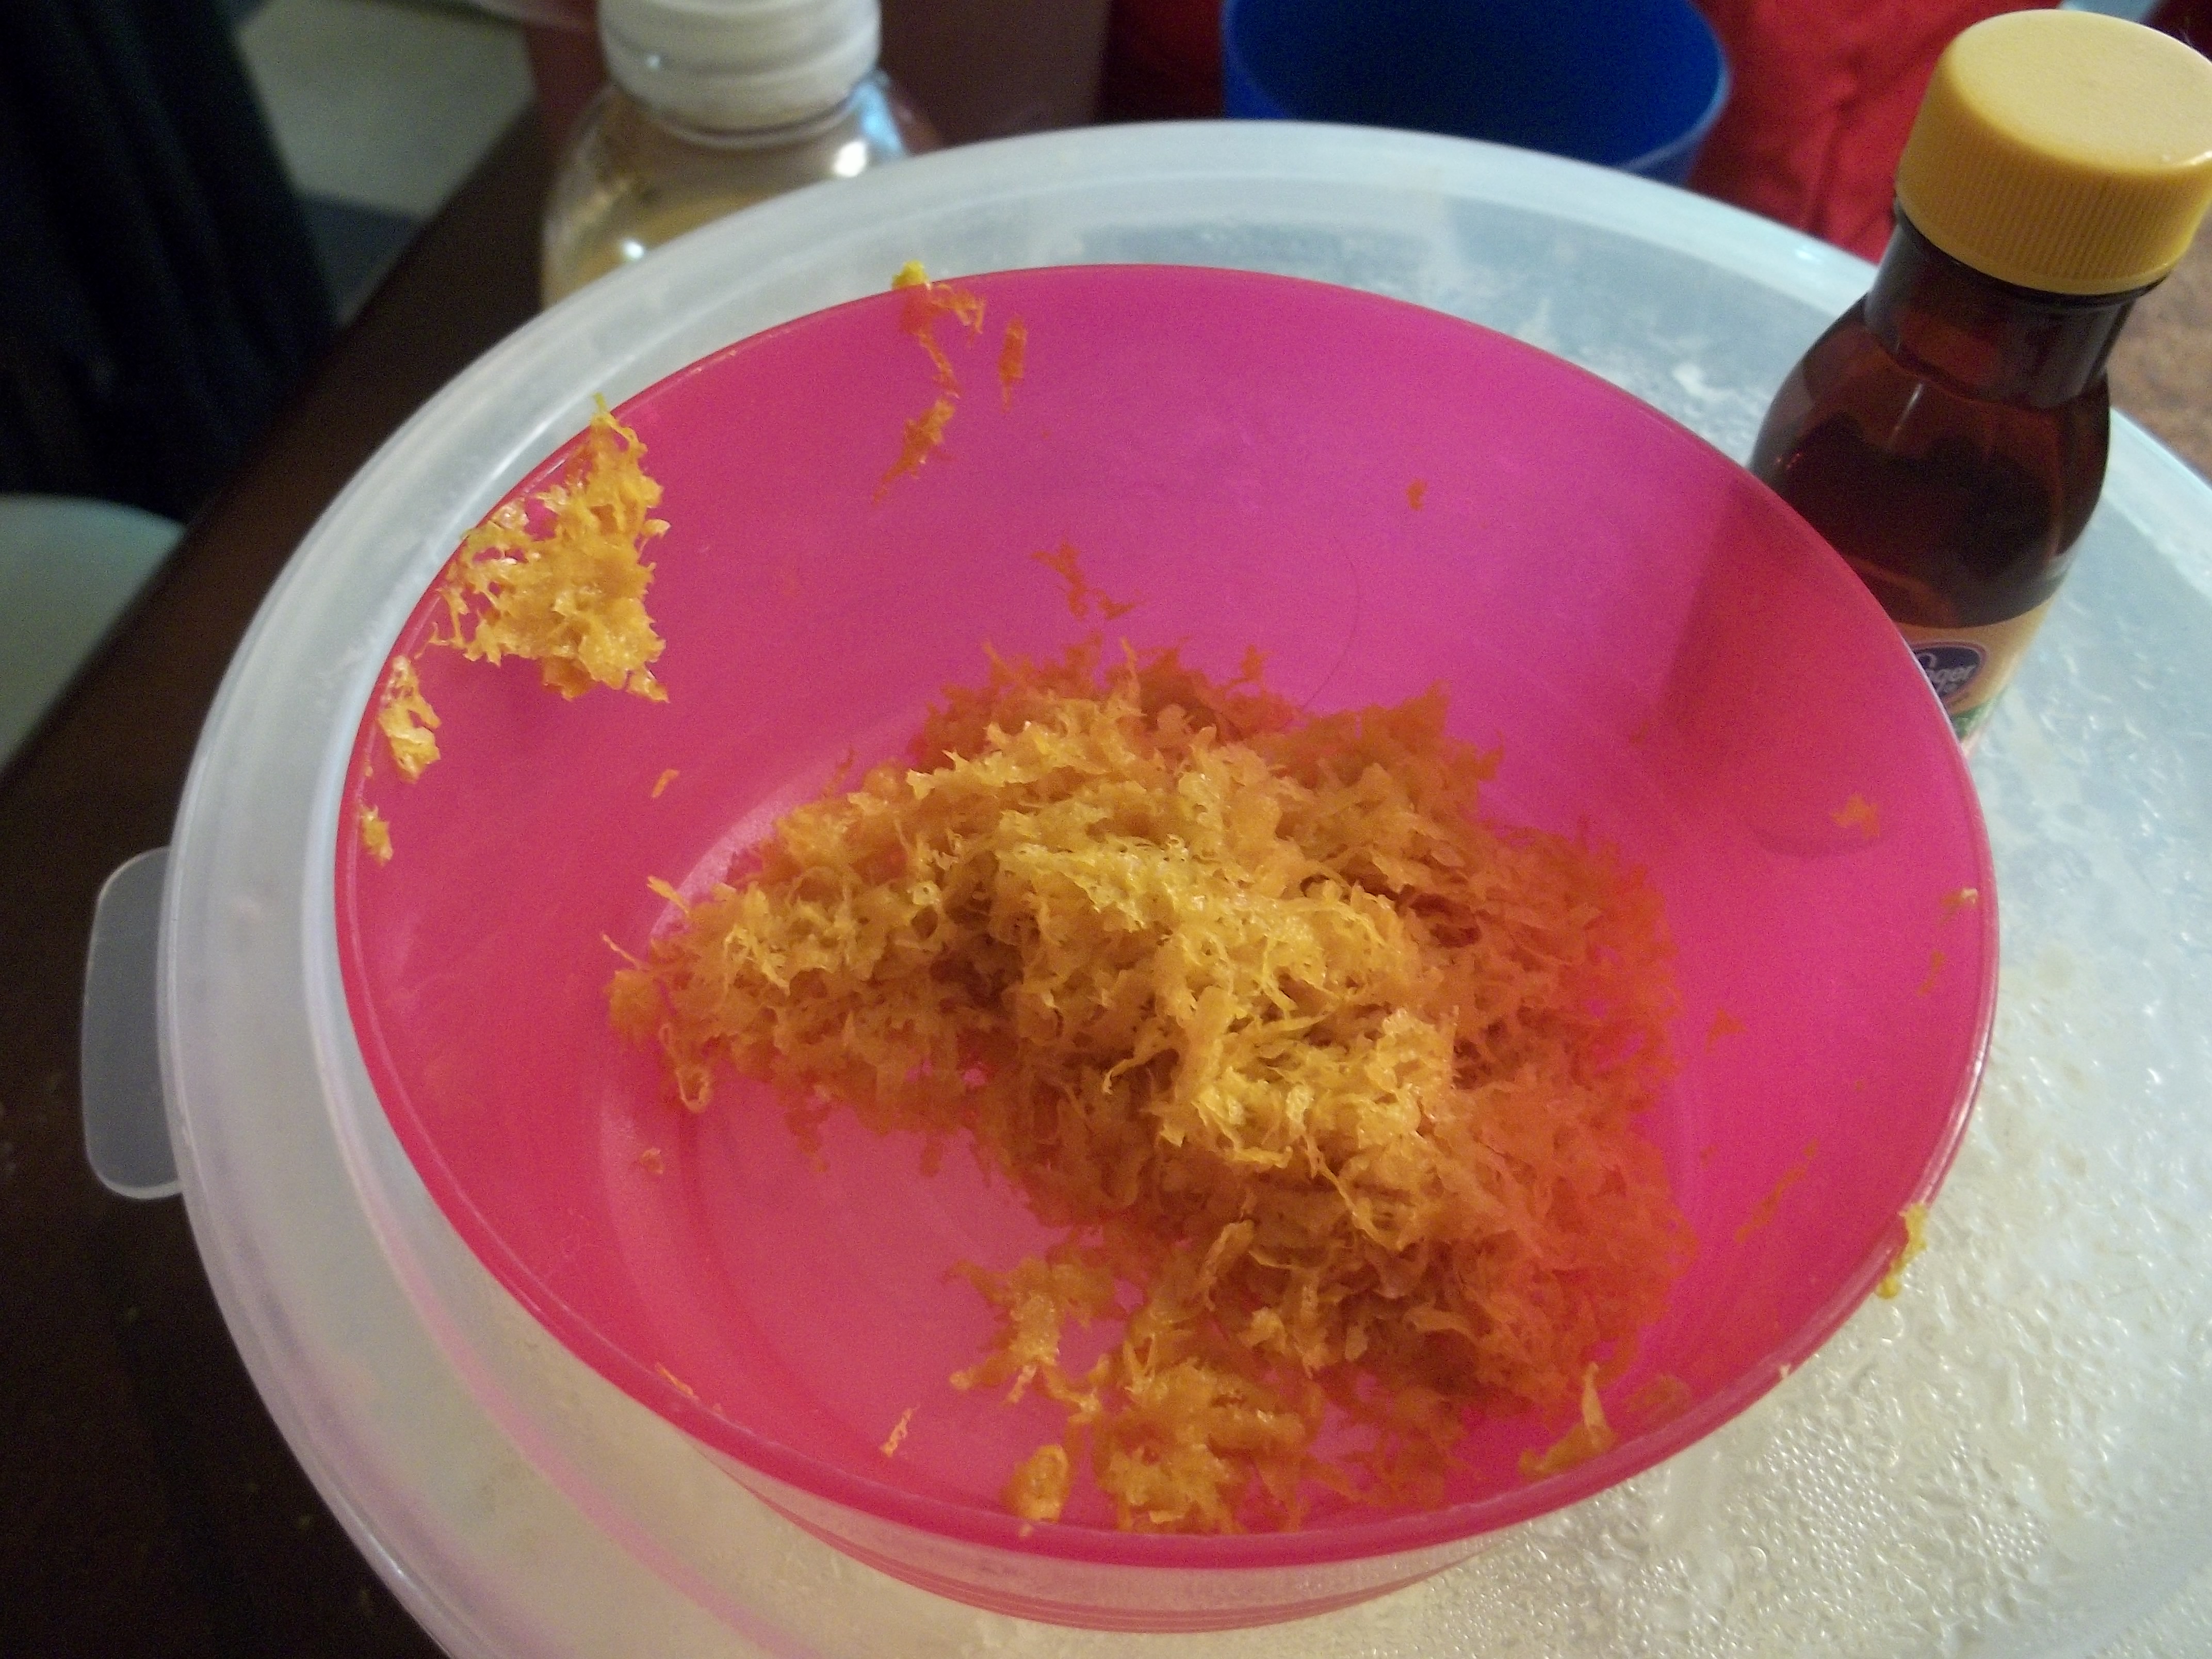
Since I used the entire batch of dough for rolls this time, I made up an extra-large batch of filling: a cup and a half of brown sugar, three tablespoons of butter, a dash of salt, and about a tablespoon of cinnamon. That’s less cinnamon than for the cinnamon rolls, but I wanted the other flavors to be detectable. Once everything was mixed together, I added about half the orange zest and mixed it in carefully to get it evenly distributed.
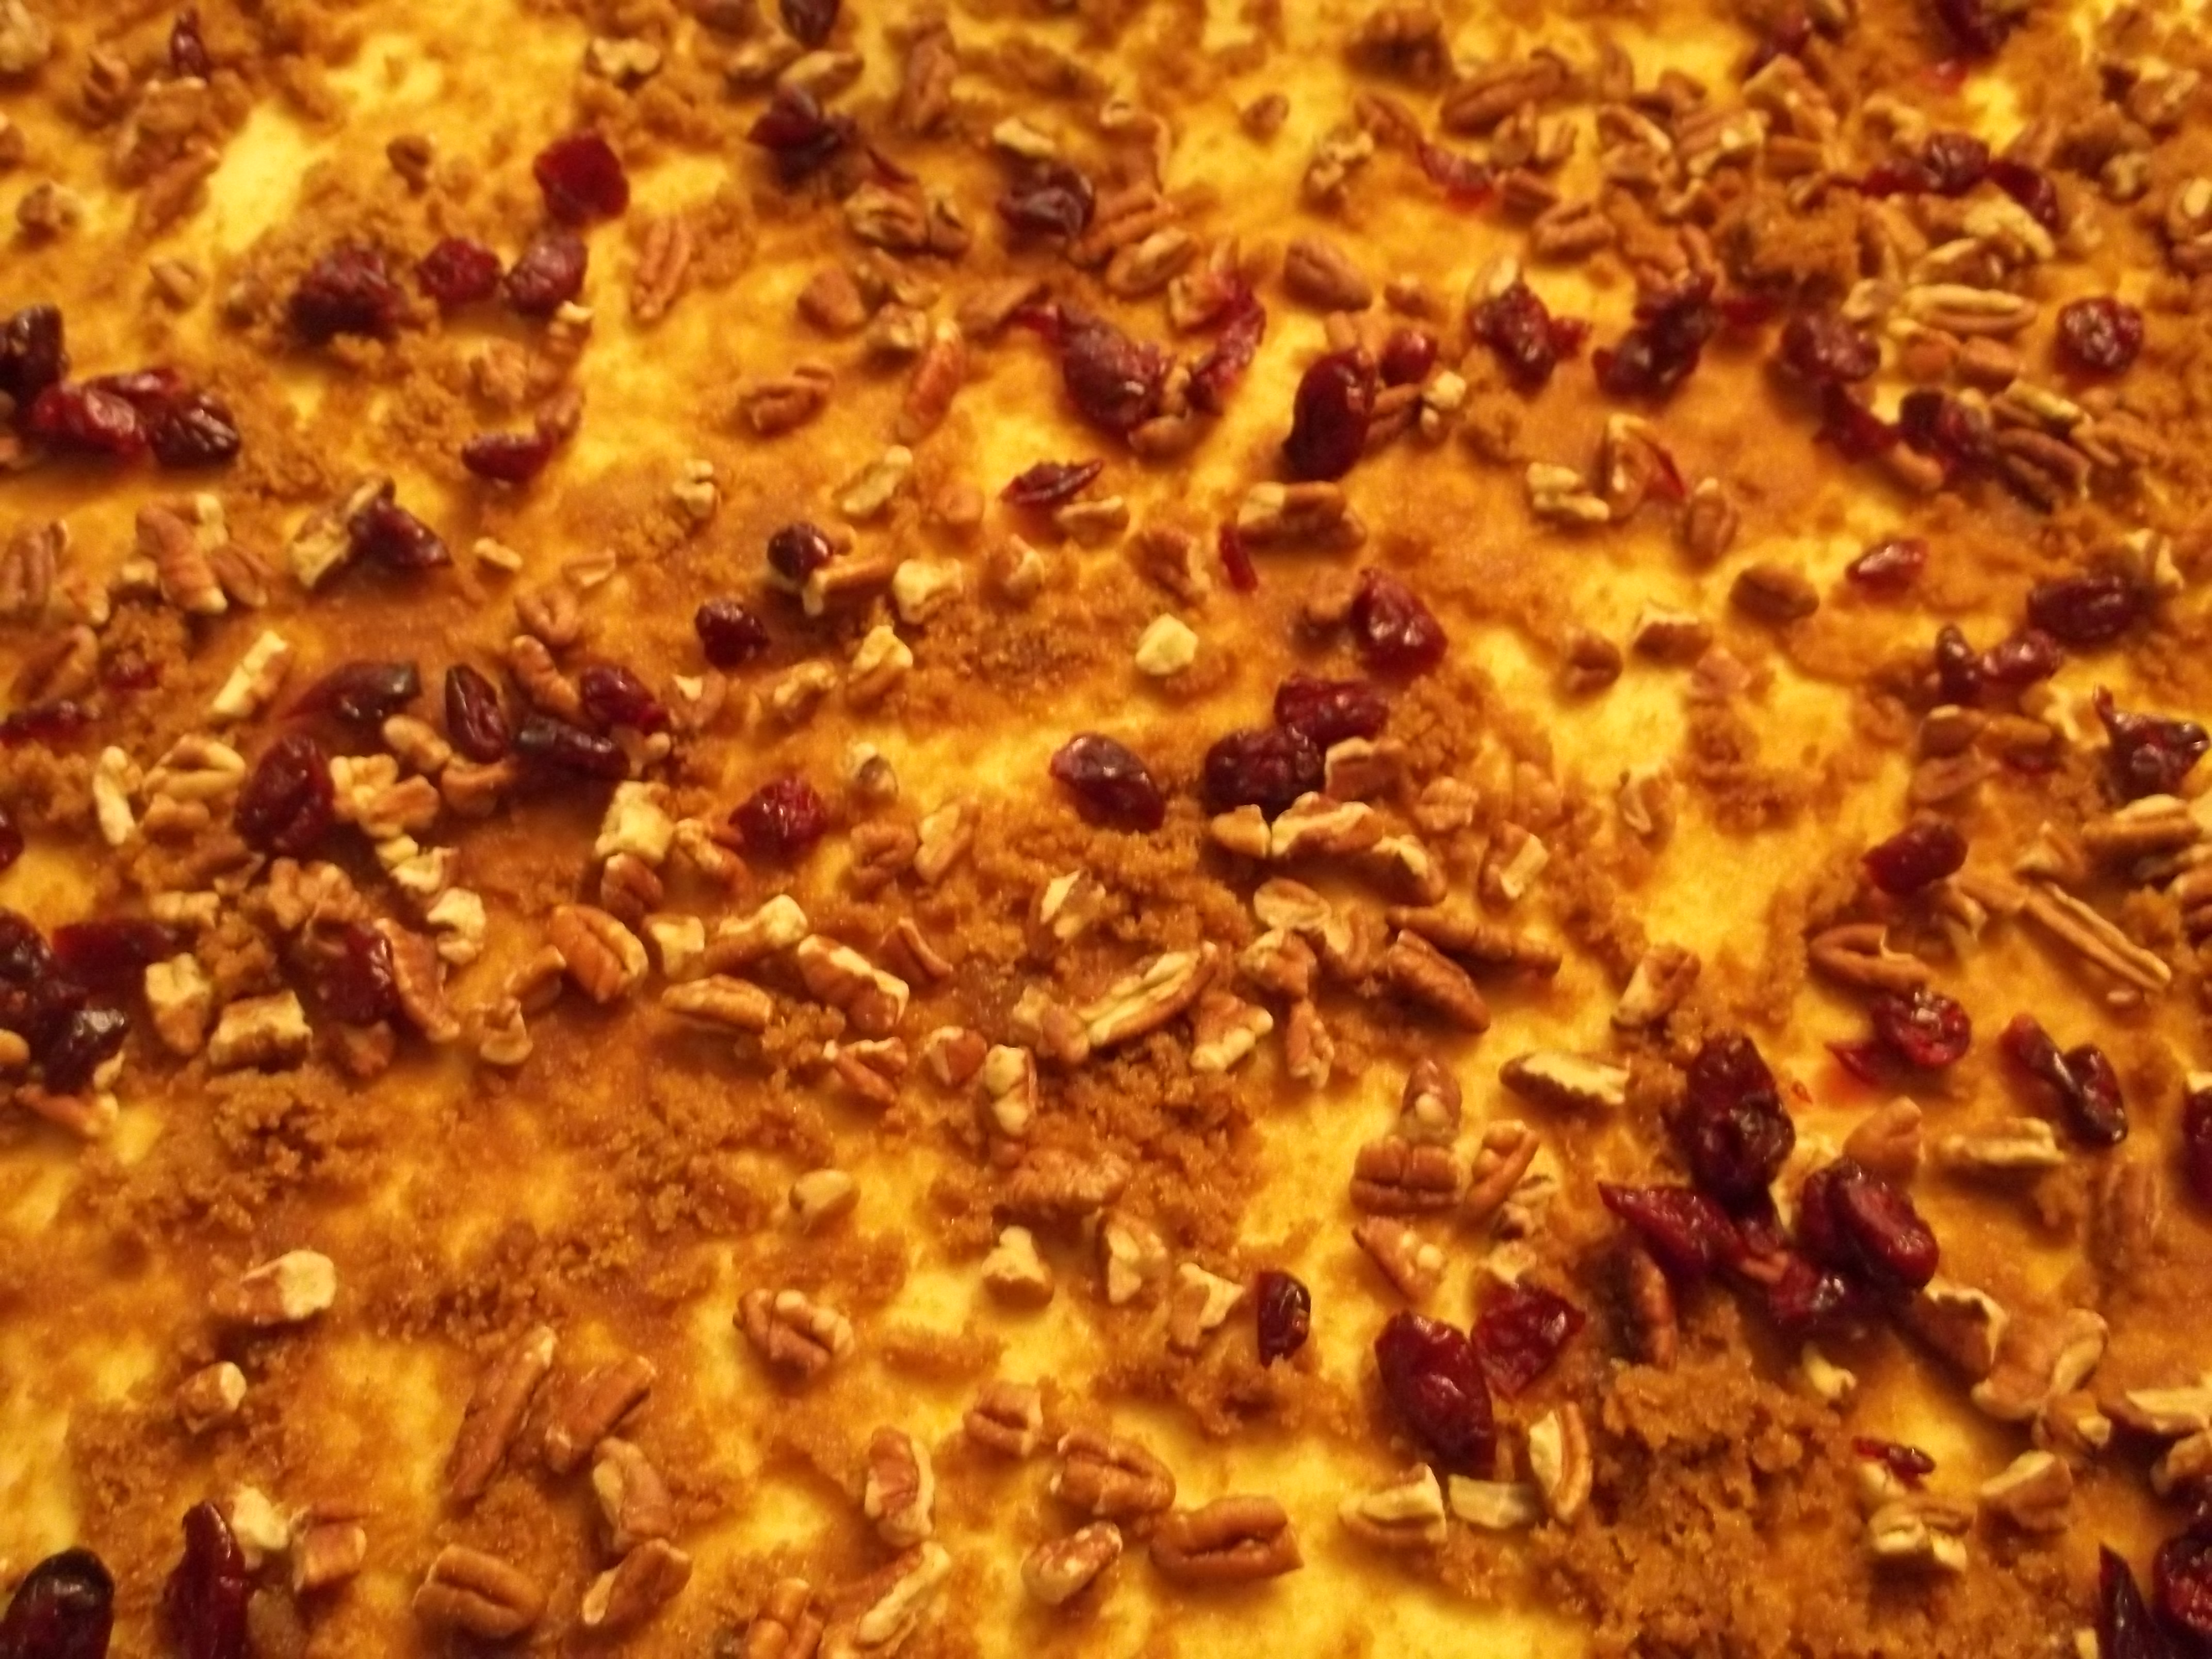
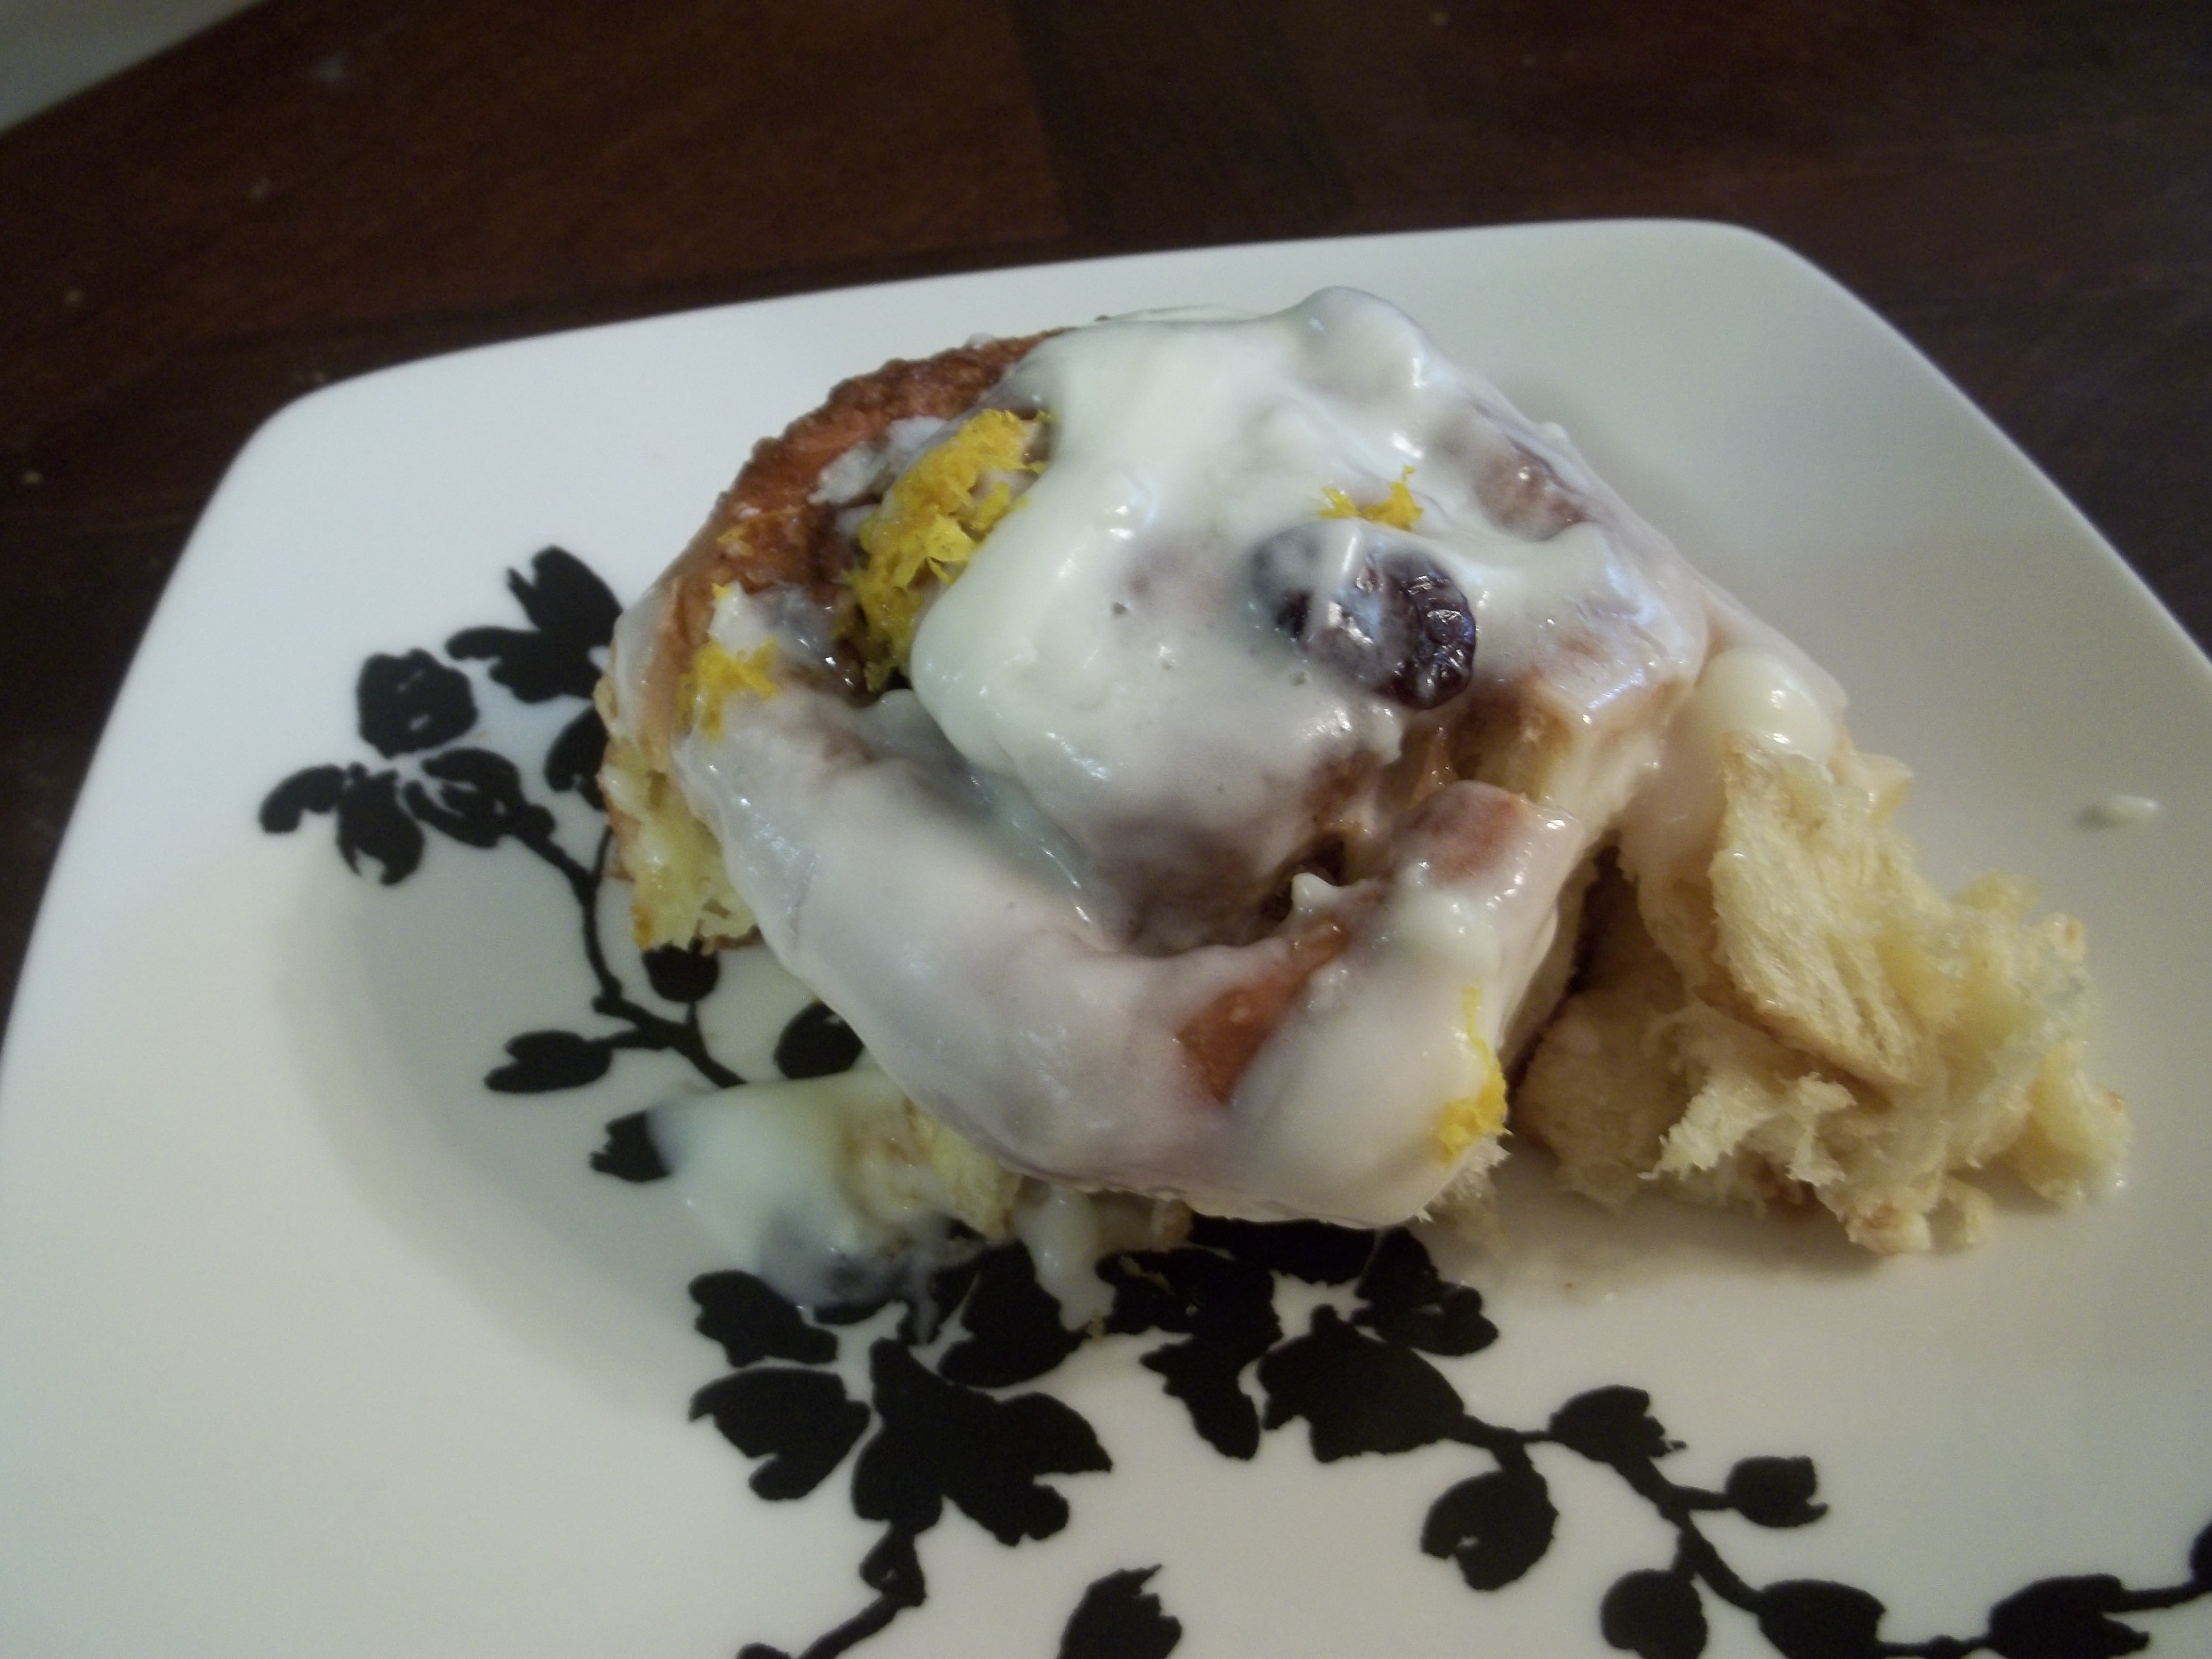
I spread the filling over the rolled-out, butter-brushed brioche dough as evenly as I could and then sprinkled the whole thing with about a half-cup of chopped pecans and slightly more than a quarter cup of craisins. The craisins were a last-minute addition, subbing in for the raisins I was originally going to use, since I remembered how much I enjoy orange cranberry muffins.
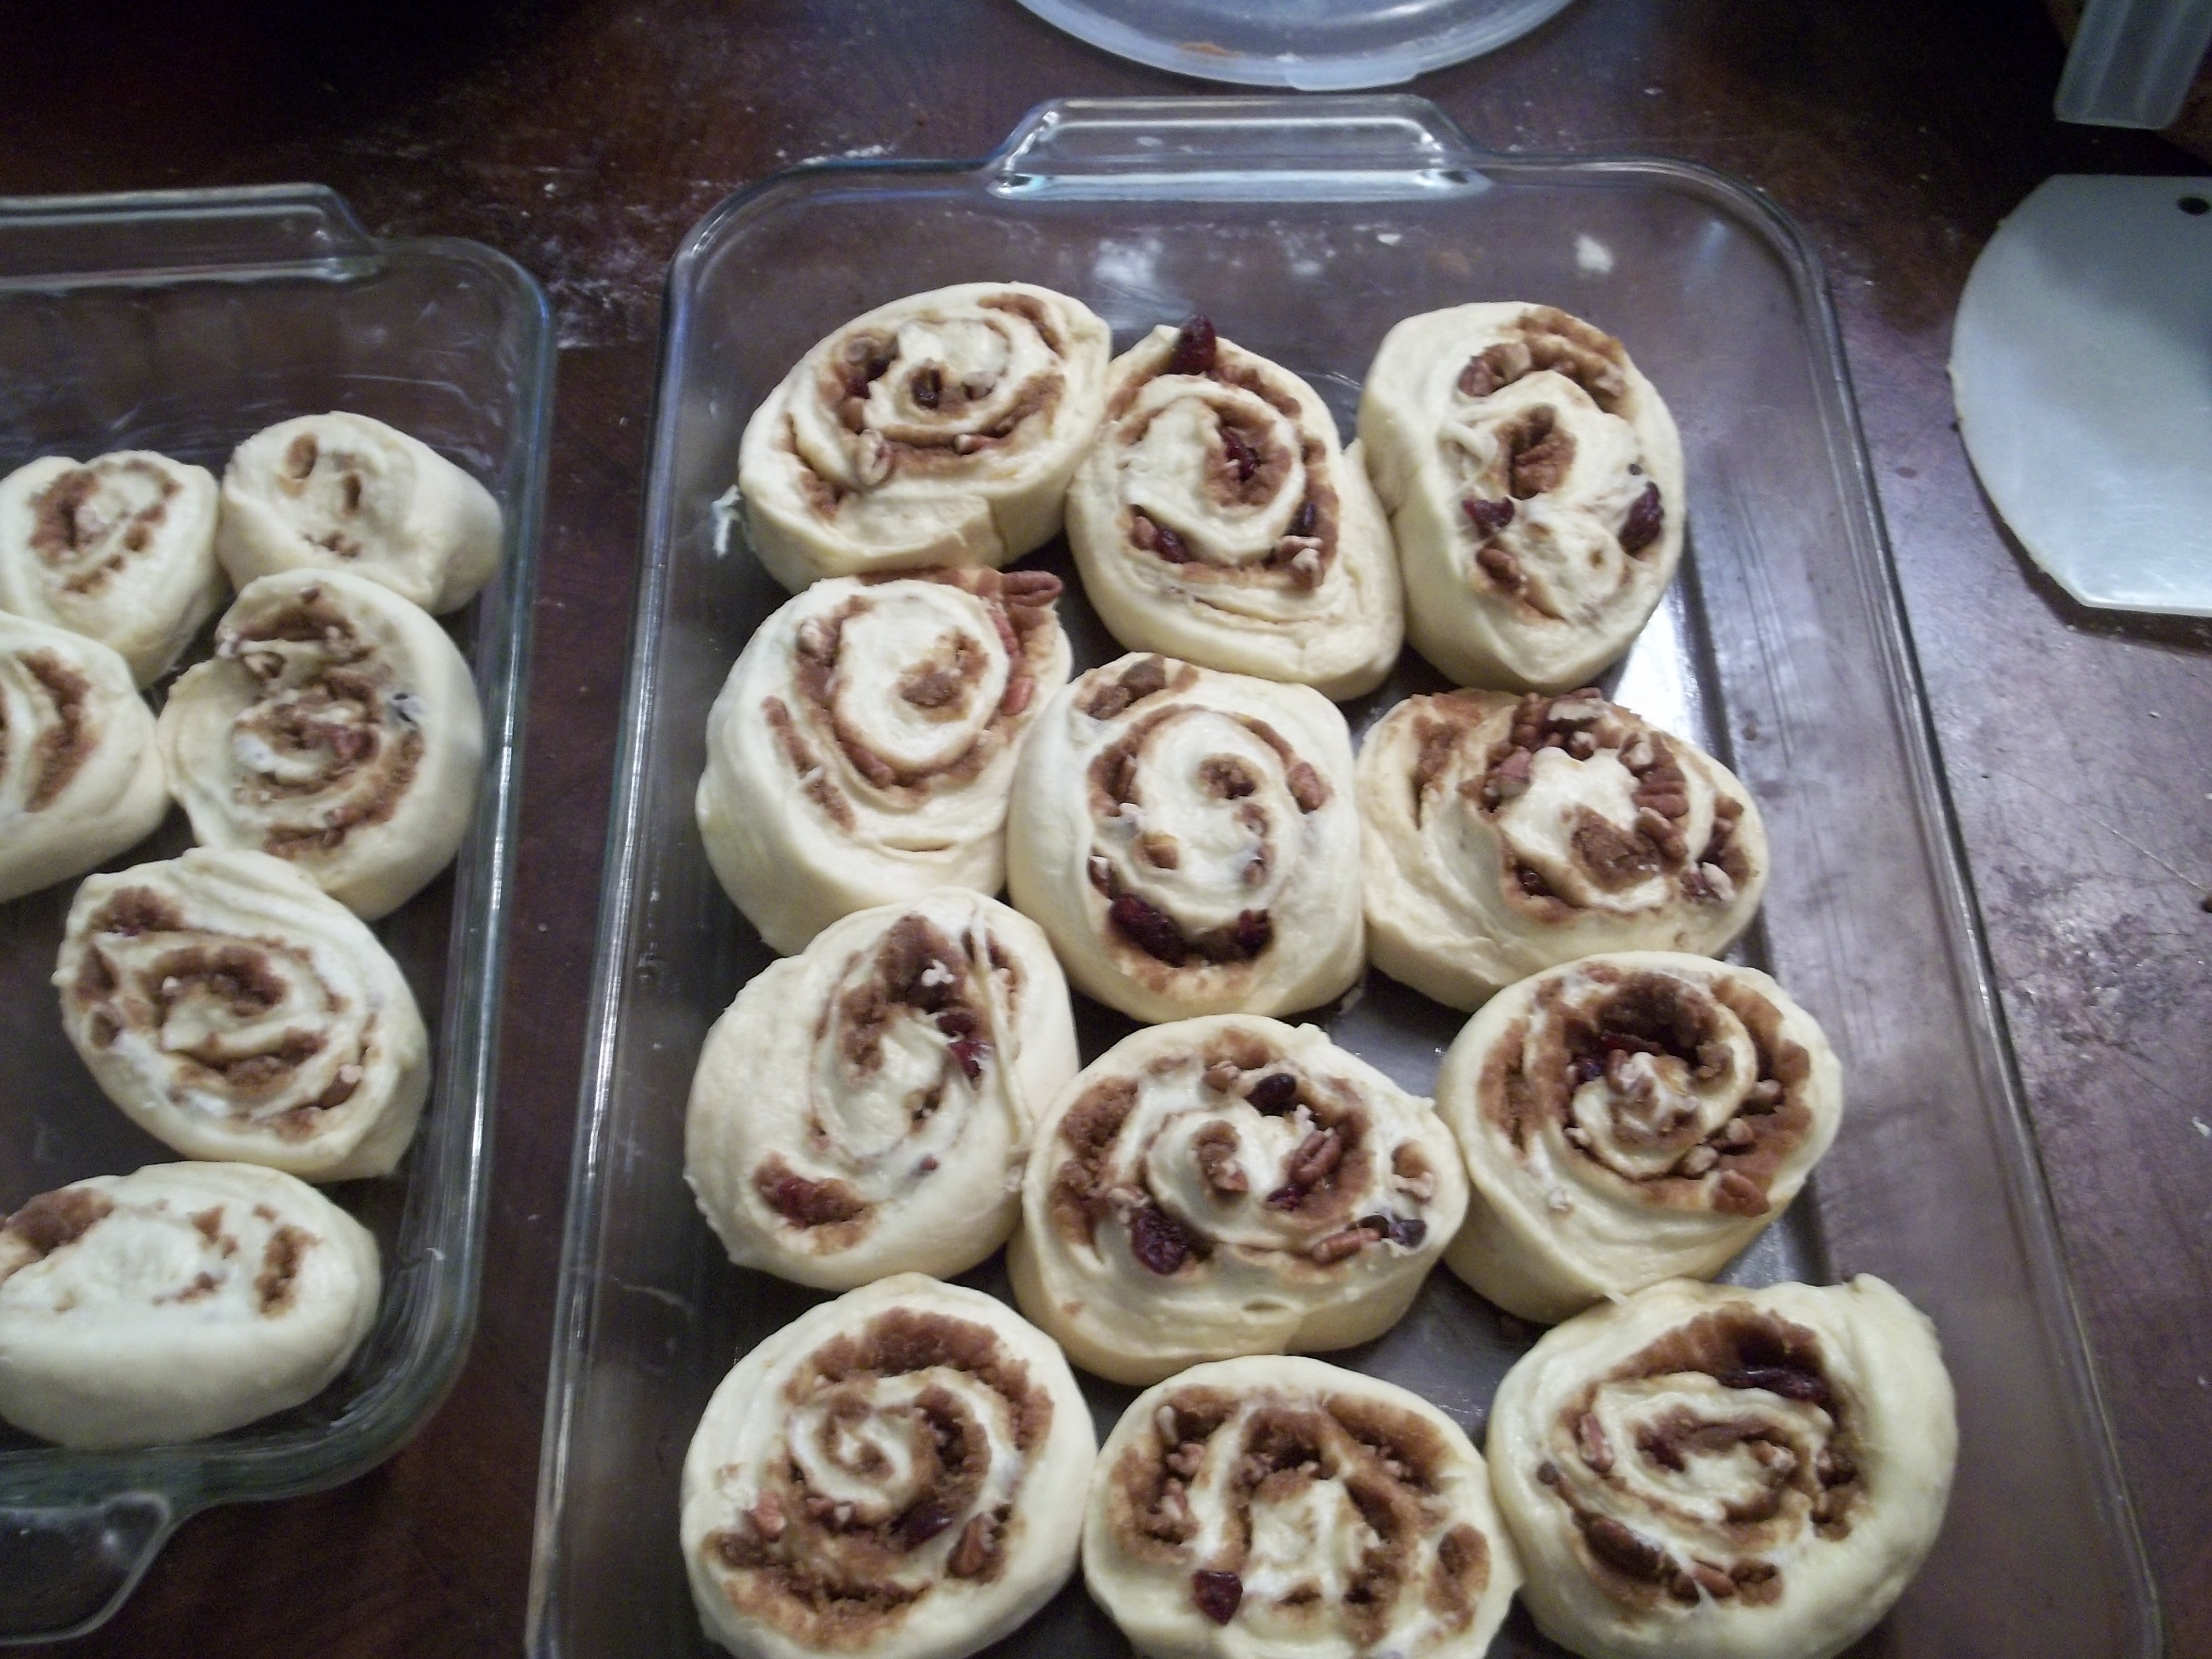
Once everything was spread out as evenly as I could make it, I rolled the dough and filling up, exactly like for cinnamon rolls, and used a little melted butter to seal the seam before using my plastic dough scraper to cut the rolls. I’ve read somewhere that you can use un-flavored dental floss for the cutting, but I haven’t tried that yet. Once I got them cut and put into buttered pans, I preheated the oven to 350 and set the rolls to rise.
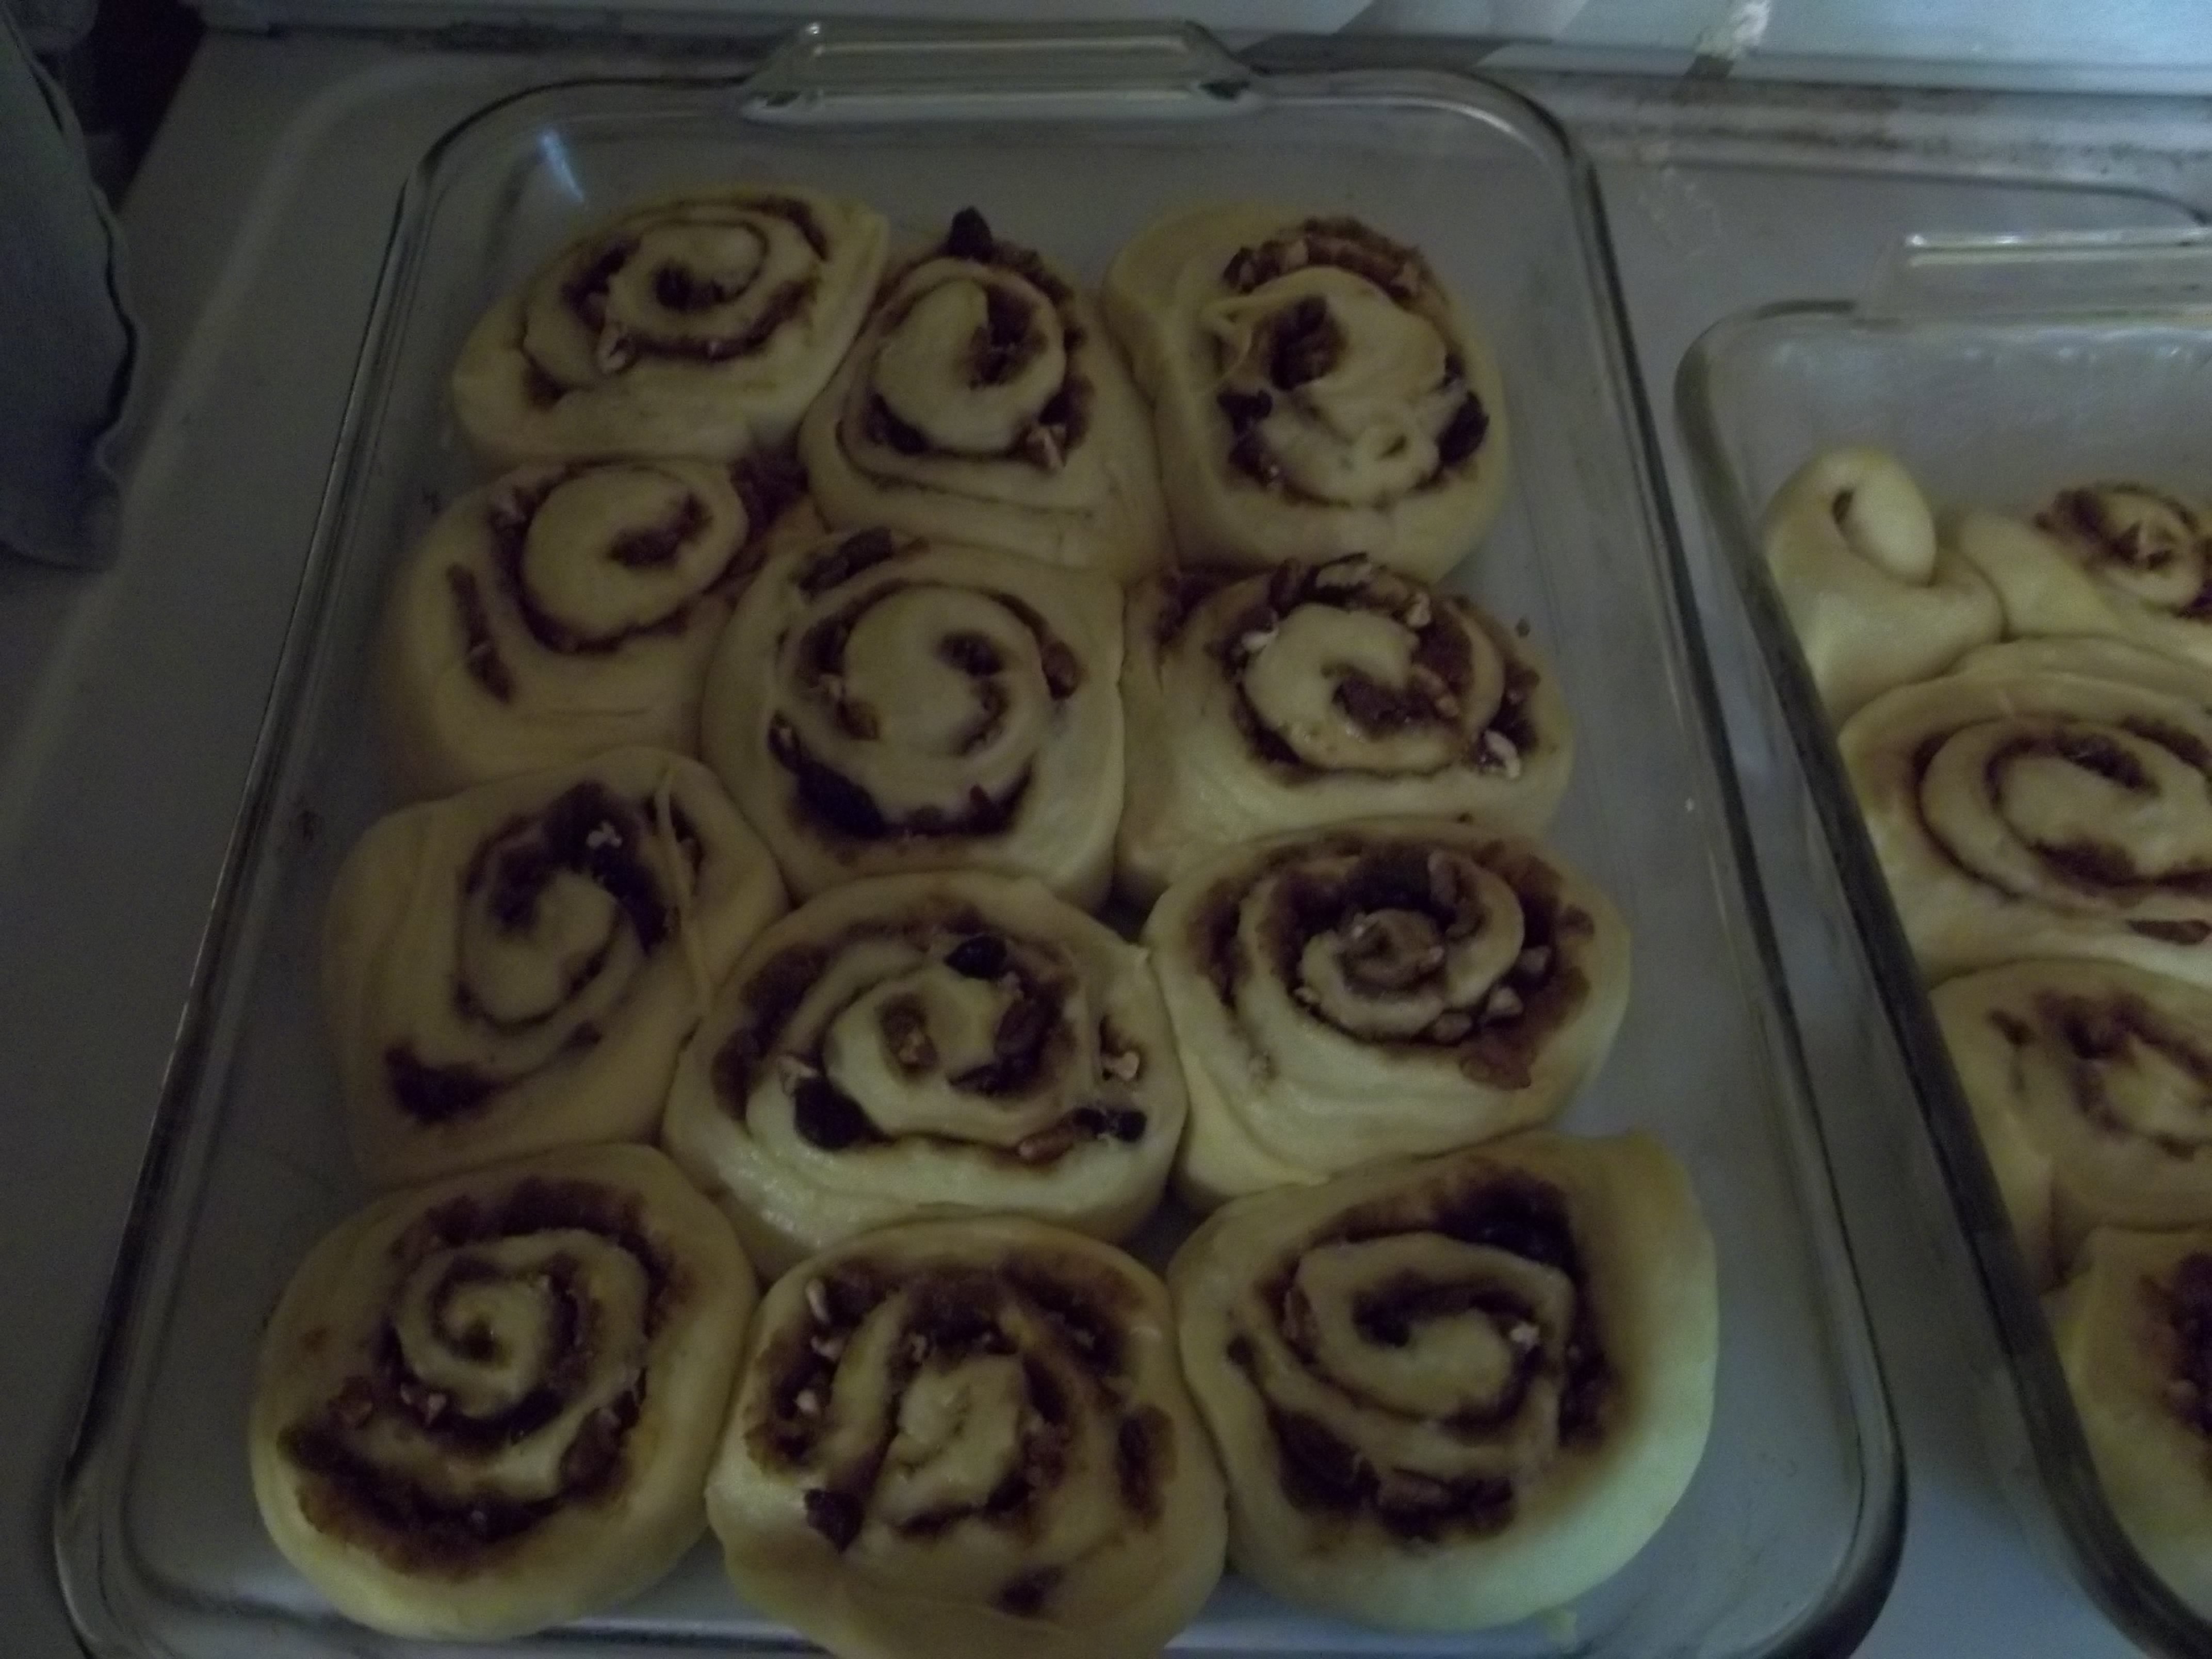
I’m a bad baker today and I lost track of time, but when the rolls looked like they’d risen enough to pretty much fill the pan, they all went into the oven for 30 minutes with a 180-degree turn halfway through to make sure they cooked evenly. Wade was invaluable with that because my wrists are a little achy from weather today and Pyrex is heavy.
While they were baking, I put together the topping. Now, for cinnamon rolls, I do more of a glaze, but I wanted something heavier for these guys. I went for full-on cream-cheese frosting. I figured if I’m going to go over-the-top with filling, might as well just go whole hog.
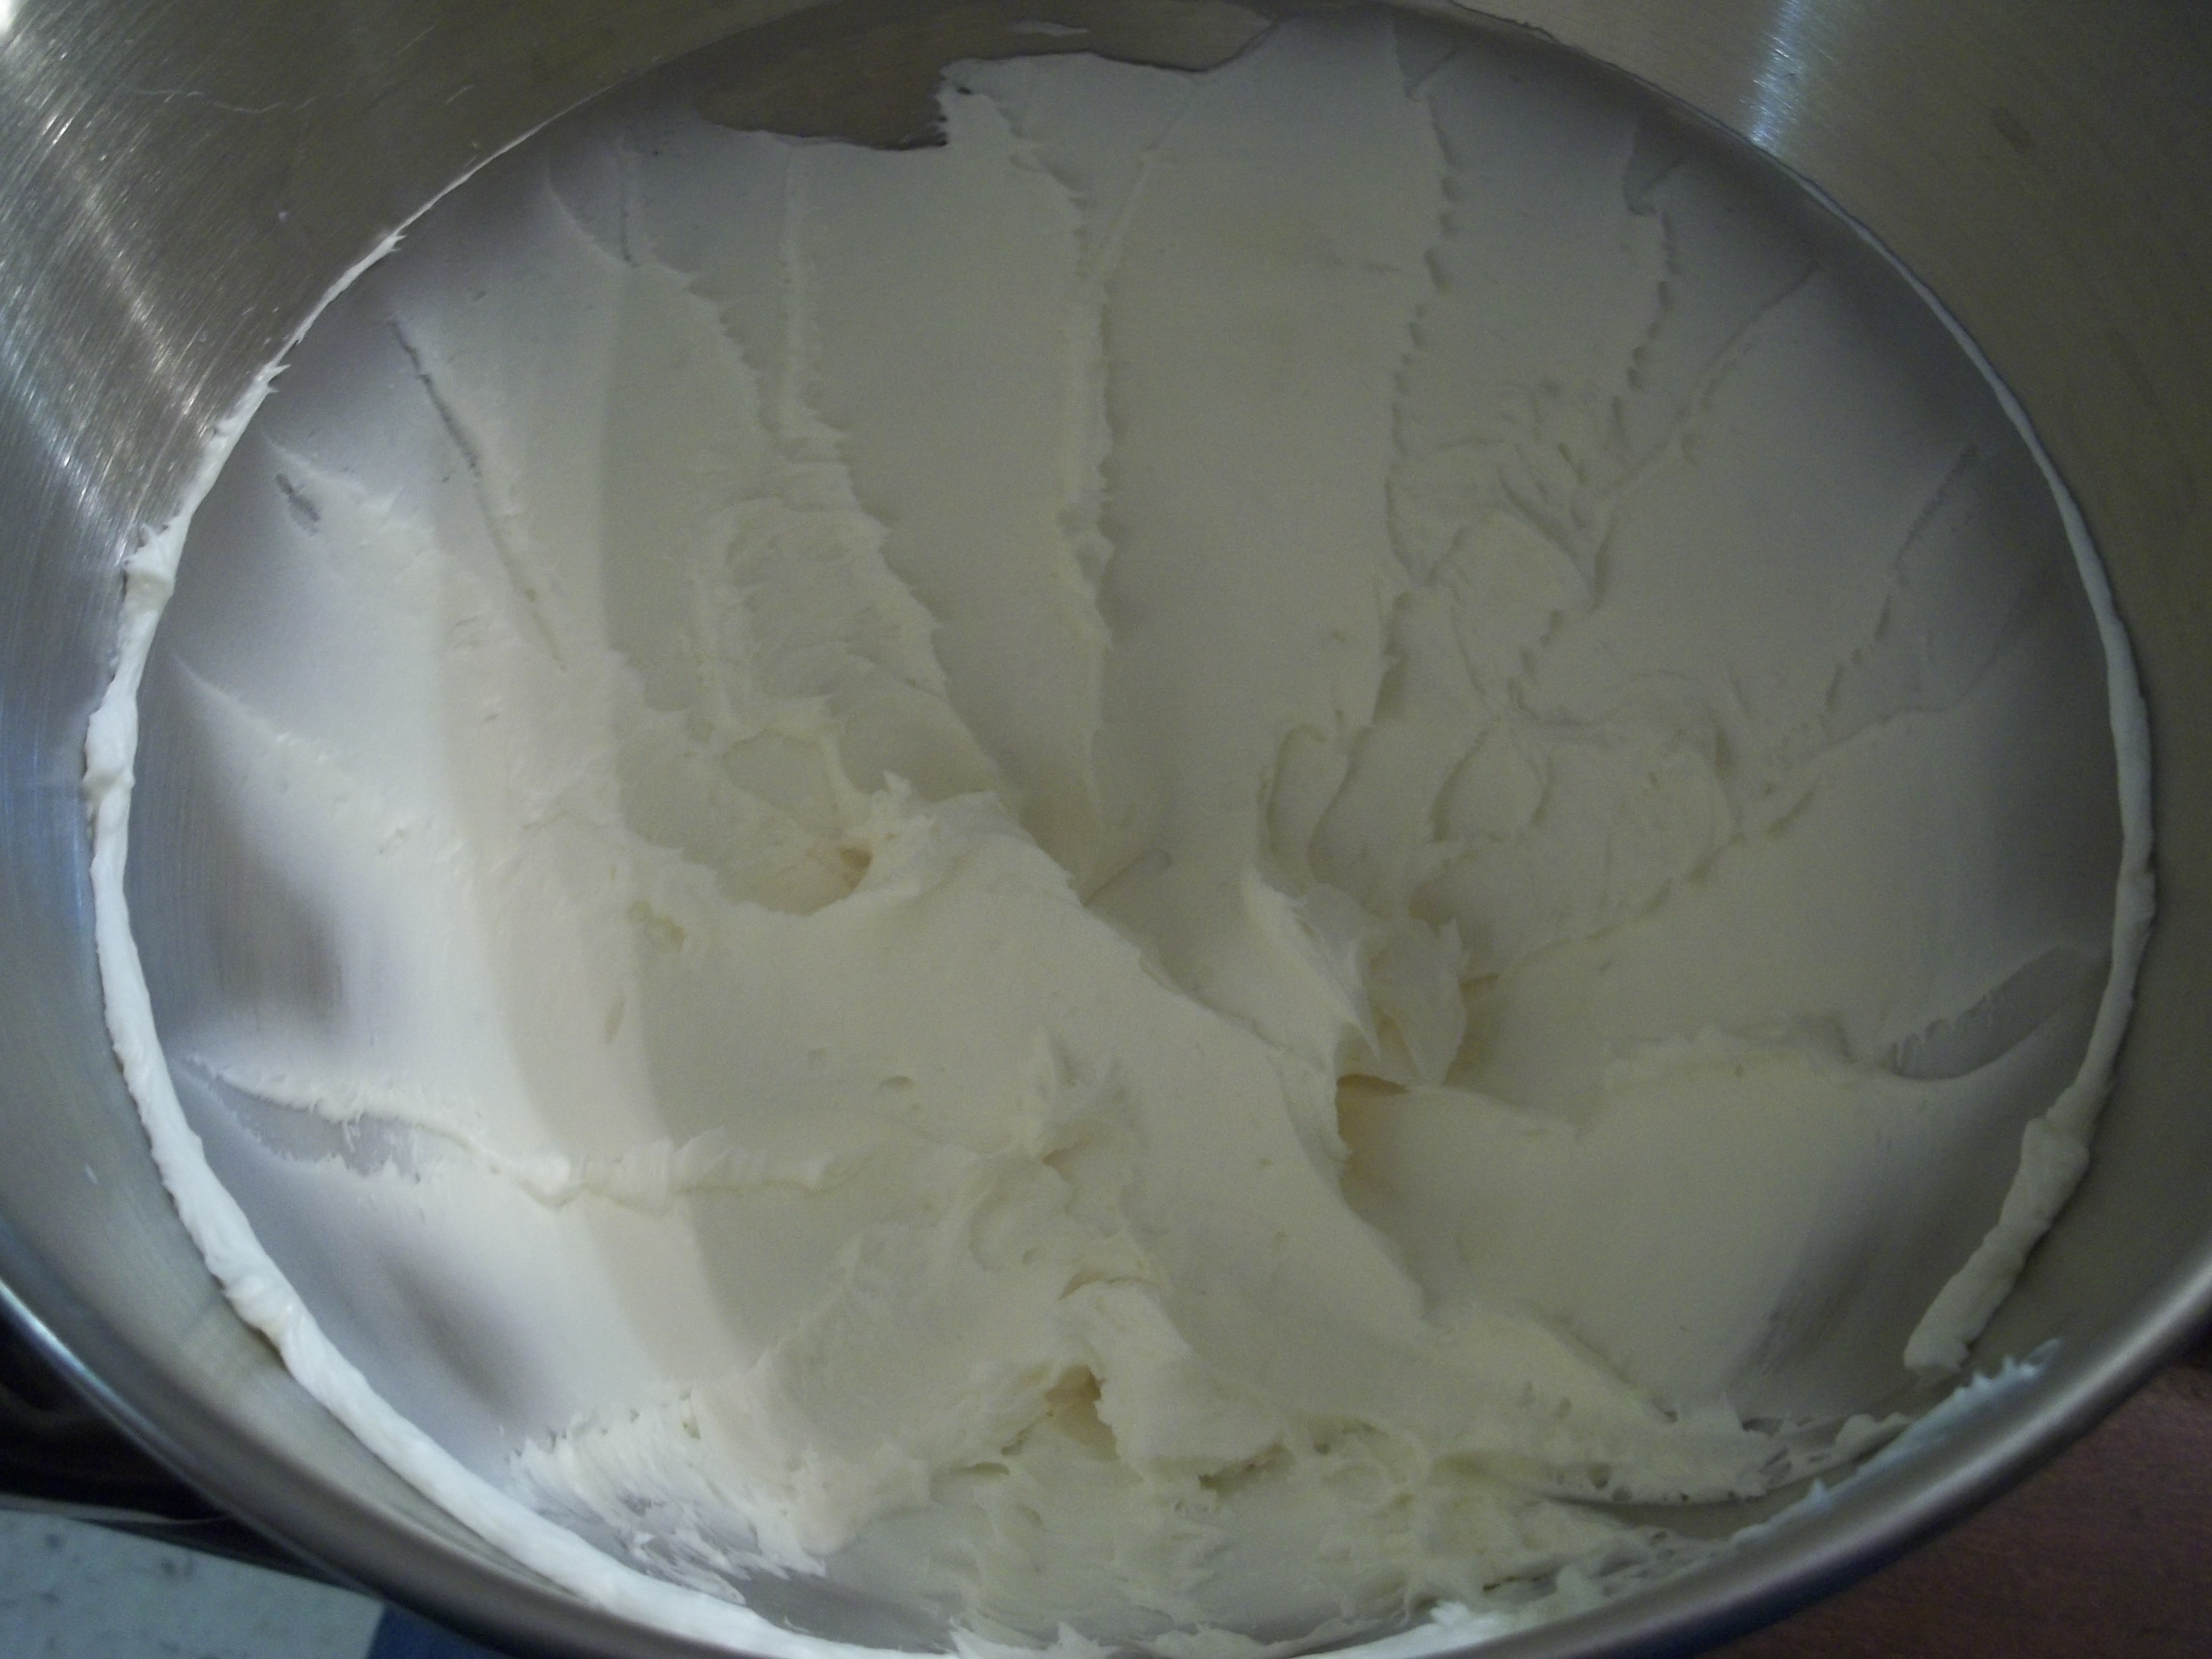
Cream-cheese frosting is one of my favorite things ever. It goes great on so many things and can be adapted for flavor with extracts or even with cocoa powder to make a decadent chocolate frosting. In fact, this same recipe, plus cocoa powder, got put on my first-ever homemade chocolate cake last week. It starts with 8 ounces of cream cheese and six tablespoons of butter, both softened. Cream them together until they’re light and fluffy like the picture up above.
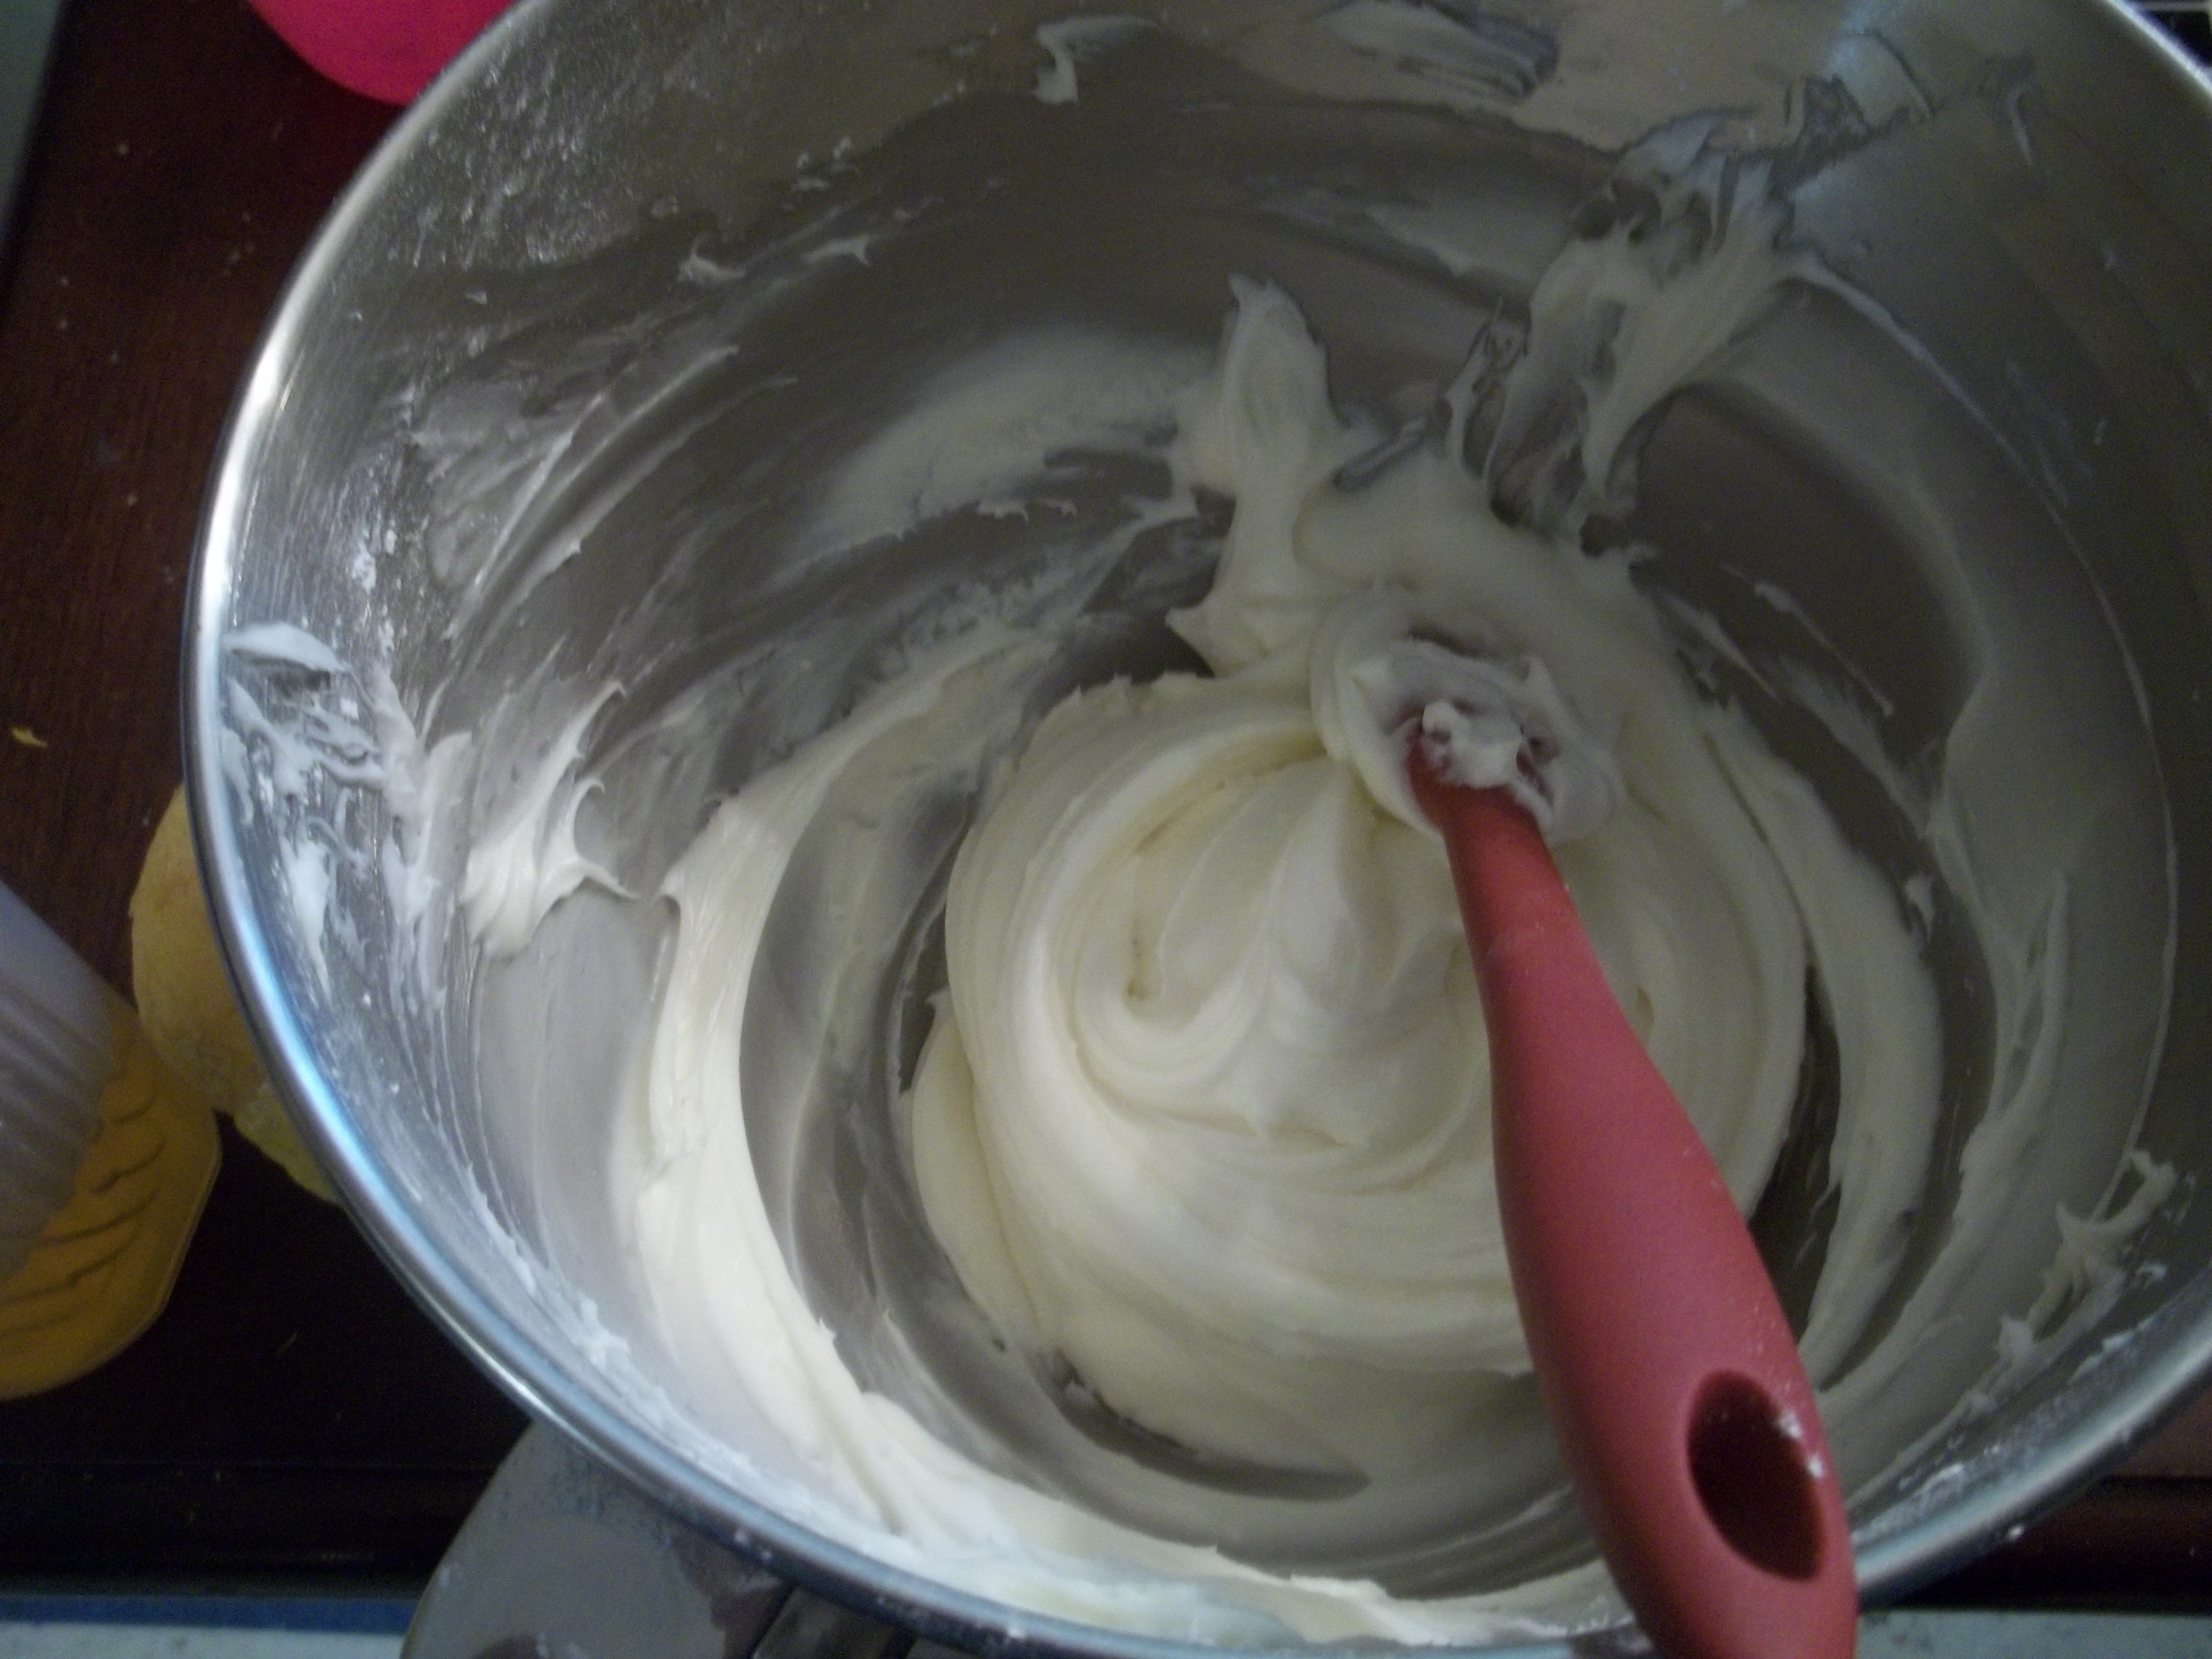
Once that’s ready, add about three and half cups of sifted confectioner’s sugar. Do it carefully and in batches. And preferably with some sort of shield over the bowl. Confectioners sugar seems to have some sort of built-in desire to get all over everything, and it’s apparently lighter-than-air. I have yet to make anything that includes confectioner’s sugar that doesn’t leave the kitchen with a fine layer of white dust over everything. This is also the step where you’ll add flavorings. I often use a little lemon juice to cut the sweet, for this batch, I added maybe a quarter teaspoon of salt and a tablespoon of orange extract. If it’s too thick to spread, you can also add a tablespoon or so of milk to thin it.
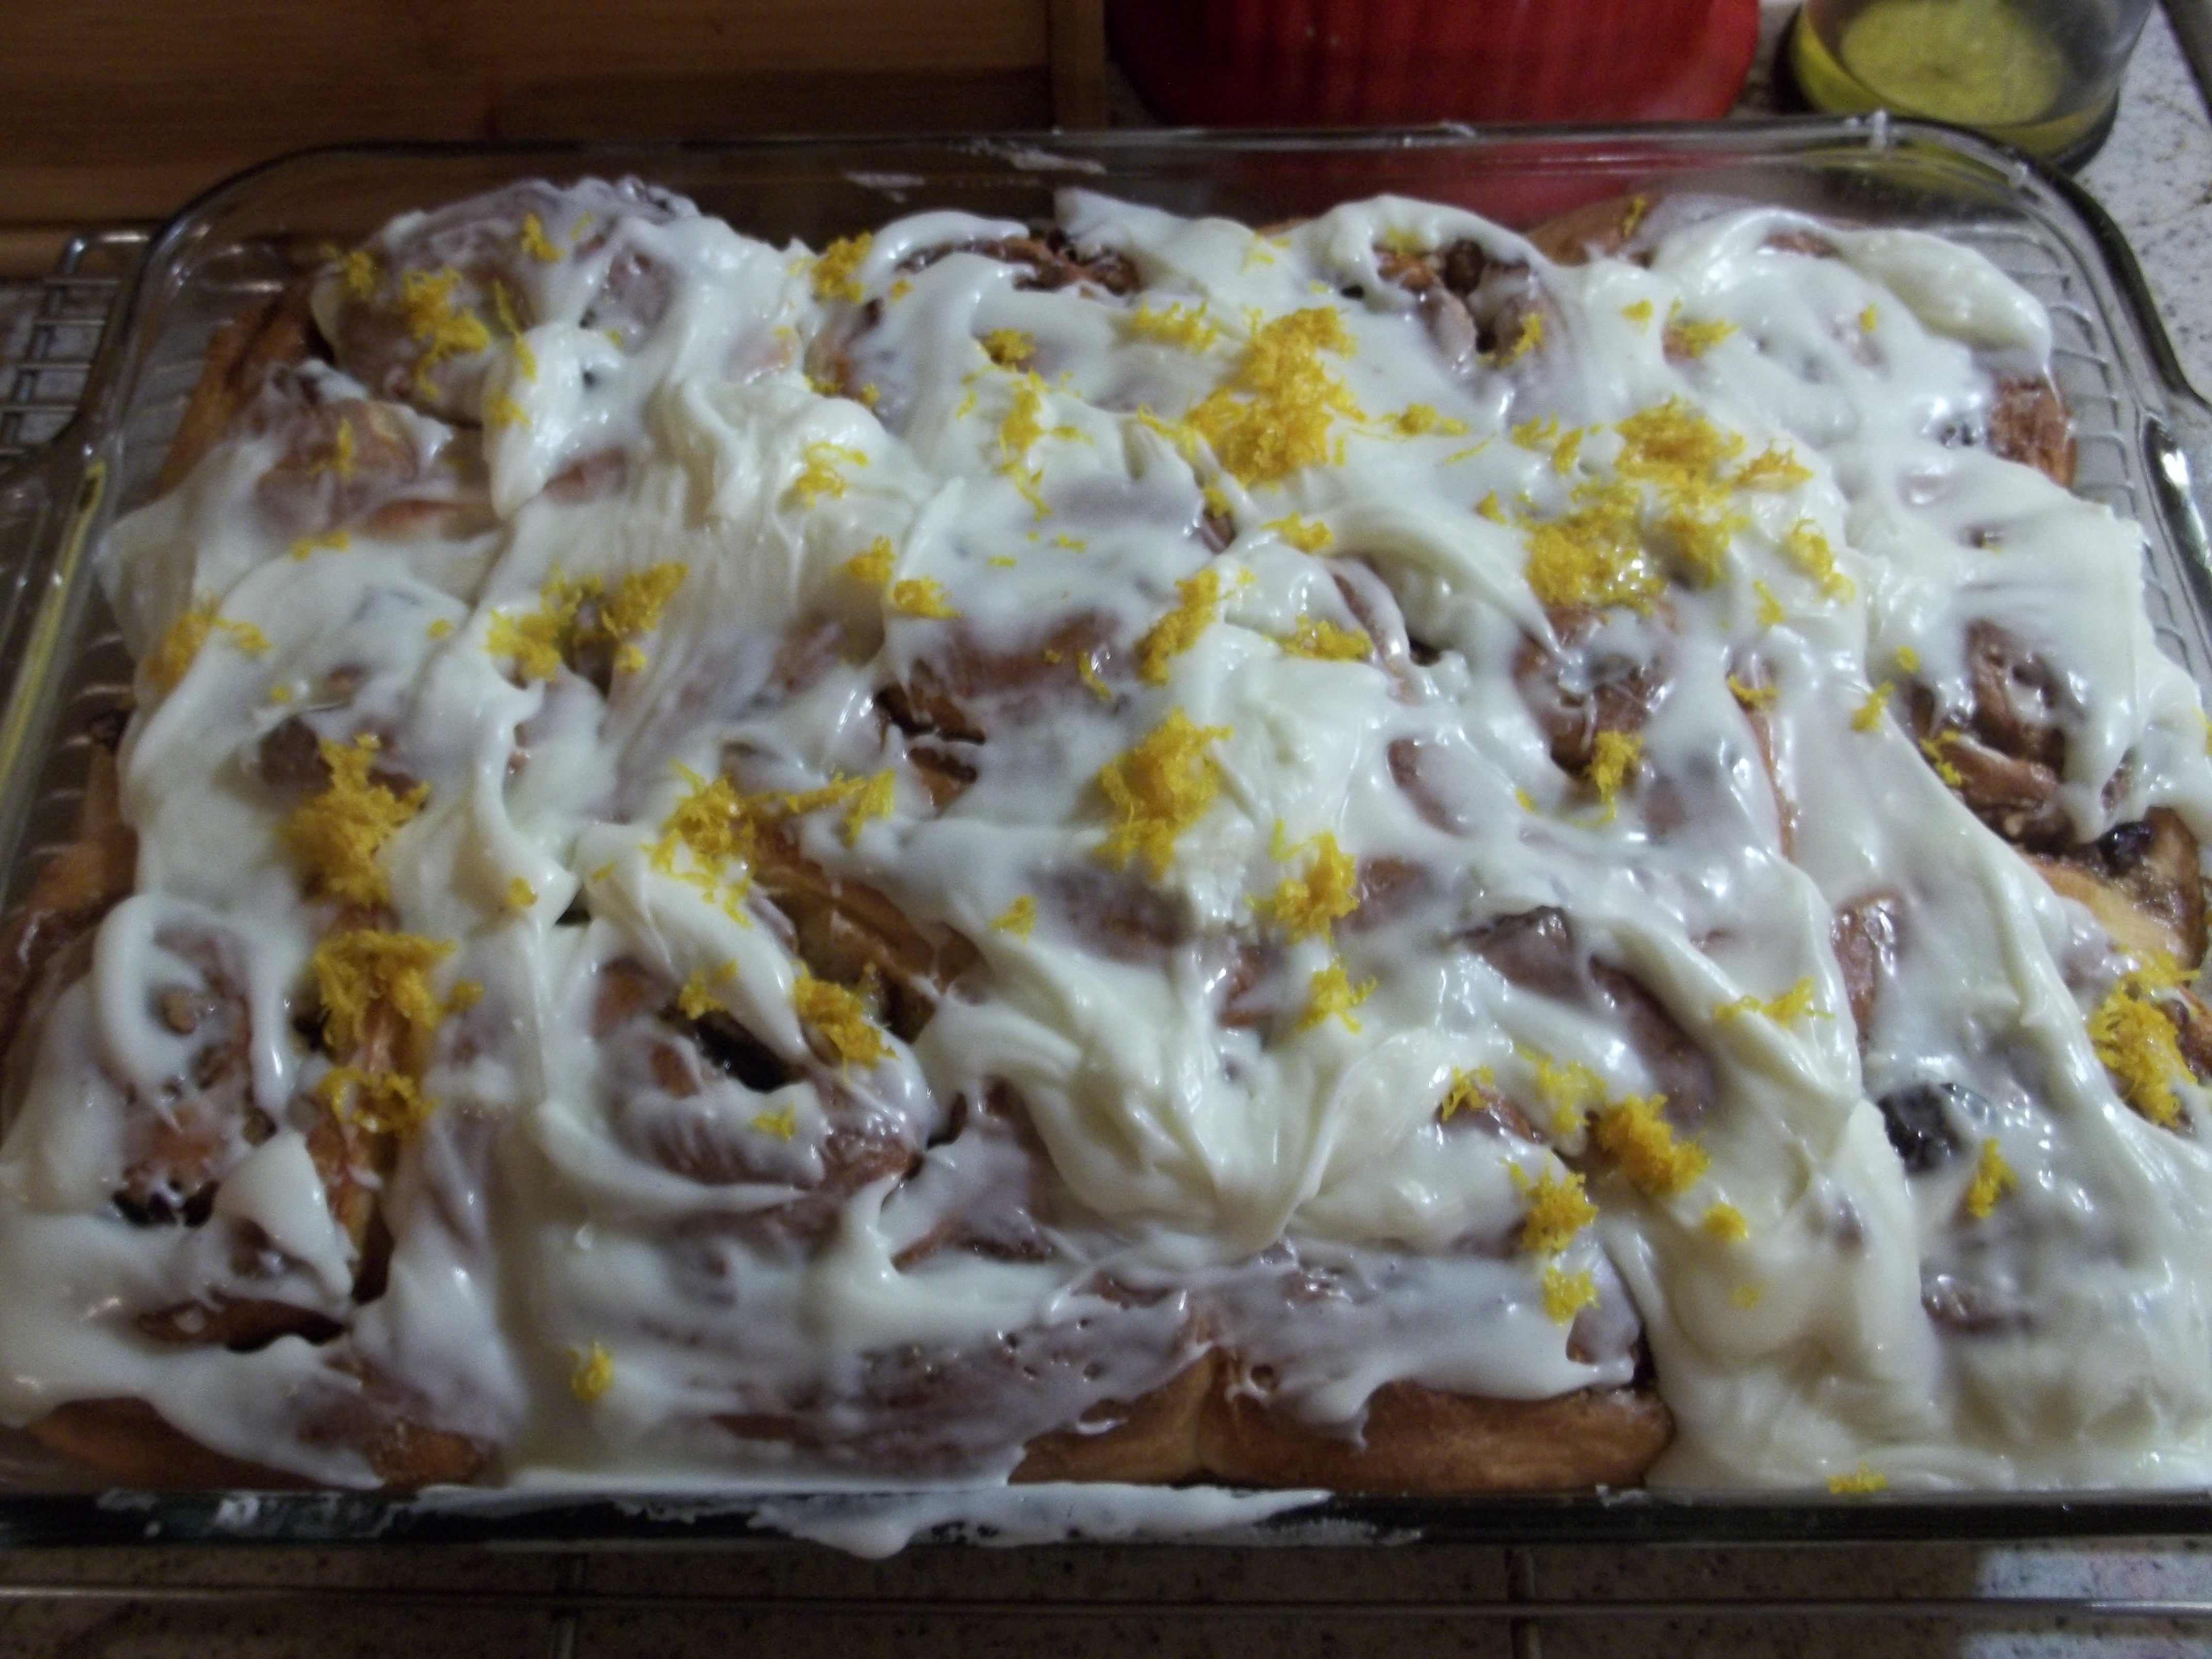
Unlike almost anything else, I put frosting on cinnamon rolls the moment they come out of the oven. You need to be careful doing so because they won’t be set quite yet, but you want the frosting to have time to melt and get a little gooey as it’s going on. I sprinkled the remaining half of the orange zest over them, because pretty, and now I have to figure out what to do with a dozen and a half orange rolls.
Gee, I wonder if I know anyone that might eat them?